Home Blog Page 369

Bryton Rider 450 GPS computer review: Unsurpassed value!

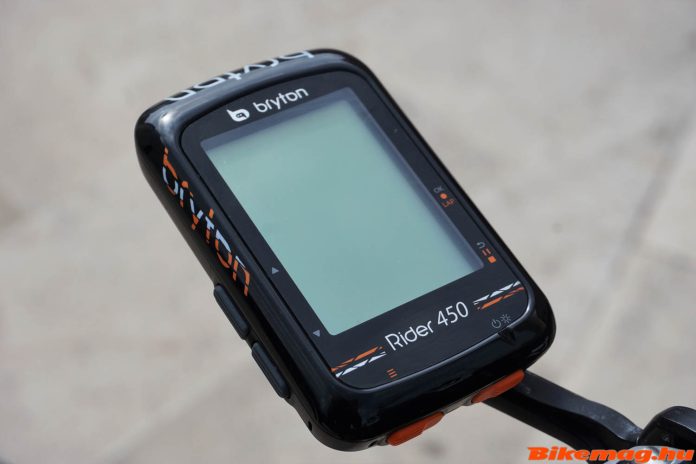
Bryton made great leaps in the last few years, the most recent range of GPS bike computers is up there with best in every aspect. There is no better example for this progression than the Bryton’s Rider 450 model, which I have ridden quite extensively, and found to represent the outmost value for money for 2019.
Bryton arrived relatively late on the GPS bike computer market, nevertheless the brand has not only managed to catch up to the main players, but surpass them in many aspects, including technology and functionality. It is no coincidence that some of the top Wolrd Tour teams – including the extremely successful Belgian Quick-Step squad – rides with Bryton computers this season. The brand’s GPS models are greatly popular here in Hungary as well, thanks in part to the excellent value they offer.

Last year Bryton launched two new models, both representing major advancements for the company. One is the Rider 450 GPS featured in this review, the other is the virtually identical Aero 60, differentiated merely by the aerodynamic mounting system. I selected the Rider 450 for this test, since in general it offers a more universal application for cyclists. I’ve managed to put some serious distances into this Bryton GPS unit in the past few months, so I have a lot to talk about. Let’s get started!
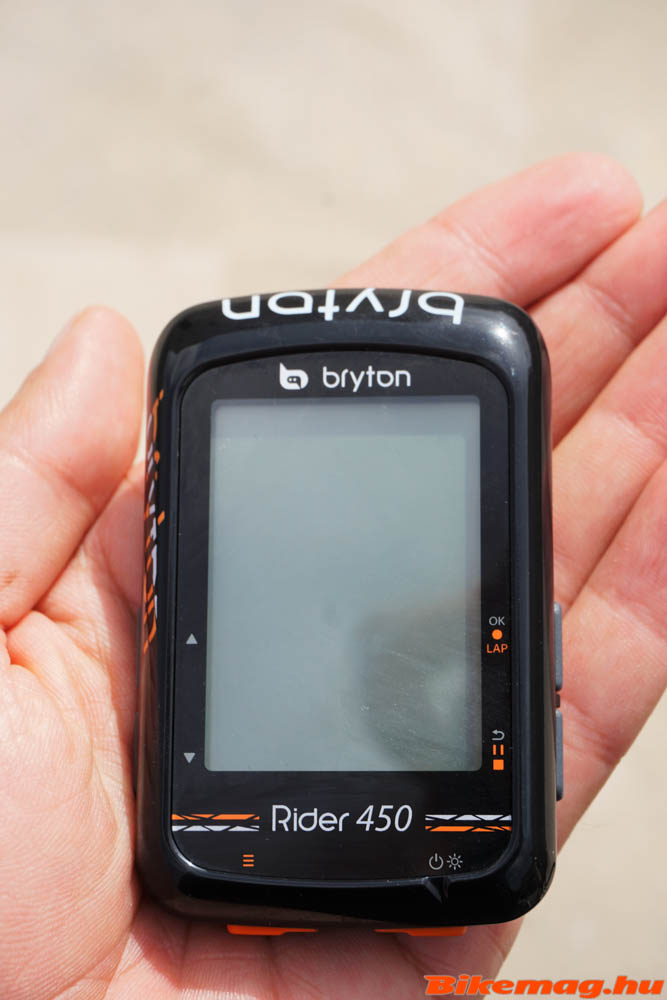
First of all, the Rider 450 includes an awe-inspiring number of features, so many, that I’d be surprised to find a cyclist who could make use of each and every one of them. The list seem never-ending, but there is good reason to pack every function into the unit. It allows the rider to fully customize the use of the computer, selecting only the essential ones. Hence each user gets a slightly different Rider 450, one that best fits the needs and desires.
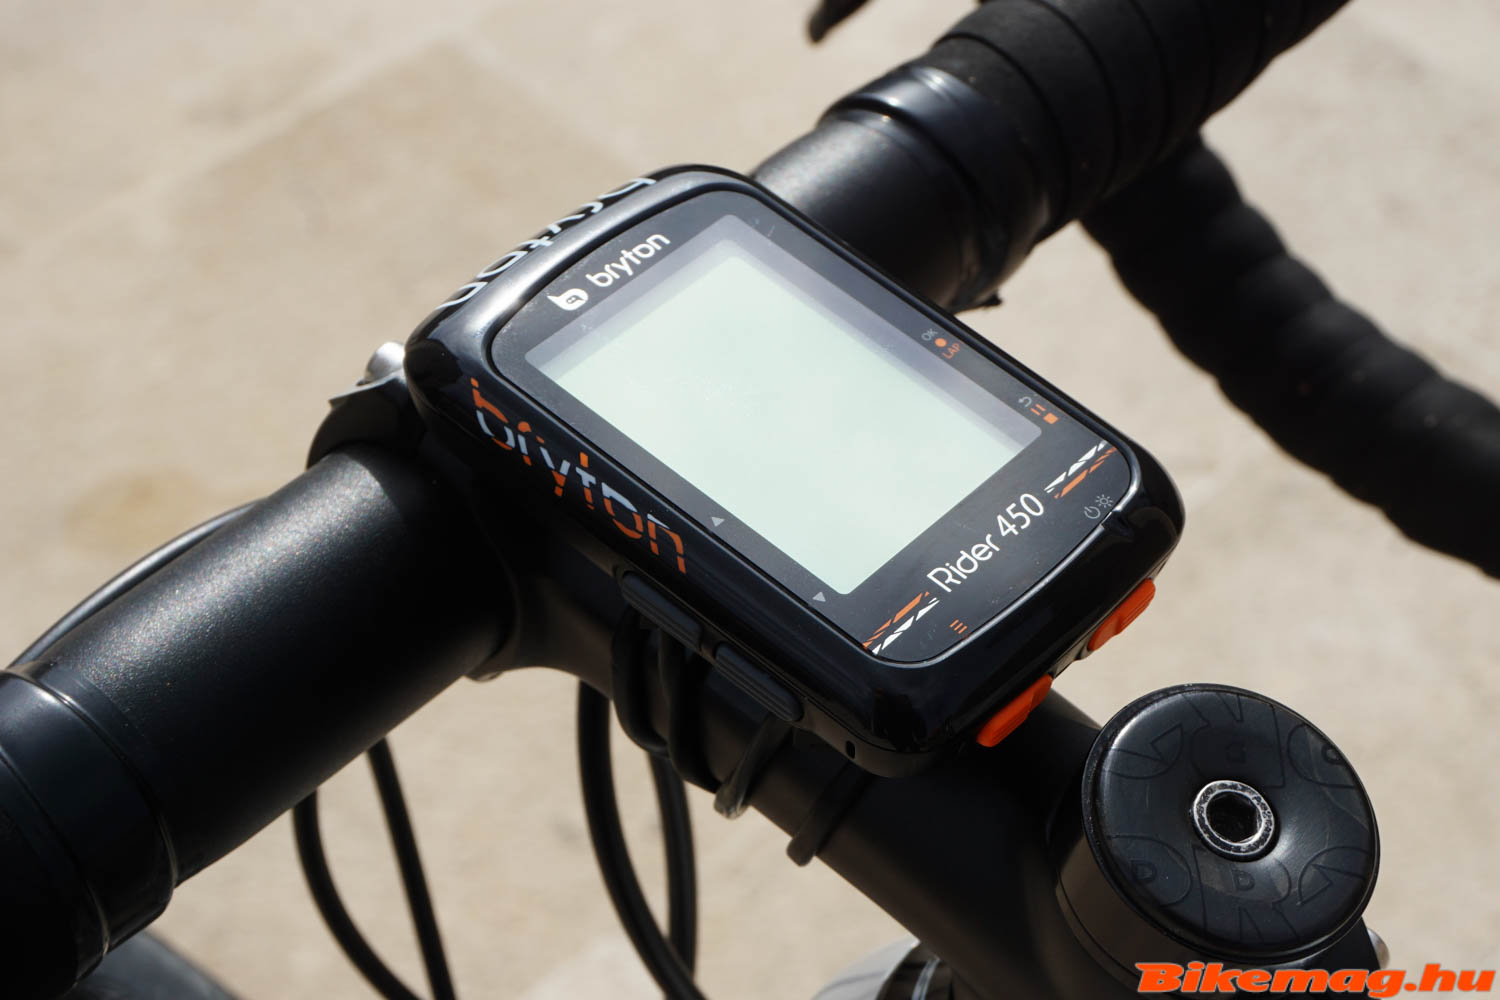
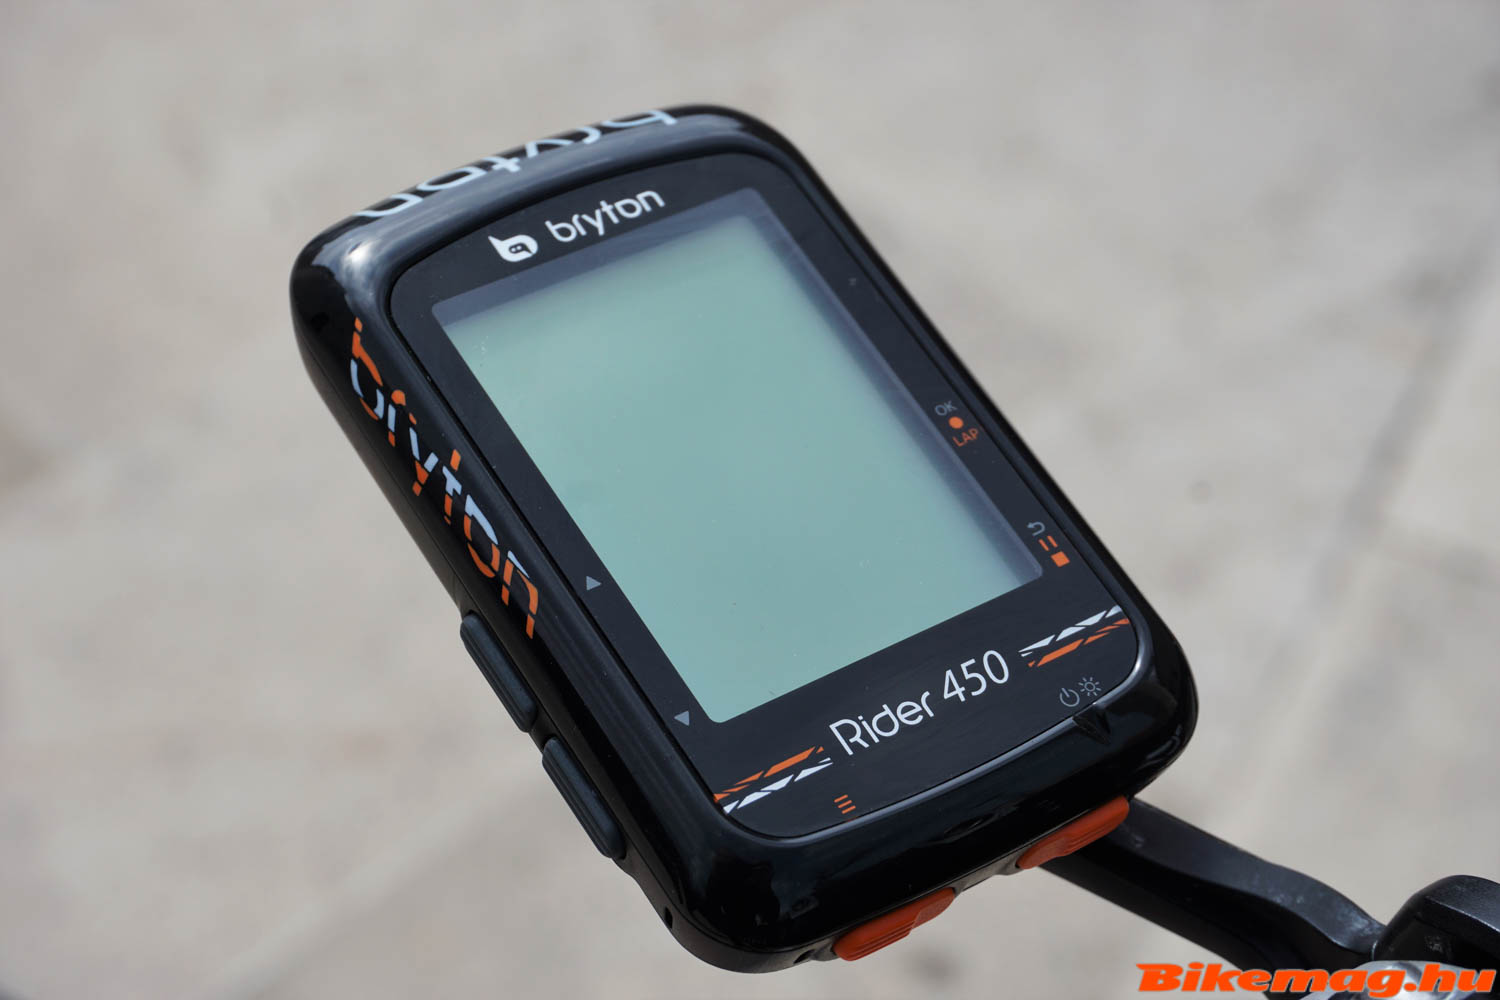
Apart from the comprehensive customization, there is another novelty, the possibility to employ more than one satellite system (GPS, Glonass, BDS, Galileo, QZSS) for a more precise and reliable localization. This also allows the unit to offer street navigation. Furthermore the Rider 450 has some significant tricks up its sleeve: handling has been improved for the complete 400 model line, starting with the size and tactility of the buttons. This progression is especially important as the 2.3” display in not particularly large.
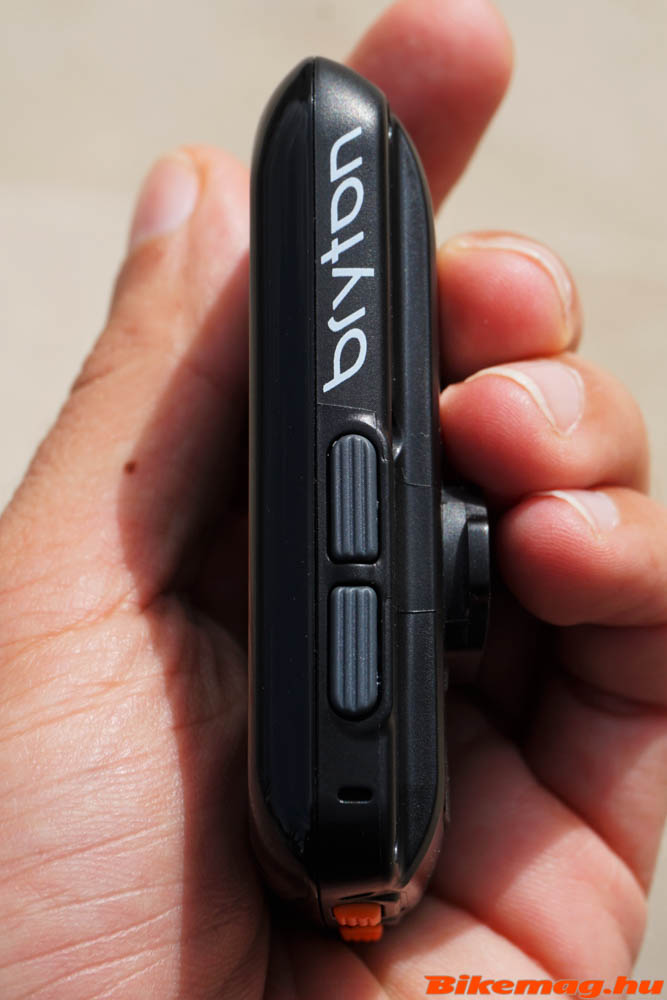
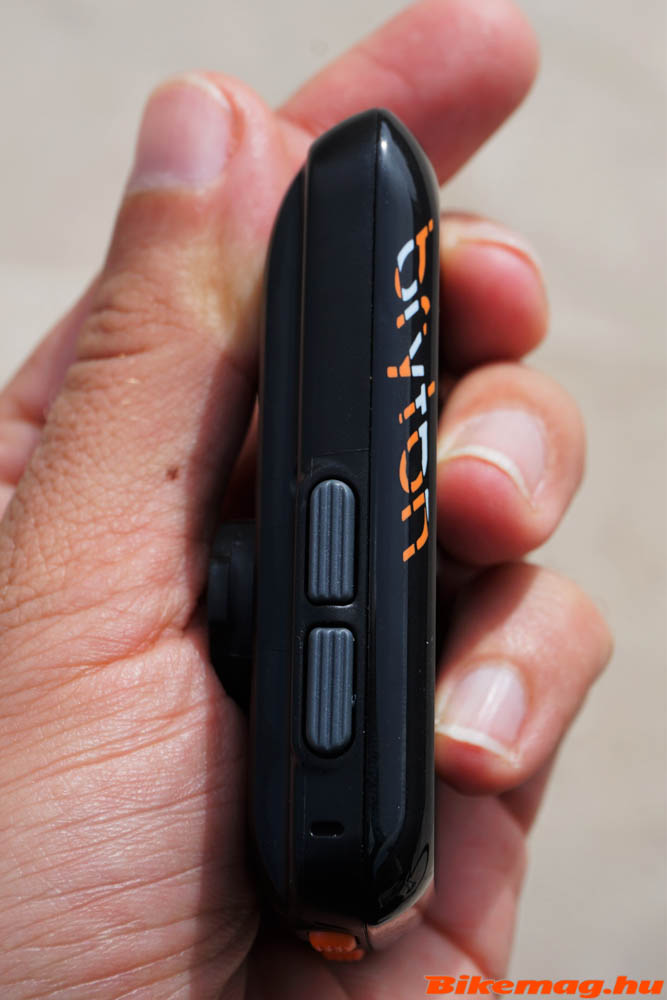
The first bike computers from Bryton were notorious for having an overly complicated, awkward menu system. It’s safe to say that software developers for these early models didn’t take into account that not all cyclist are expert in computer programming. The new models seem to have solved this annoying deficiency. Navigation in the menu is much more refined, with ordinary human brains in mind. There are one or two small nags that I encountered, but in general the Rider 450 is quick to use, the menu system is logical in structure, making it easy to find the desired function. The least we can say is that the Rider 450’s functionality is no worse than the best GPS bike computers on the market, and in some respects – such as the fast reaction time – it’s undoubtedly better. Last but not least, the menu is available in many languages, including Hungarian!
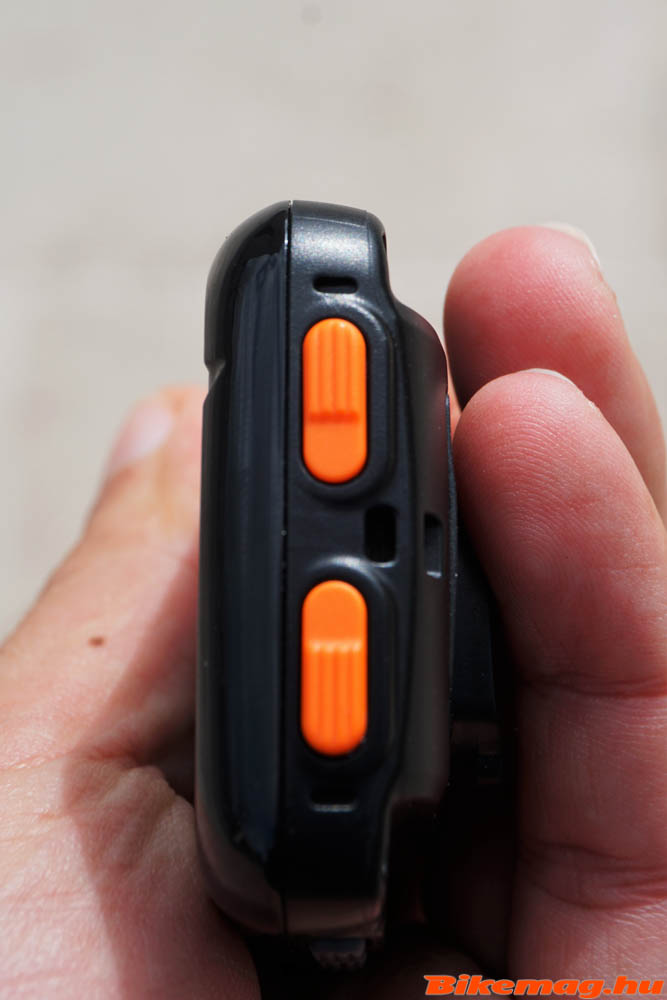
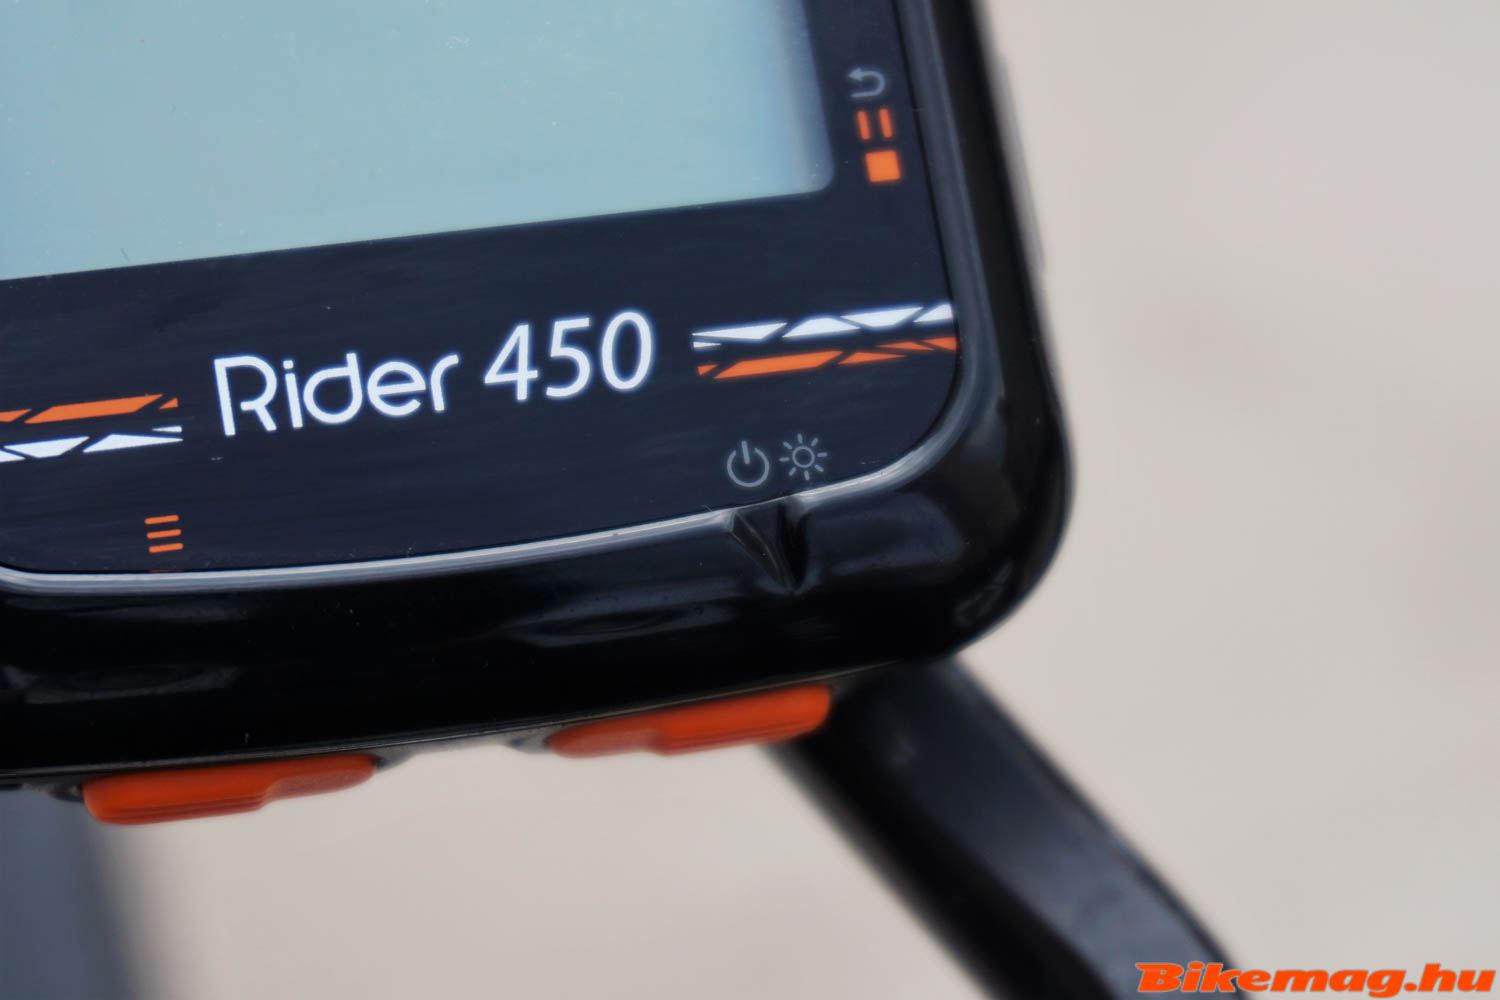
There are no less than 6 rubberized buttons on the Rider 450: two on the right side – the top one serving as “start/new lap/OK”, the bottom one for “return/pause/menu”. There are another pair of knobs on the left side to scroll up/down in the menu, and two at the bottom of the unit. The left one to advance to the next page and the right to turn on the computer, and also backlight when it’s operational. Personally I’m glad that Bryton engineers chose not to cram the access of the myriad of functions into just 3-4 buttons as that would have certainly lead to chaos. I’d say that 90% of the time the cyclist will use only the four side controls, which definitely are the most ergonomic to operate while riding.

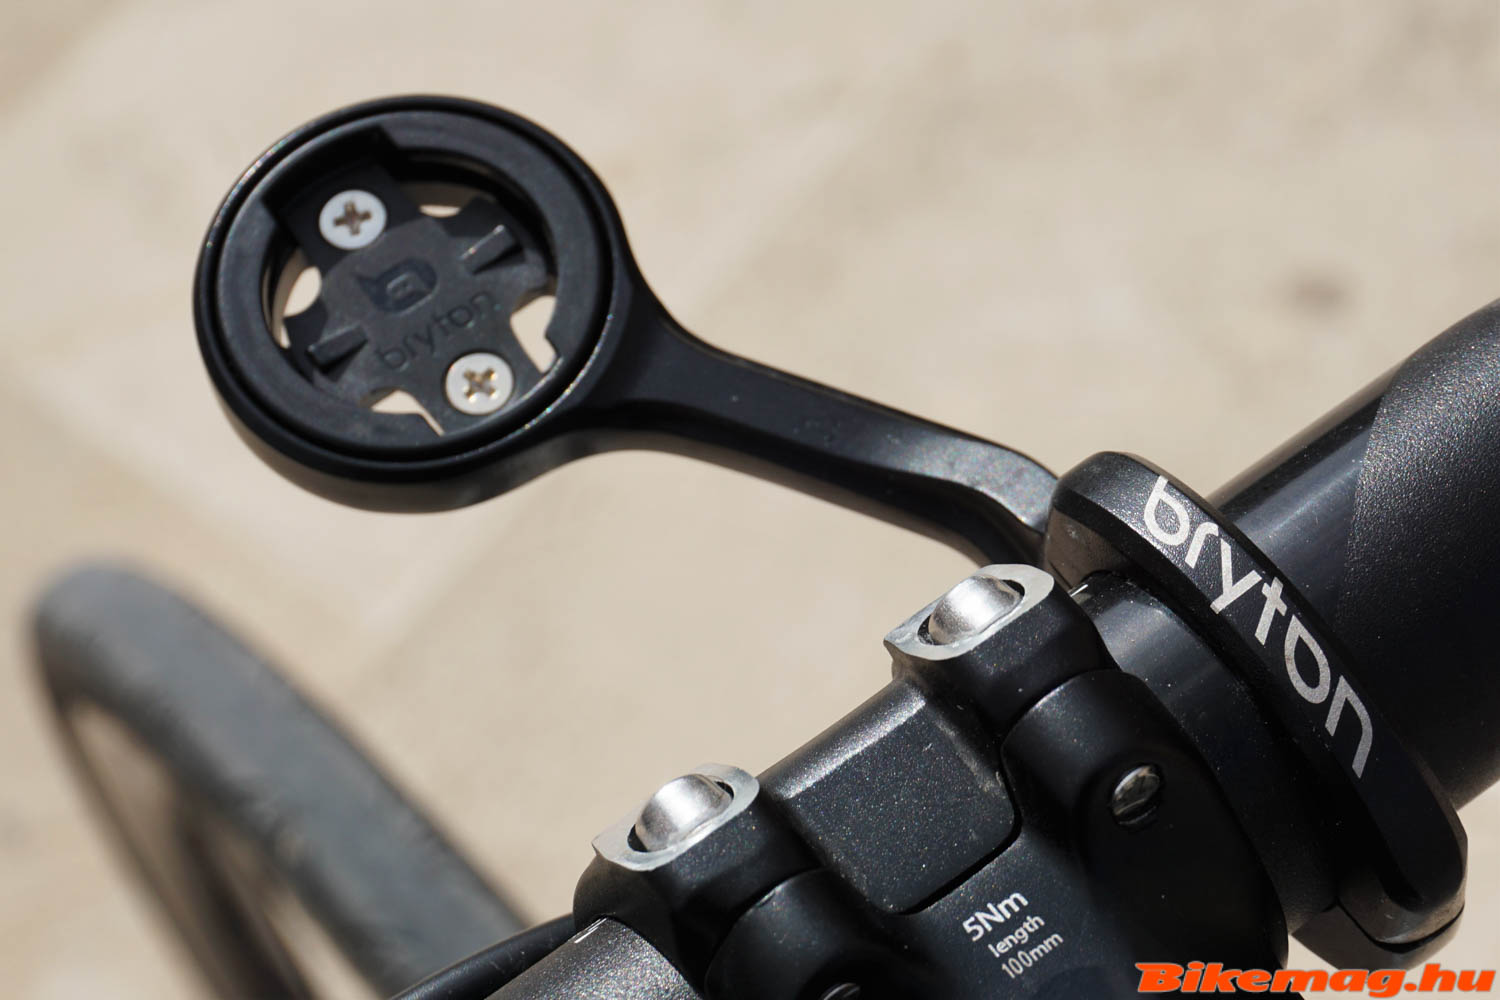
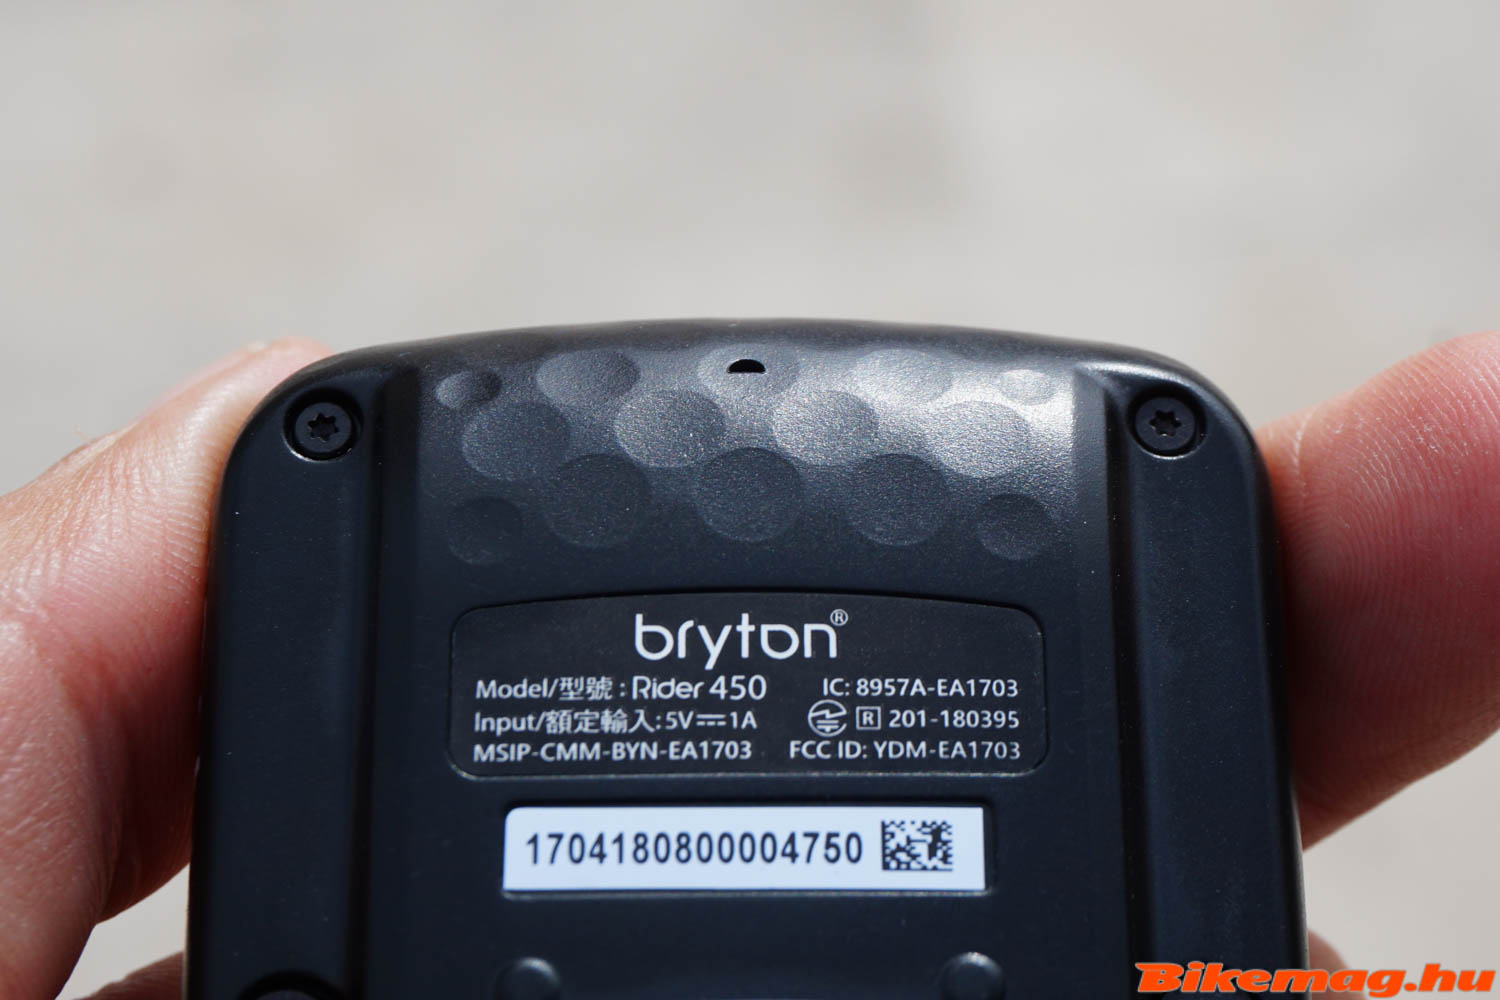
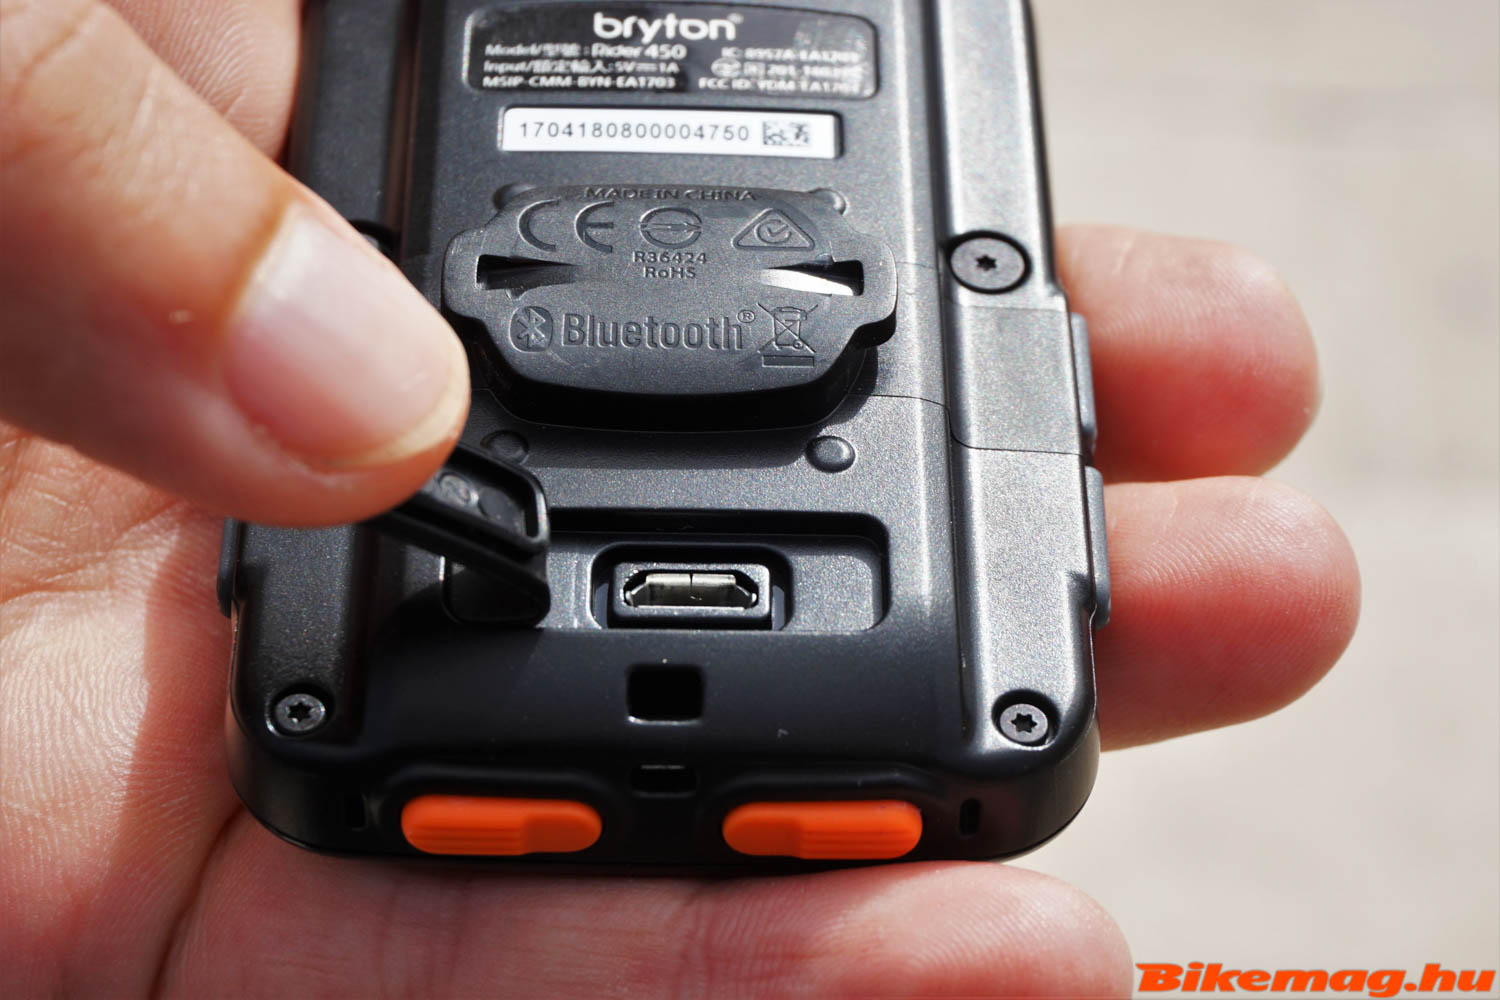
Before adverting to the countless of functions offered by the Rider 450, I’d like to say a few words about the mount. Just like its predecessors, this model features Bryton’s proprietary mounting system, where you have to twist the unit 90 degrees until a click is heard. You get one console which is mounted either to the handlebar or the stem. Optionally a forward-reaching aluminum console is available which lines up the unit at level with the bar. It not only provides an aesthetic improvement over the regular mount, but offers considerable aerodynamic advantage as well. (As a side note, the Aero 60’s mount is even sleeker, offering additional aero benefits.) The back side of the Bryton 400 bike computers also feature a dimpled surface – as seen on golf balls – which could marginally reduce air drag even further. (The housing of the 410, 450 and the aero 60 is essentially identical.)
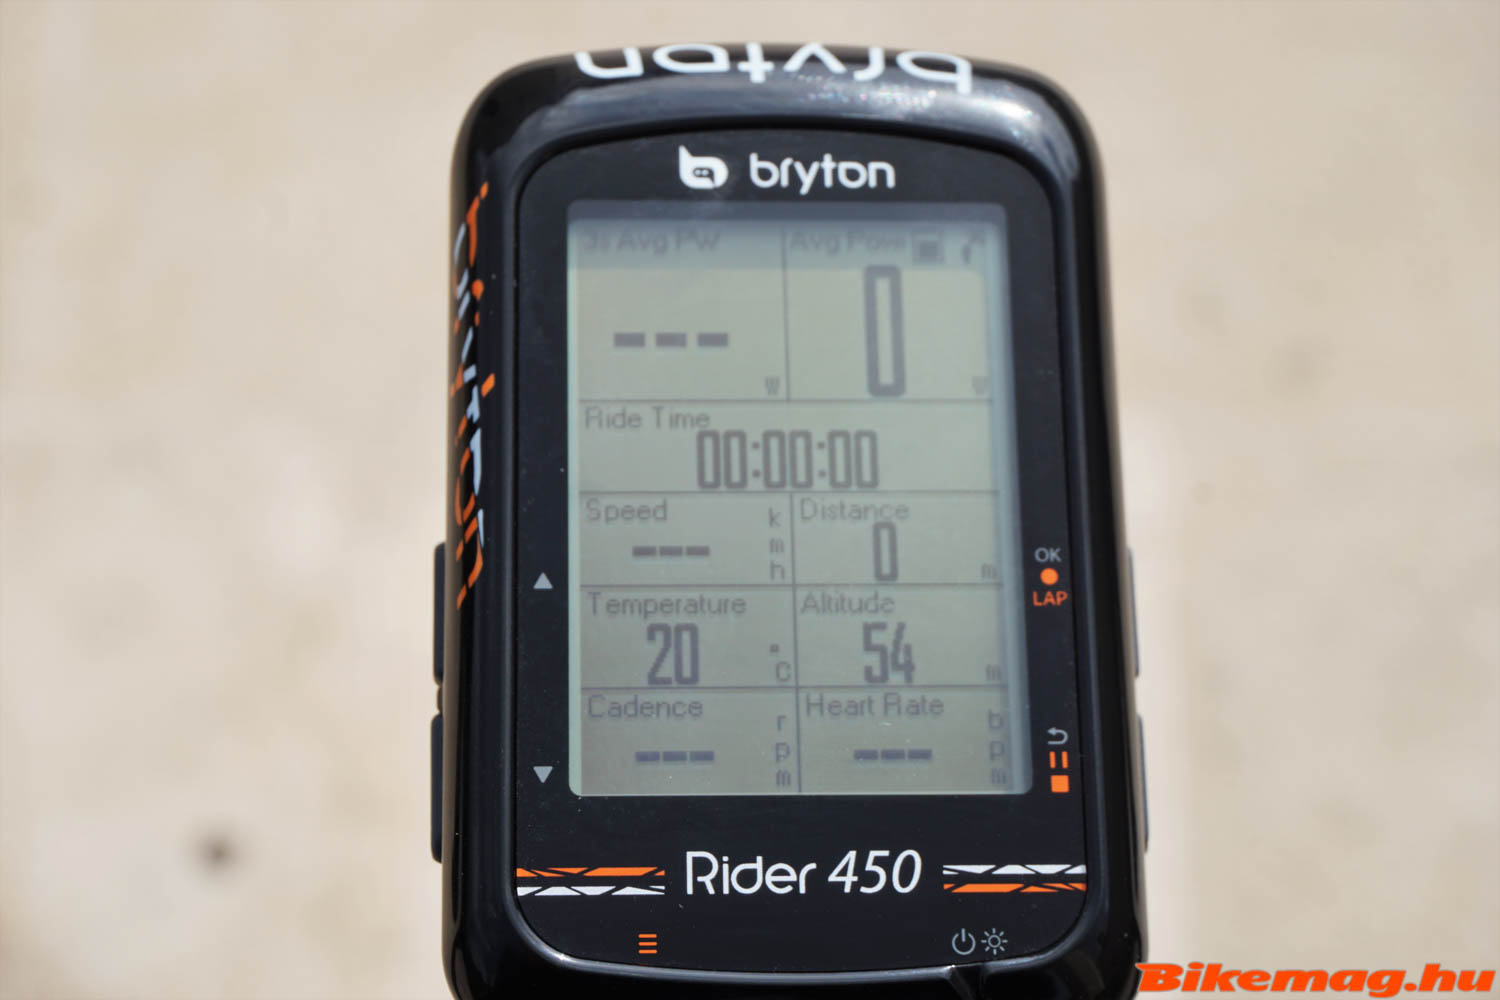
What functions does the Bryton Rider 450 offer? Well, practically everything! It can communicate with any device through either Bluetooth or ANT+ protocol (e.g. speed, cadence, heart rate sensors and power meters), process all the data it receives, calculate speed, distance, altitude information based in the GPS signals it collects, and has a built-in barometric air pressure sensor in order to correct slight errors in elevation measurement. Furthermore it includes a handy thermometer and when paired with our mobile phone, it lets the rider know of incoming call and messages. And the list doesn’t end here: the Rider 450 can be paired to an electronic gear shifting system (e.g. Di2), with on screen gearing information. Did I miss anything?

All together there are 78 functions for the rider to observe during and after riding. 10 can be viewed on screen simultaneously, and there are 5 pre-programmed pages to scroll through. That add up to a whopping 50 functions! I believe no cyclist actually needs so much data, but it’s there, and the Rider 450 can be fully customized to show only the functions required, in the order of significance. Customization can be done in two ways. On one hand the rider can choose the functions using the buttons on the unit, or alternatively there is a more convenient method by downloading the Bryton app to the phone. If the Rider 450 is paired with the phone, the latter will assist in carrying out the modifications in the menu in a fraction of time.
The above-mentioned app is useful for more than just making settings. If there is no Wi-Fi coverage, the phone can be used to upload ride data to the Internet. Similarly route planning can be made on the phone for on-unit navigation. Likewise the altitude calibration is much more convenient if you open the app. All data recorded by the Rider 450 is automatically transferred to the app, allowing the user to review and analyze the bike ride on the phone.

As I’ve mentioned, the Rider 450 can communicate using Wi-Fi connection, thus uploading ride data to our Bryton profile is spontaneous. The Bryton personal profile can be linked to a Strava, TrainingPeaks or Selfloops profile, so the data will automatically be transferred to these as well.
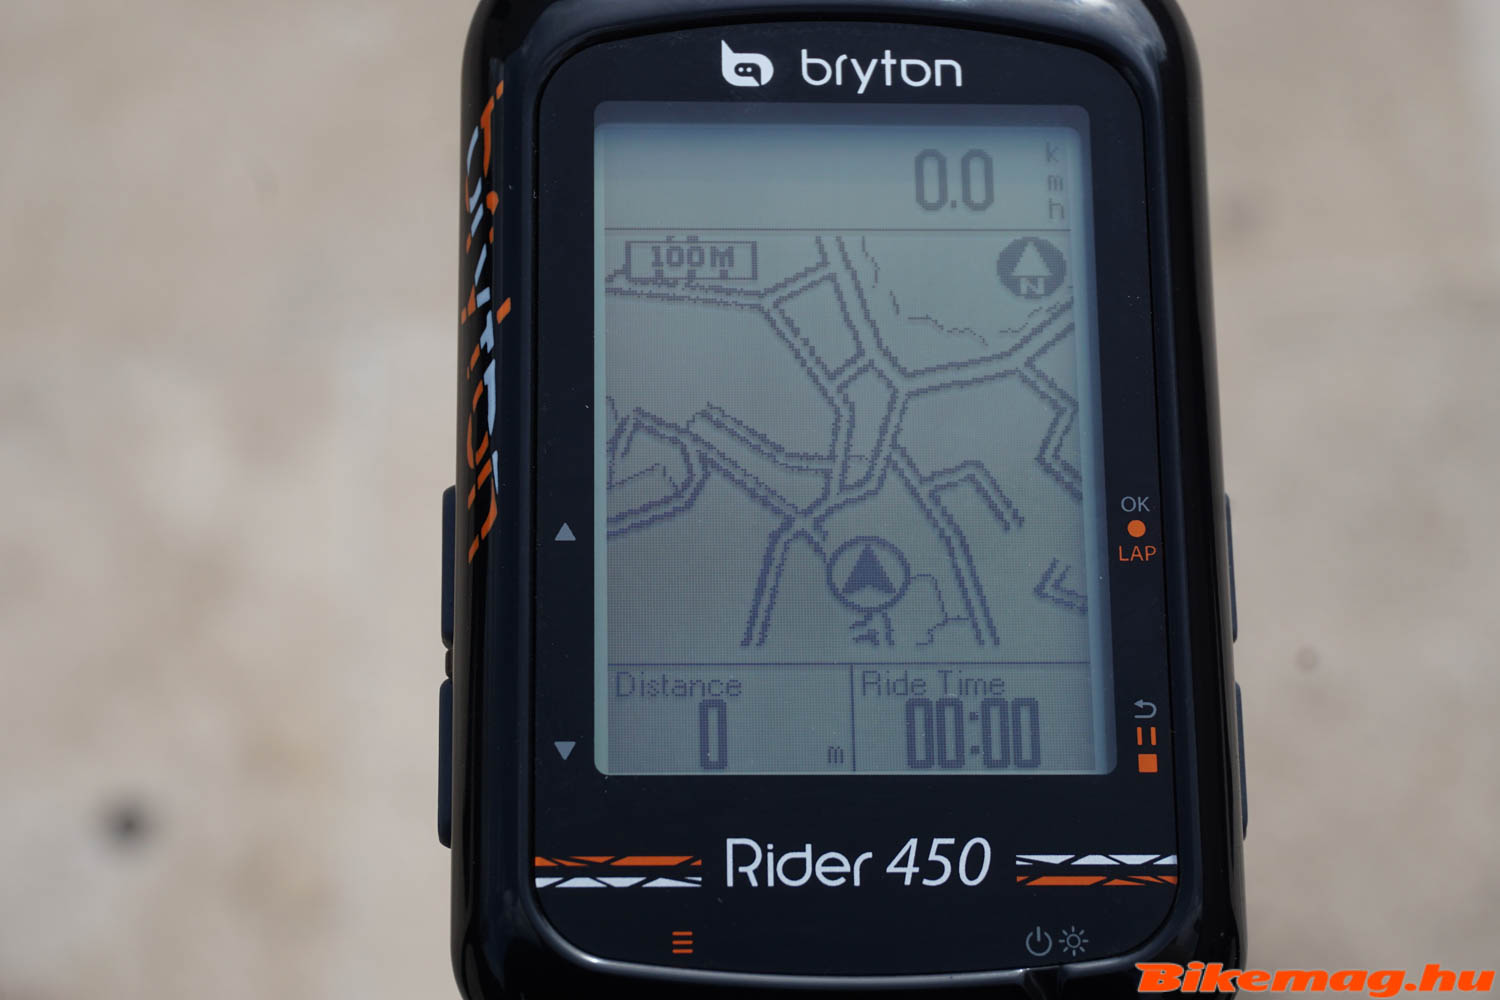
The Rider 450 and the Aero 60 are the first bike computers from Bryton to offer street navigation. The units have built in OpenStreetMap, and can navigate the cyclist along the uploaded route. Route planning can be done either by entering the destination or simply drawing the path by hand on screen. There are other ways as well, thus making precise route upload possible. If the navigation receives no route or destination, it’ll still show the rider’s location on the map.
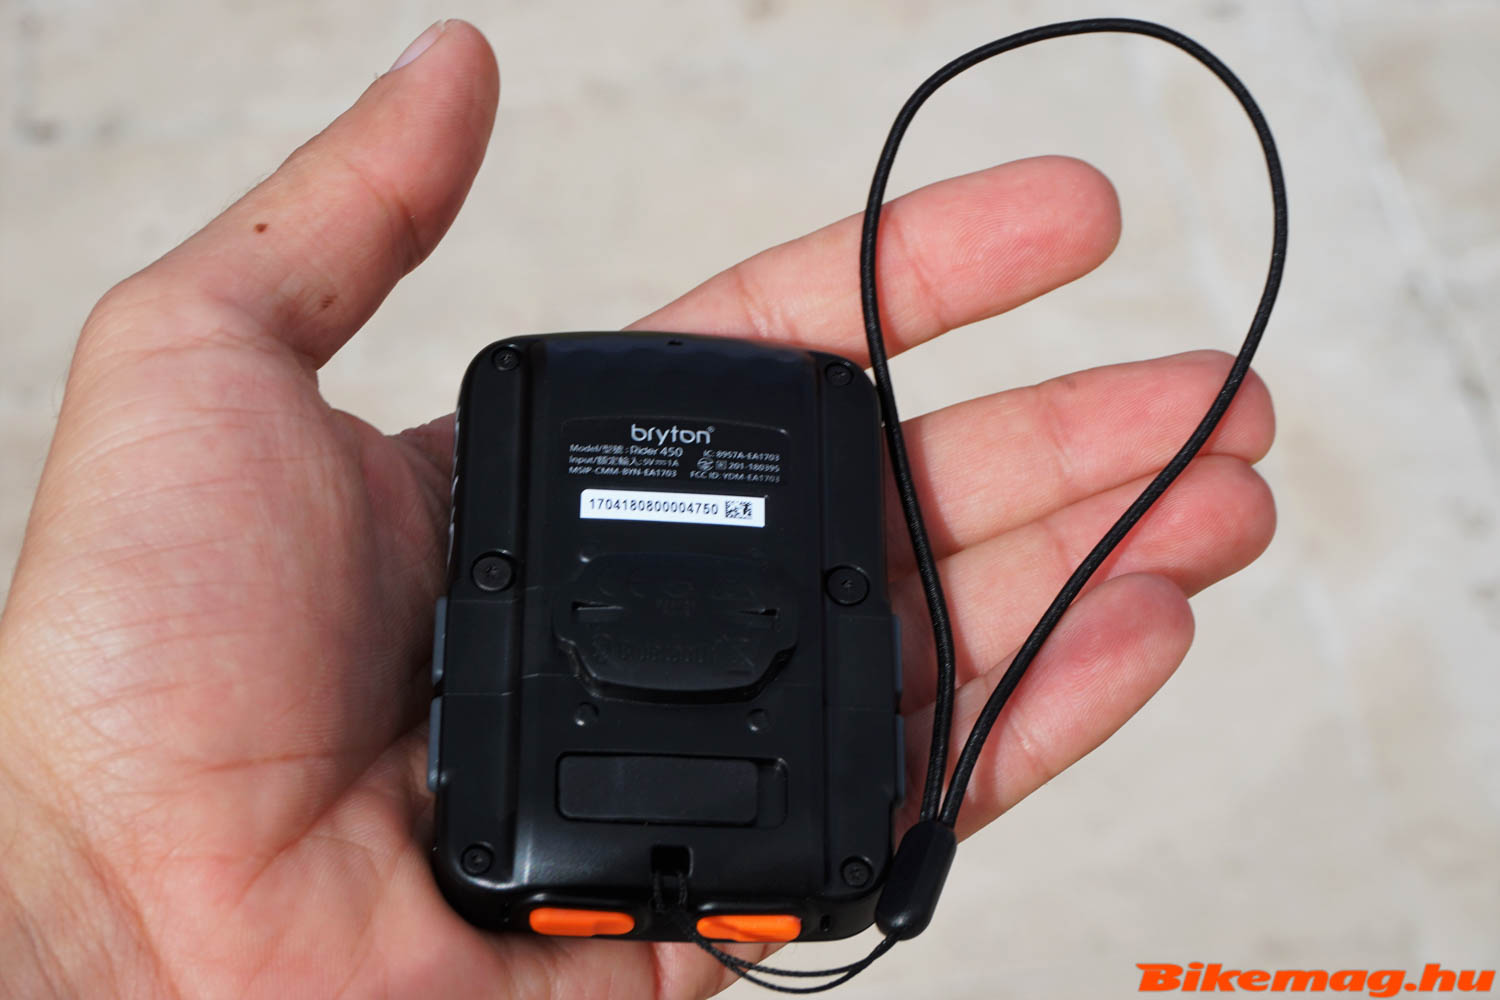
I have ridden with the Rider 450 for over two month on a daily basis, which is plenty of time to get a good picture of its strengths and weaknesses. However, there is not much I can report! It performed its job without any hiccups, day after day, and I experienced no problems whatsoever. And there was no need for occasional system reboot like with some older generation Bryton bike computers. It successfully paired with every device I tried, and there was no problem switching between platforms. During testing it received a software update, and continued to run without a glitch.
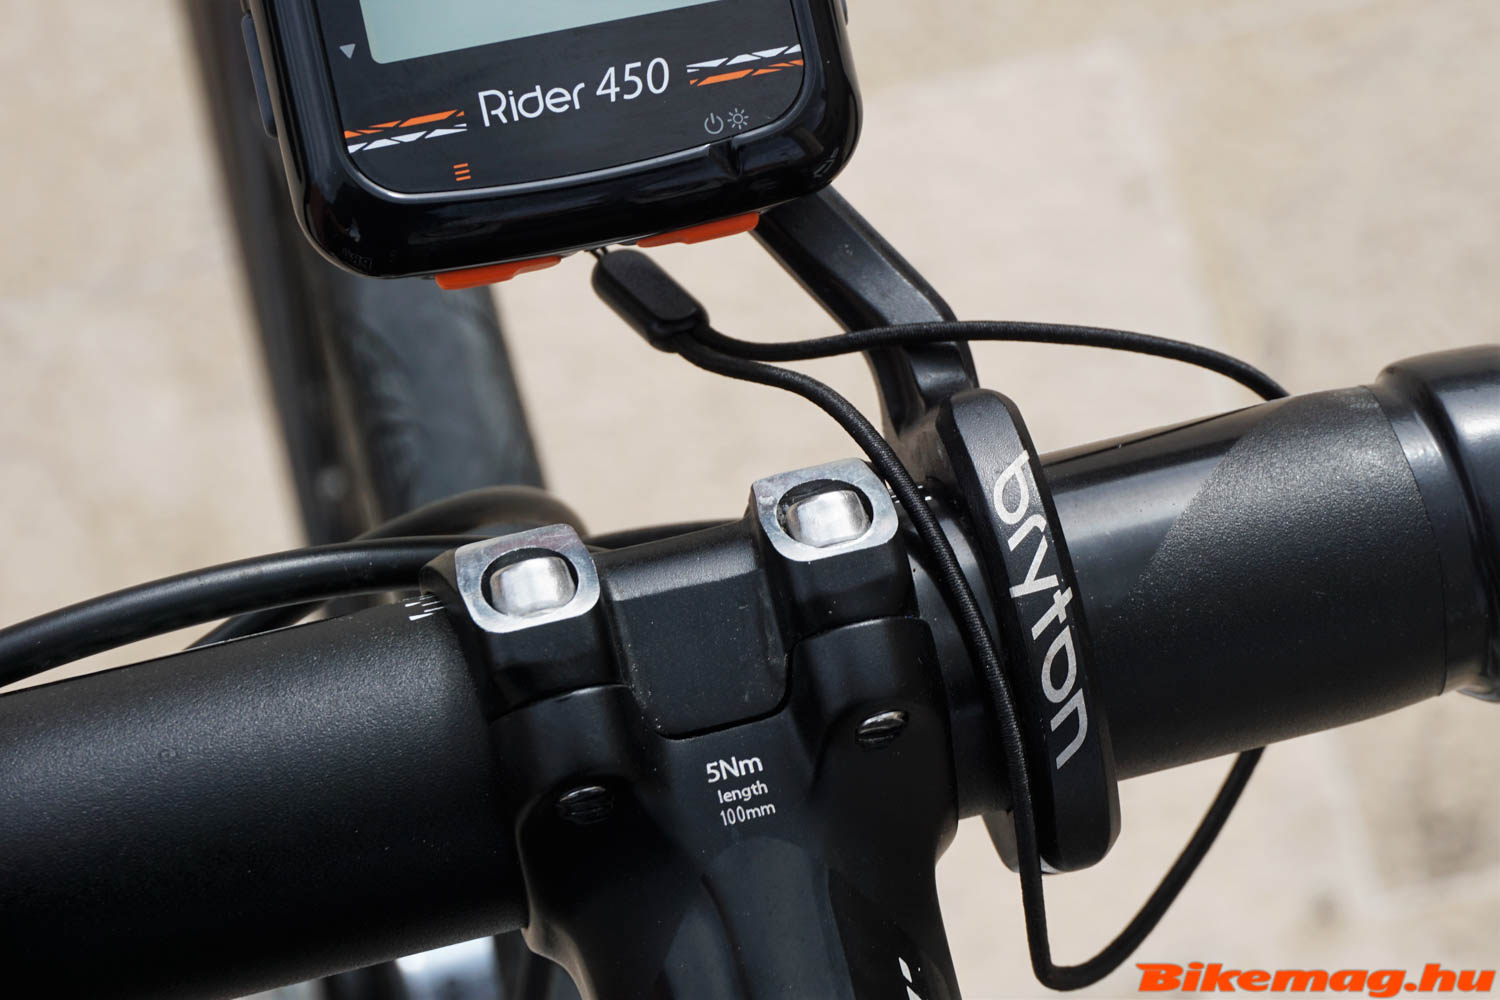
It doesn’t get lost in a fall!

Many users seem to complain about the Rider 450’s altitude sensor. I don’t know what they’re doing wrong, since I experienced no malfunction. Whenever there was a major change in the weather system, I recalibrated the barometric sensor, as it’s written in the user manual. Likewise when I paired the unit with a power meter, there was no drop-out in the signal whatsoever. It seems to have a very strong antenna, unlike in some other devices on the market.
The GPS signal reception is a different kettle of fish. No matter how many different satellite signal the Rider 450 can work with, tall building in the vicinity will likely to cause problems with the reception. It’s the same story for all consumer GPS devices on the market: the satellites must be visible for reliable localization. Once the Rider 450 found the signal, the GPS functions were stable.
The manufacturer specifies 32 hour battery life which I couldn’t replicate by a far margin. If all the satellites are selected for GPS reception and Bluetooth is turned on, then the most I could get out of its battery was 18 hours. Naturally, if I cut back on the number of satellites, and didn’t run the power meter all the time, I could get more time for one charge, but such restrictions would have excessively compromised functionality. On the positive side, the device starts to warn the rider of low battery charge an hour before shutdown. The Rider 450 can be topped up with any phone charger or computer thanks to the common micro USB socket.
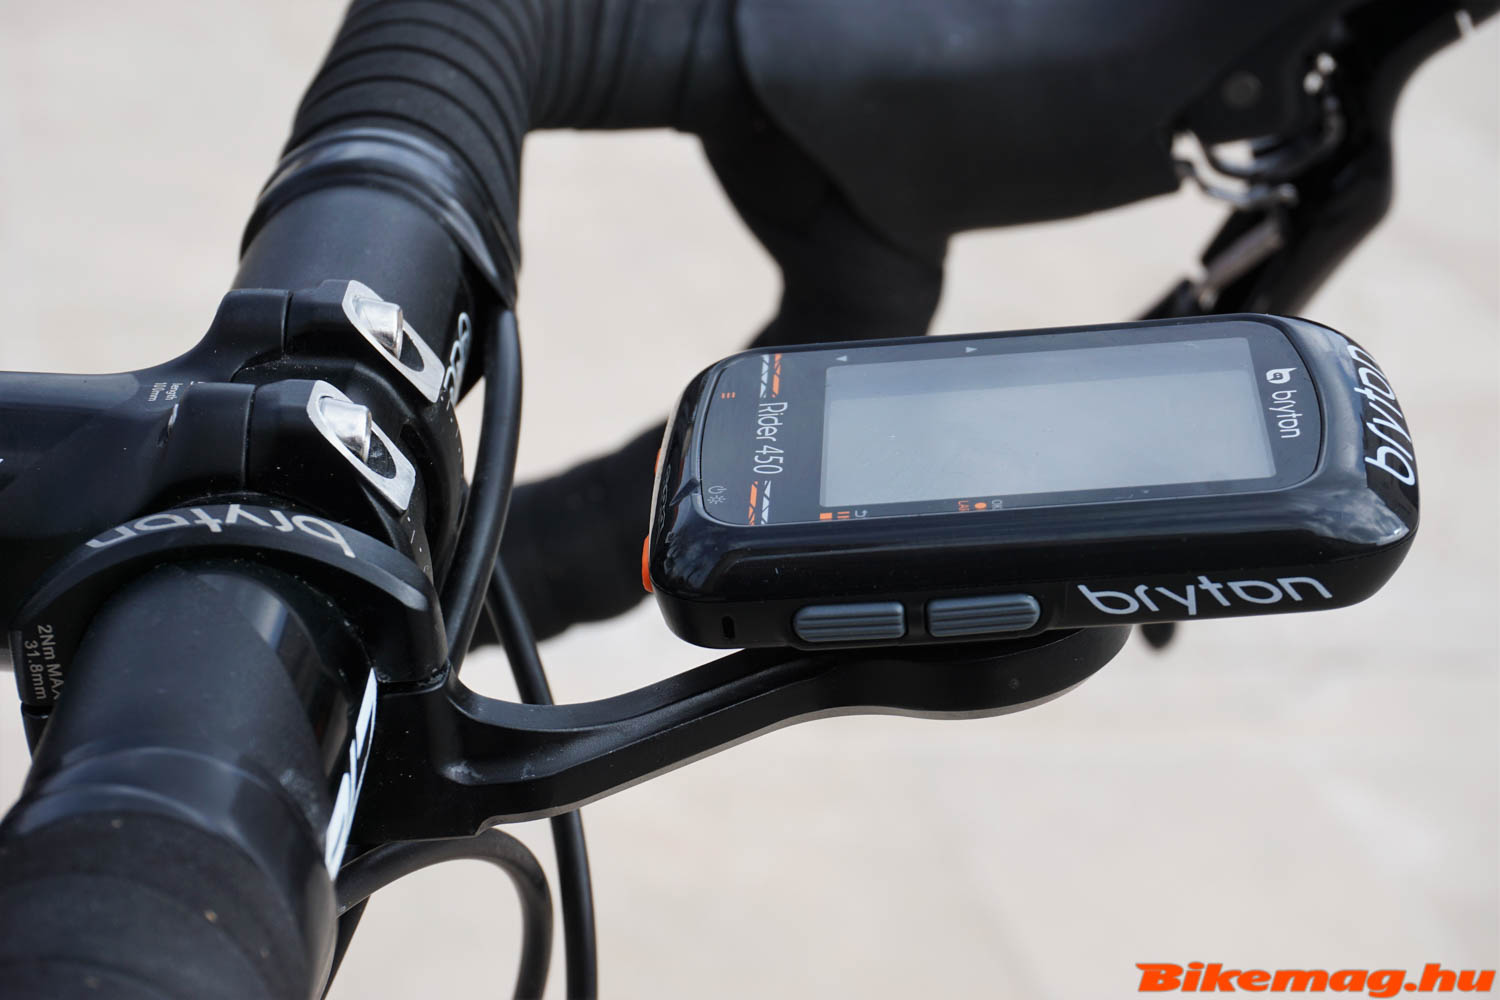
There are two features I found to be invaluable on the Rider 450. One is the direct Wi-Fi connectivity, so my ride is automatically uploaded to the Interned. There’s no need to fiddle about connecting the unit or uploading: everything is done for you moments after you stepped through the door. For this feature alone I’d swap my own Rider 410 for the new model. Secondly the screen has a tiny water “gutter” which relieves the rider from having to wipe off water from the display in rainy conditions. Truly ingenious!

I consider the Bryton Rider 450 GPS computer to have all the functions a cyclist would ever need, and for the recommended retail price of HUF 62,990 it definitely merits a best buy recommendation.
More information on the distributor’s website.

Topeak Hexus X – Zsebfegyver

A Topeak elővette egyik régebbi szerszámkészletét, a Hexus II-t és egy komolyabb ráncfelvarrást hajtott rajta végre, hogy a modern igényeknek leginkább megfelelő multiszerszámot hozza létre a Hexus X formájában. A minőség nyilván nem kérdéses, az esztétikum pedig tetszetős. Vennéd?

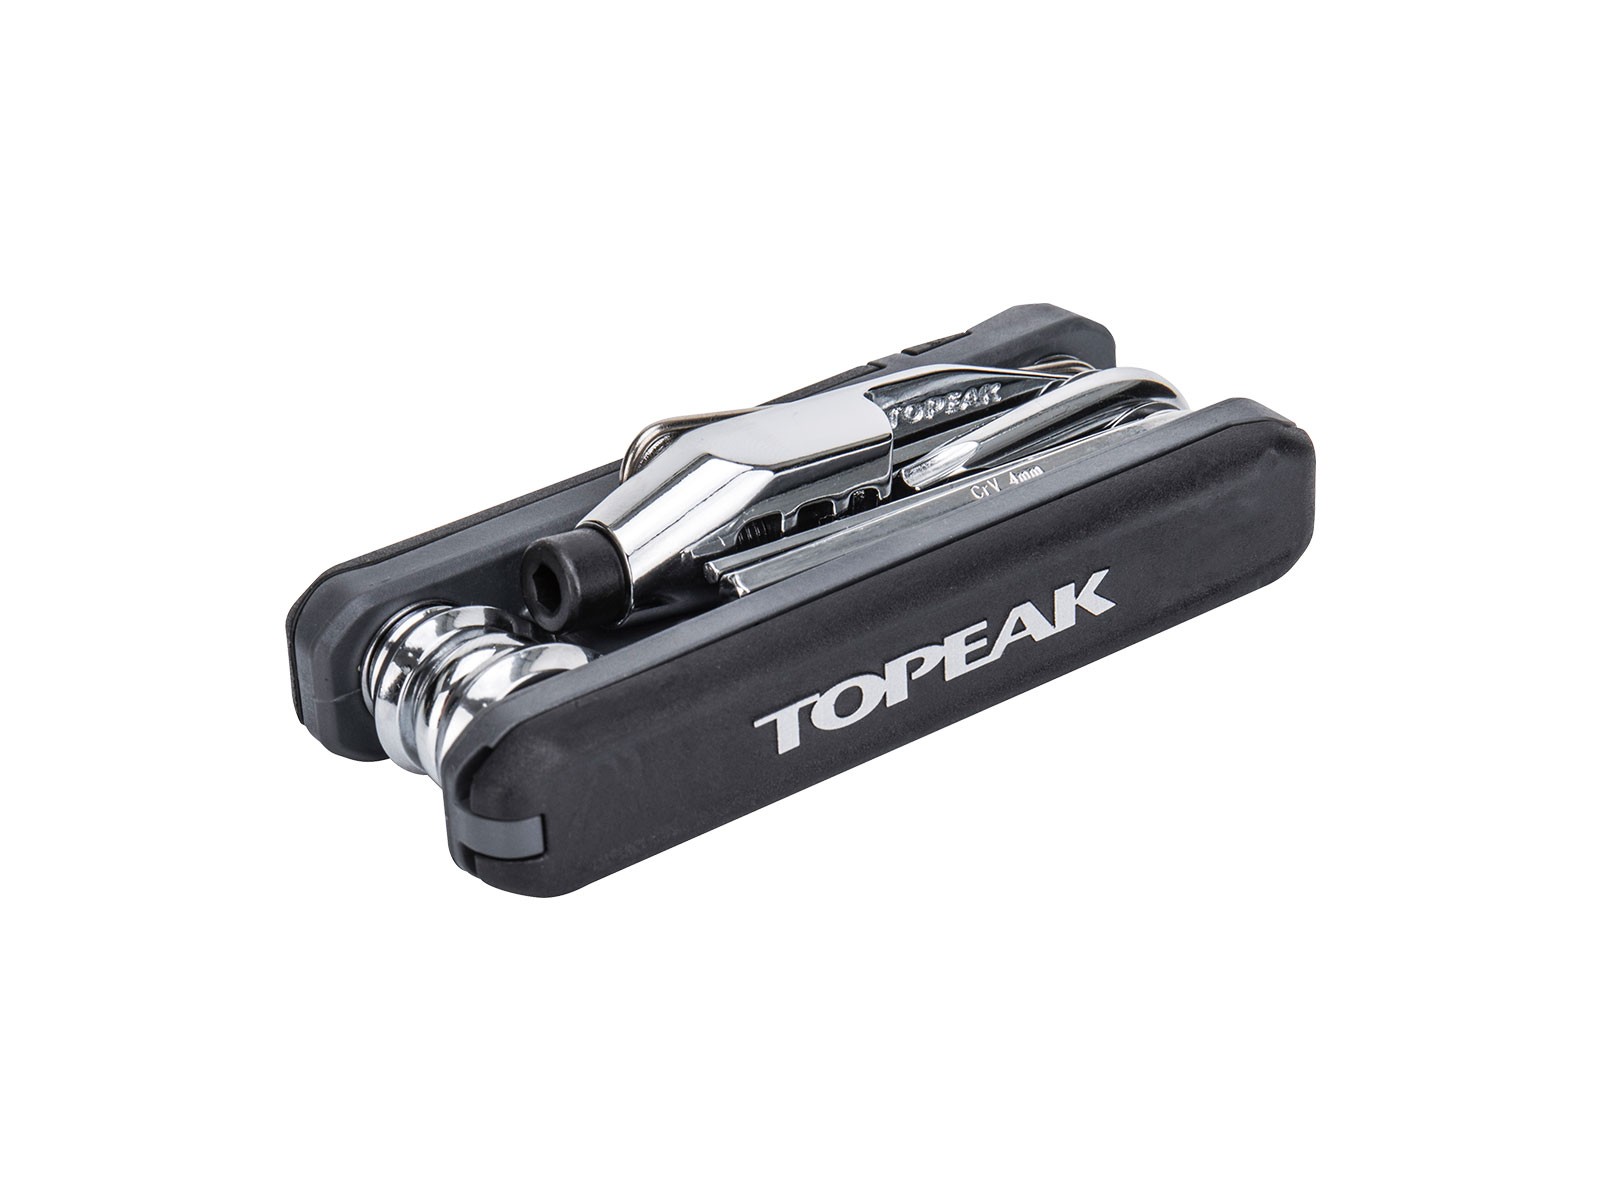
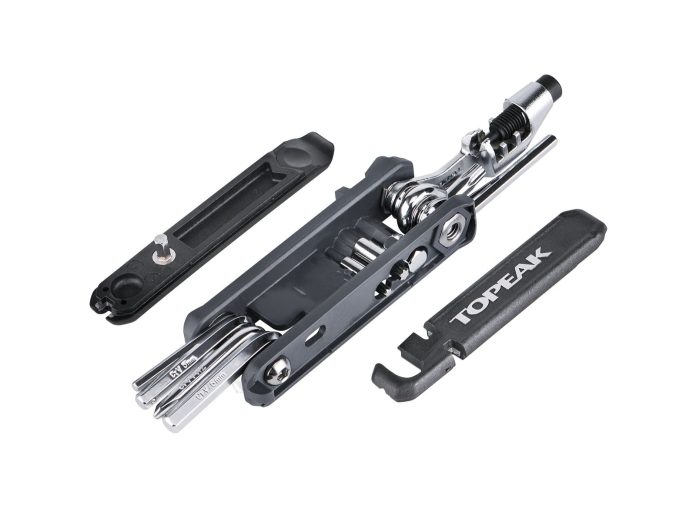
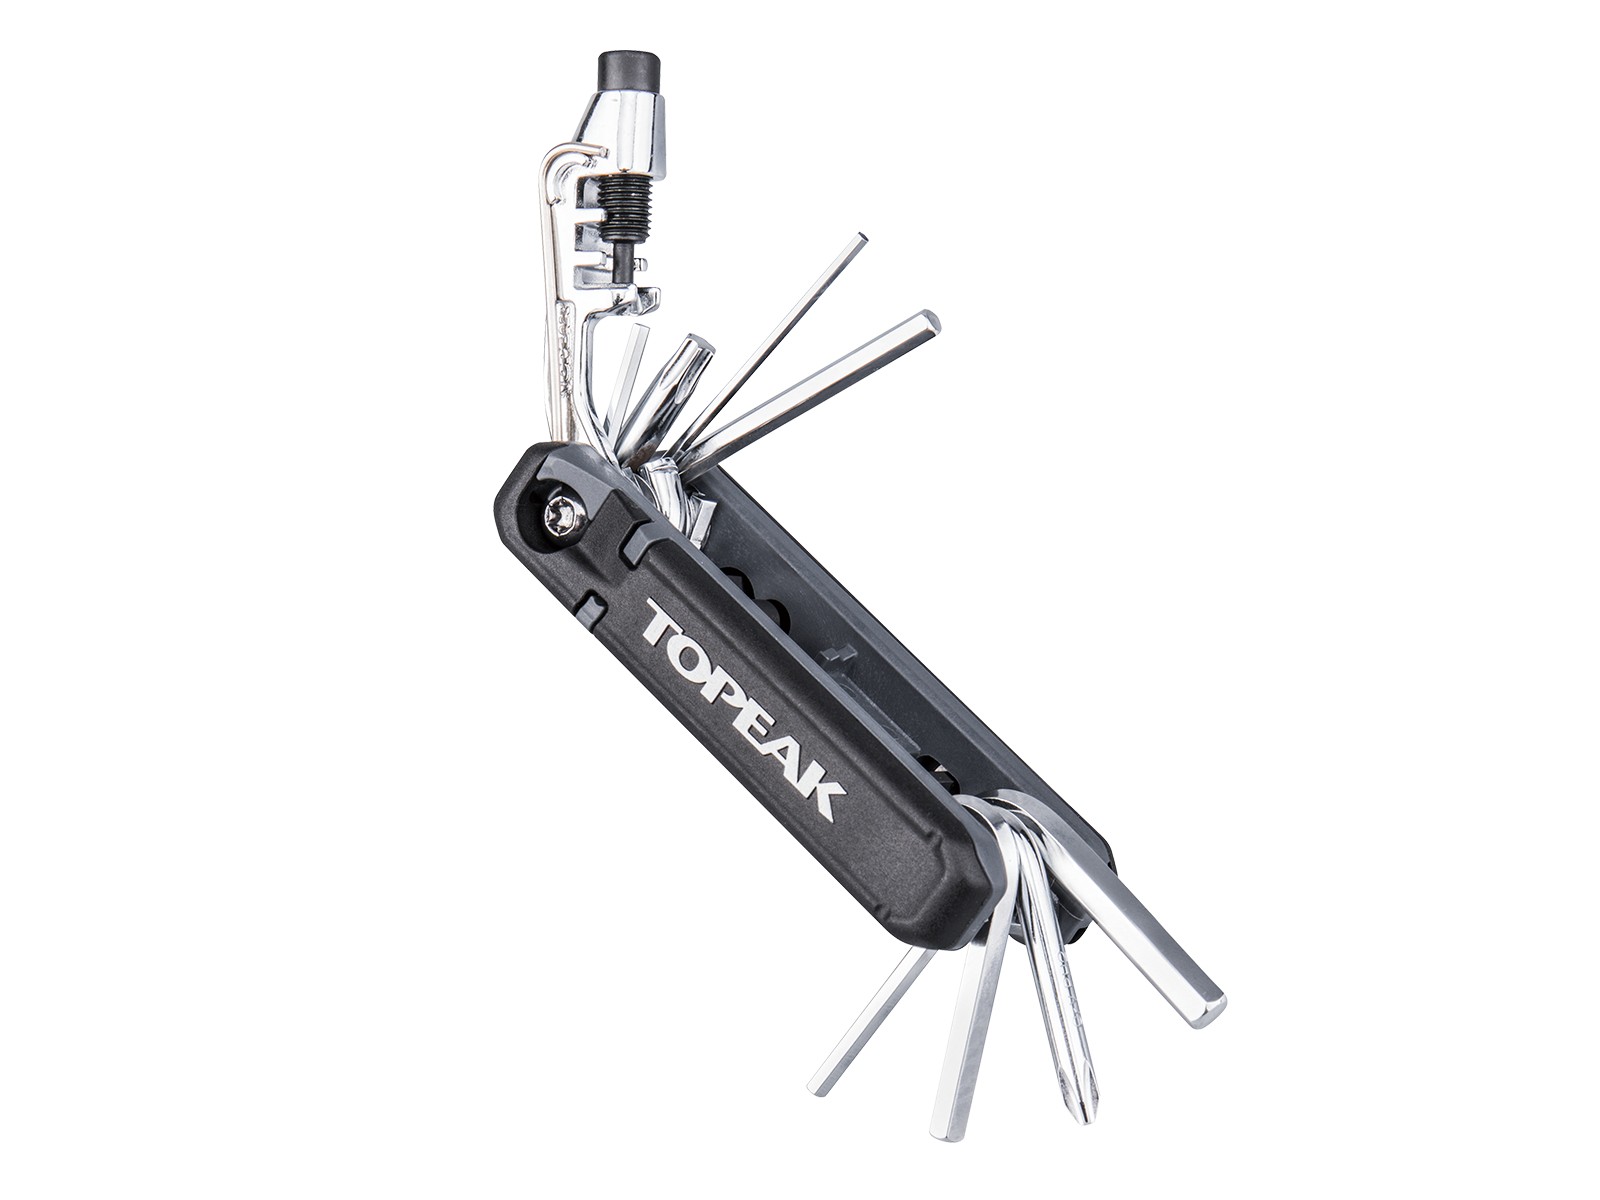
De mit is lehet tudni erről a mobil javítóegységről? 21 Funkció rejlik benne, meglepően sok, ugye? A kulcsok alapanyaga króm-vanádium, jószerivel a tartósság egyik záloga. Mint az elődnek, ennek is lepattinthatóak az oldallapjai, amik gumiszerelő szerszámként funkcionálnak, s ez alatt lapulnak meg a plusz funkciókat rejtő bitfejek.

Persze ez az egyik gyengepont is: egy útszéli szerelésnél extra figyelmet igényel az összes bit felcsipegetése a földről, szóval vigyázzunk rájuk. A másik gyengéje véleményem szerint a lapos csavarhúzó hiánya, ez alkalmanként hasznos lehet. Kompenzál viszont egy nagyon minőségi 12 sebességes láncig használható láncbontó, tehát a világbéke talán mégis összejön.


Összehajtott állapotban méretei 9 x 4 x 2.7 cm, súlya pedig 170 gramm. Funkciói a következőkből tevődnek össze:

  • 2 – 2,5 – 3 – 4(2db) – 5 – 6 – 8mm(bit) imbuszkulcs
  • T15(bit) – T25(bit) – T30 Torx kulcs
  • PH2 csavarhúzó
  • 14G – 15G küllőkulcs
  • Lánckampó
  • 2db ipari polymer gumileszedő
  • Presta szelep bontó
  • Cro-mo láncbontó

Íme egy gyári demonstráló videó:

Ajánlott fogyasztói ára: 9480 Forint


Giro d’Italia: előny Roglicnál a hegyi szakaszok előtt

Ma került sor a 102. Giro d’Italia leghosszabb egyenkénti időfutamára, ami alapján már körvonalazódni látszik, kik lesznek harcban idén az összetettben a rózsaszínű trikóért.

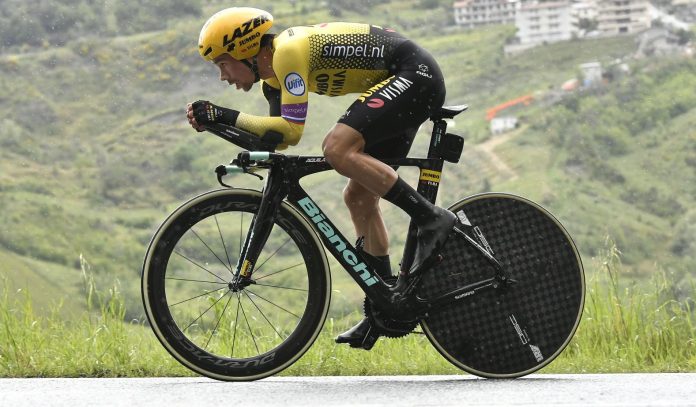
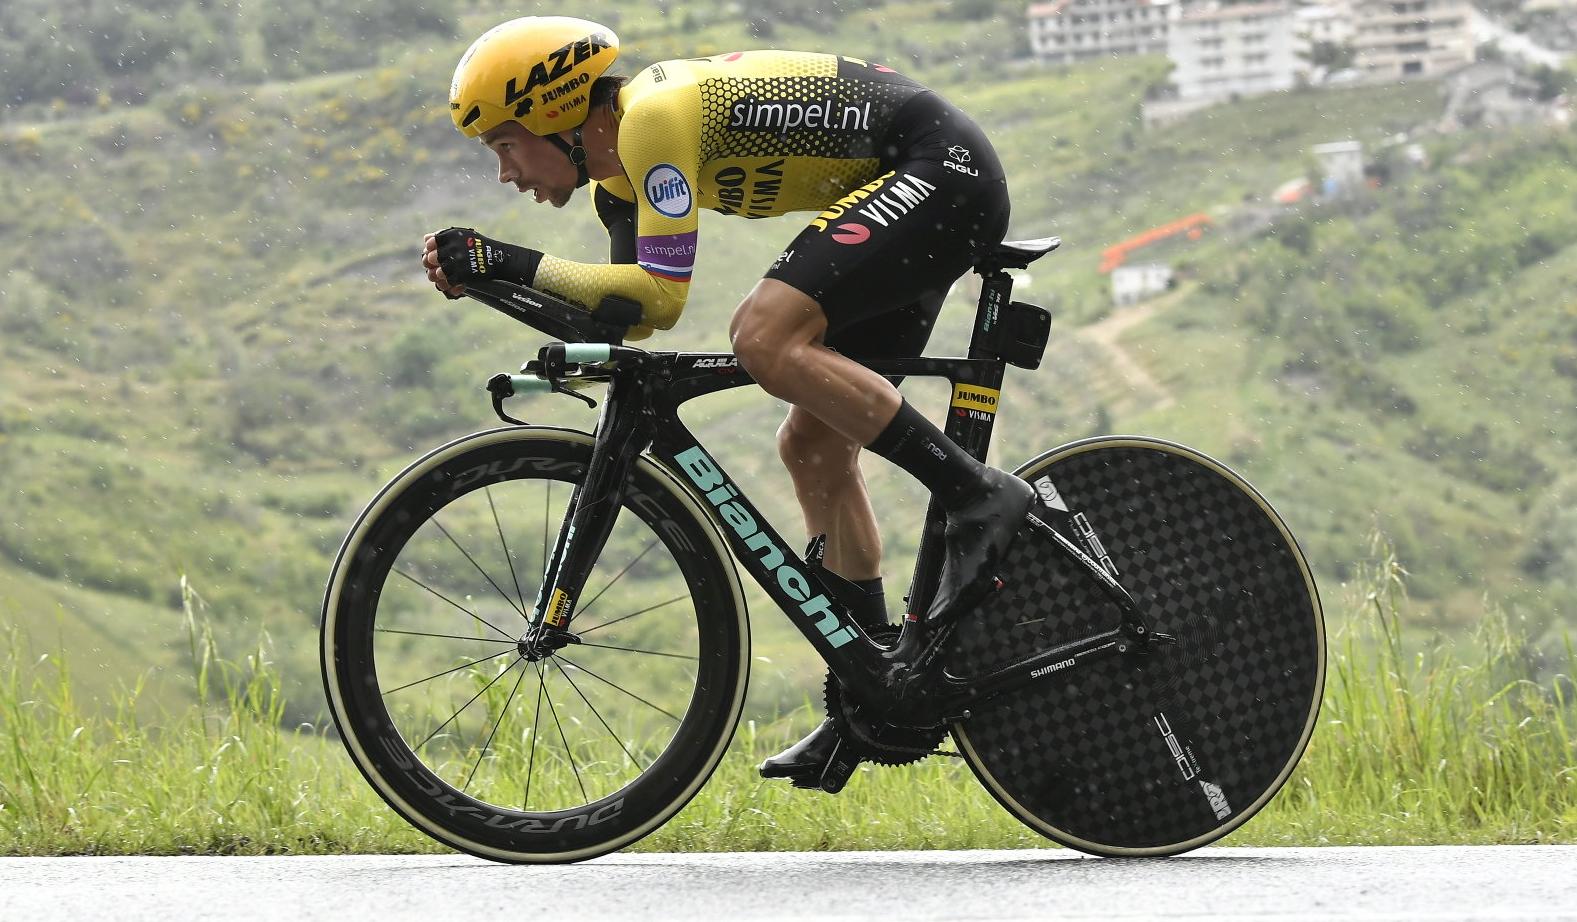
A 9. szakaszon Riccione és San Marino között 34,9 kilométert kellett megtenni az óra ellen, a táv második felében nagyrészt emelkedő úton. A korábbi rózsaszínű trikós szlovén Primoz Roglic (Jumbo-Visma) győzelme mondhatni papírforma, bár a pályán az egyórás világcsúcstartó Victor Campeanerts-et (Lotto-Soudal) csak egy láncleesés akadályozta meg 1,5 kilométerre a céltól, hogy övé legyen a szakasz, így 11 másodperc hátránnyal a második lett.

Az összetett favoritok közül a bolognai egyenkéntihez hasonlóan Vincenzo Nibali (Bahrain Merida) ment nagyon jól, önmagához képest Richard Carapaz (Movistar) is repült, a Trek-Segafredo csapatából pedig Bauke Mollema mutat jó formát, a hollanddal úgy tűnik, hogy idén számolni kell a generálban. Érdekesség, hogy az Astanából a 7. szakaszt nyerő Pello Bilbao sokkal jobban teljesített, mint Lopez, és így az összetettben is sokkal jobban áll a kolumbiainál. Az esélyesek közül Simon Yates (Mitchelton-Scott) és Mikel Landa (Movistar) nyújtott halvány teljesítményt.

A rózsaszínű trikós olasz Valerio Conti (UAE Team) hozta a kötelezőt, 3:34 perc hátránnyal is megőrizte első helyét az összetettben, amit néhány szakaszon keresztül valószínűleg még őrizni is fog Roglic előtt.

Giro d’Italia 9. szakasz eredménye:

1 Primoz Roglic (Slo) Team Jumbo-Visma 0:51:52
2 Victor Campenaerts (Bel) Lotto Soudal 0:00:11
3 Bauke Mollema (Ned) Trek-Segafredo 0:01:00
4 Vincenzo Nibali (Ita) Bahrain-Merida 0:01:05
5 Tanel Kangert (Est) EF Education First 0:01:10
6 Chad Haga (USA) Team Sunweb 0:01:14
7 Bob Jungels (Lux) Deceuninck-QuickStep 0:01:16
8 Hugh John Carthy (GBr) EF Education First 0:01:30
9 Pello Bilbao (Spa) Astana Pro Team 0:01:43
10 Mattia Cattaneo (Ita) Androni Giocattoli-Sidermec 0:01:52
11 Richard Carapaz (Ecu) Movistar Team 0:01:55
11 Jan Polanc (Slo) UAE Team Emirates
13 Ilnur Zakarin (Rus) Katusha-Alpecin 0:01:56
14 Rafal Majka (Pol) Bora-Hansgrohe 0:02:04
15 Diego Ulissi (Ita) UAE Team Emirates 0:02:08
16 Victor De La Parte (Spa) CCC Team 0:02:20
17 Ben O’Connor (Aus) Dimension Data 0:02:23
18 Thomas De Gendt (Bel) Lotto Soudal 0:02:32
19 Scott Davies (GBr) Dimension Data 0:02:37
20 Ion Izagirre Insausti (Spa) Astana Pro Team 0:02:39
21 Damiano Caruso (Ita) Bahrain-Merida 0:02:40
22 Tobias Ludvigsson (Swe) Groupama-FDJ 0:02:44
23 Andrey Amador (CRc) Movistar Team 0:02:46
24 Pavel Sivakov (Rus) Team Ineos 0:02:47
25 Tao Geoghegan Hart (GBr) Team Ineos 0:02:49

Összetett állás:

1 Valerio Conti (Ita) UAE Team Emirates 36:08:32
2 Primoz Roglic (Slo) Team Jumbo-Visma 0:01:50
3 Nans Peters (Fra) AG2R La Mondiale 0:02:21
4 José Rojas (Spa) Movistar Team 0:02:33
5 Fausto Masnada (Ita) Androni Giocattoli-Sidermec 0:02:36
6 Andrey Amador (CRc) Movistar Team 0:02:39
7 Amaro Antunes (Por) CCC Team 0:03:05
8 Valentin Madouas (Fra) Groupama-FDJ 0:03:27
9 Giovanni Carboni (Ita) Bardiani CSF 0:03:30
10 Pello Bilbao (Spa) Astana Pro Team 0:03:32
11 Vincenzo Nibali (Ita) Bahrain-Merida 0:03:34
12 Bauke Mollema (Ned) Trek-Segafredo 0:03:45
13 Pieter Serry (Bel) Deceuninck-QuickStep 0:03:47
14 Bob Jungels (Lux) Deceuninck-QuickStep 0:04:08
15 Mattia Cattaneo (Ita) Androni Giocattoli-Sidermec 0:04:34
16 Hugh John Carthy (GBr) EF Education First 0:04:36
17 Davide Formolo (Ita) Bora-Hansgrohe 0:04:42
18 Rafal Majka (Pol) Bora-Hansgrohe 0:04:43
19 Sam Oomen (Ned) Team Sunweb 0:05:02
20 Richard Carapaz (Ecu) Movistar Team 0:05:06
21 Victor De La Parte (Spa) CCC Team 0:05:20
22 Ilnur Zakarin (Rus) Katusha-Alpecin 0:05:22
23 Jan Polanc (Slo) UAE Team Emirates 0:05:24
24 Simon Yates (GBr) Mitchelton-Scott 0:05:36
25 Tanel Kangert (Est) EF Education First 0:05:51

Giro d’Italia: sprintbefutó a leghosszabb szakaszon

A 102. Giro d’Italia leghosszabb szakaszán 239 kilométert kellett megtenni a mezőnynek, az itinerben pedig szerepelt néhány emelkedő a táv utolsó harmadában. Mégis a sprinterek küzdöttek a győzelemért.

A szakasz első felében egy háromfős szökés bontakozott ki, de ezt túl korán megfogta a mezőny, várható volt, hogy lesz még akció a dombokon, ahol egyébként megfogyatkozott a peloton. Így is lett, Guido Ciccone (Trek-Segafredo) a hegyi hajrá után közvetlenül támadott, és Francois Bidard-ral (Ag2R-La Mondiale), valamint Louis Vervaeke-vel (Sunweb) hamar 45 másodperces előnyt építettek.

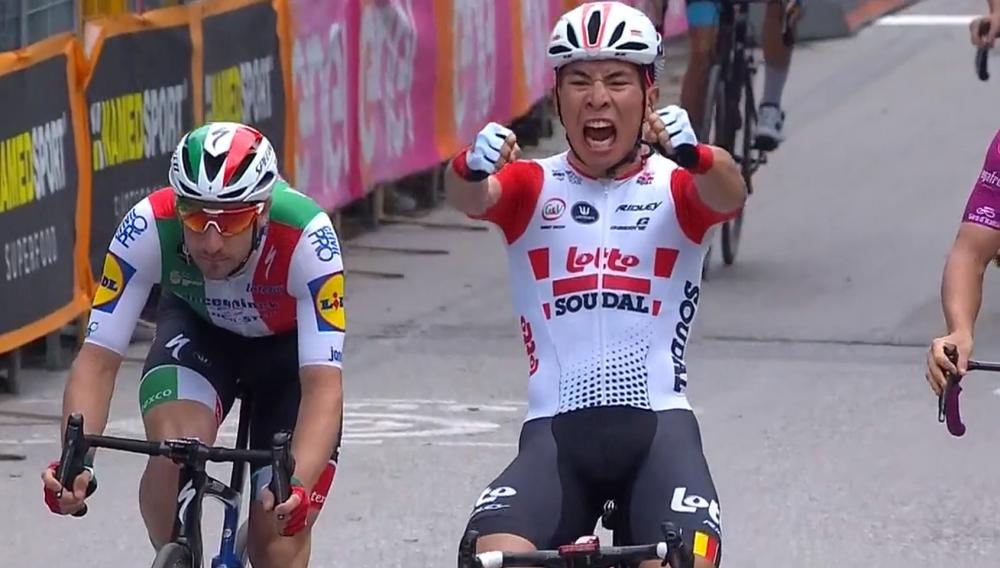
A mezőny észnél volt, és a cél előtti 5 kilométeres lejtmenet előtt utolérte az elmenést, lefelé a Quick Step kontrollálta az eseményeket. Az utolsó 2 kilométeren aztán a Bora-Hansgrohe vette át a kezdeményezést és tökéletes felvezetést adtak a ciklámen trikós Pascal Ackermann-nak. Caleb Ewan (Lotto-Soudal) azonban ma gyorsabb volt, ki tudta kerülni a németet és megszerezte első győzelmét az idei Girón. Az összetettben nem változott semmi, Valerio Conti (UAE Team) vezet.

Giro d’Italia 8. szakasz eredménye:

1 Caleb Ewan (Aus) Lotto Soudal 5:43:32
2 Elia Viviani (Ita) Deceuninck-QuickStep
3 Pascal Ackermann (Ger) Bora-Hansgrohe
4 Fabio Sabatini (Ita) Deceuninck-QuickStep
5 Manuel Belletti (Ita) Androni Giocattoli-Sidermec
6 Arnaud Demare (Fra) Groupama-FDJ
7 Davide Cimolai (Ita) Israel Cycling Academy
8 Marco Canola (Ita) Nippo-Vini Fantini-Faizane
9 Giacomo Nizzolo (Ita) Dimension Data
10 Rüdiger Selig (Ger) Bora-Hansgrohe

Összetett állás:

1 Valerio Conti (Ita) UAE Team Emirates 35:13:06
2 José Rojas (Spa) Movistar Team 0:01:32
3 Giovanni Carboni (Ita) Bardiani CSF 0:01:41
4 Nans Peters (Fra) AG2R La Mondiale 0:02:09
5 Valentin Madouas (Fra) Groupama-FDJ 0:02:17
6 Amaro Antunes (Por) CCC Team 0:02:45
7 Fausto Masnada (Ita) Androni Giocattoli-Sidermec 0:03:14
8 Pieter Serry (Bel) Deceuninck-QuickStep 0:03:25
9 Andrey Amador (CRc) Movistar Team 0:03:27
10 Sam Oomen (Ned) Team Sunweb 0:04:57

Scott Addict SE vs. RC20 Disc: Both are properly „addictive”!

Scott Addict SE Disc

The Scott Addict appears less often in the ads than the top-of-the-line Foil, nevertheless the model range offers a wide variety of choices to satisfy almost all the yearnings of a road cyclist.

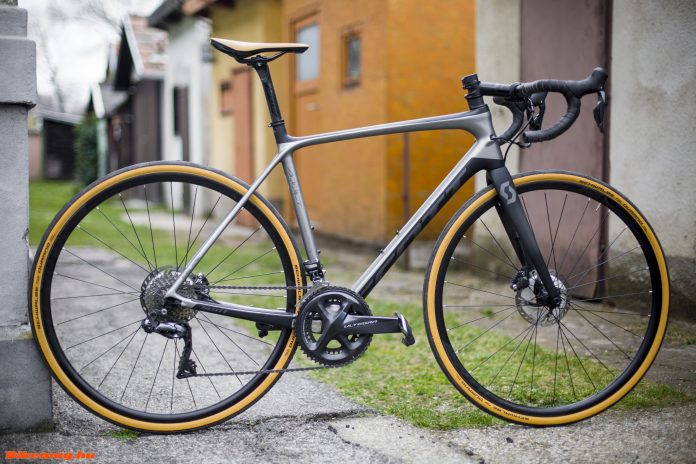
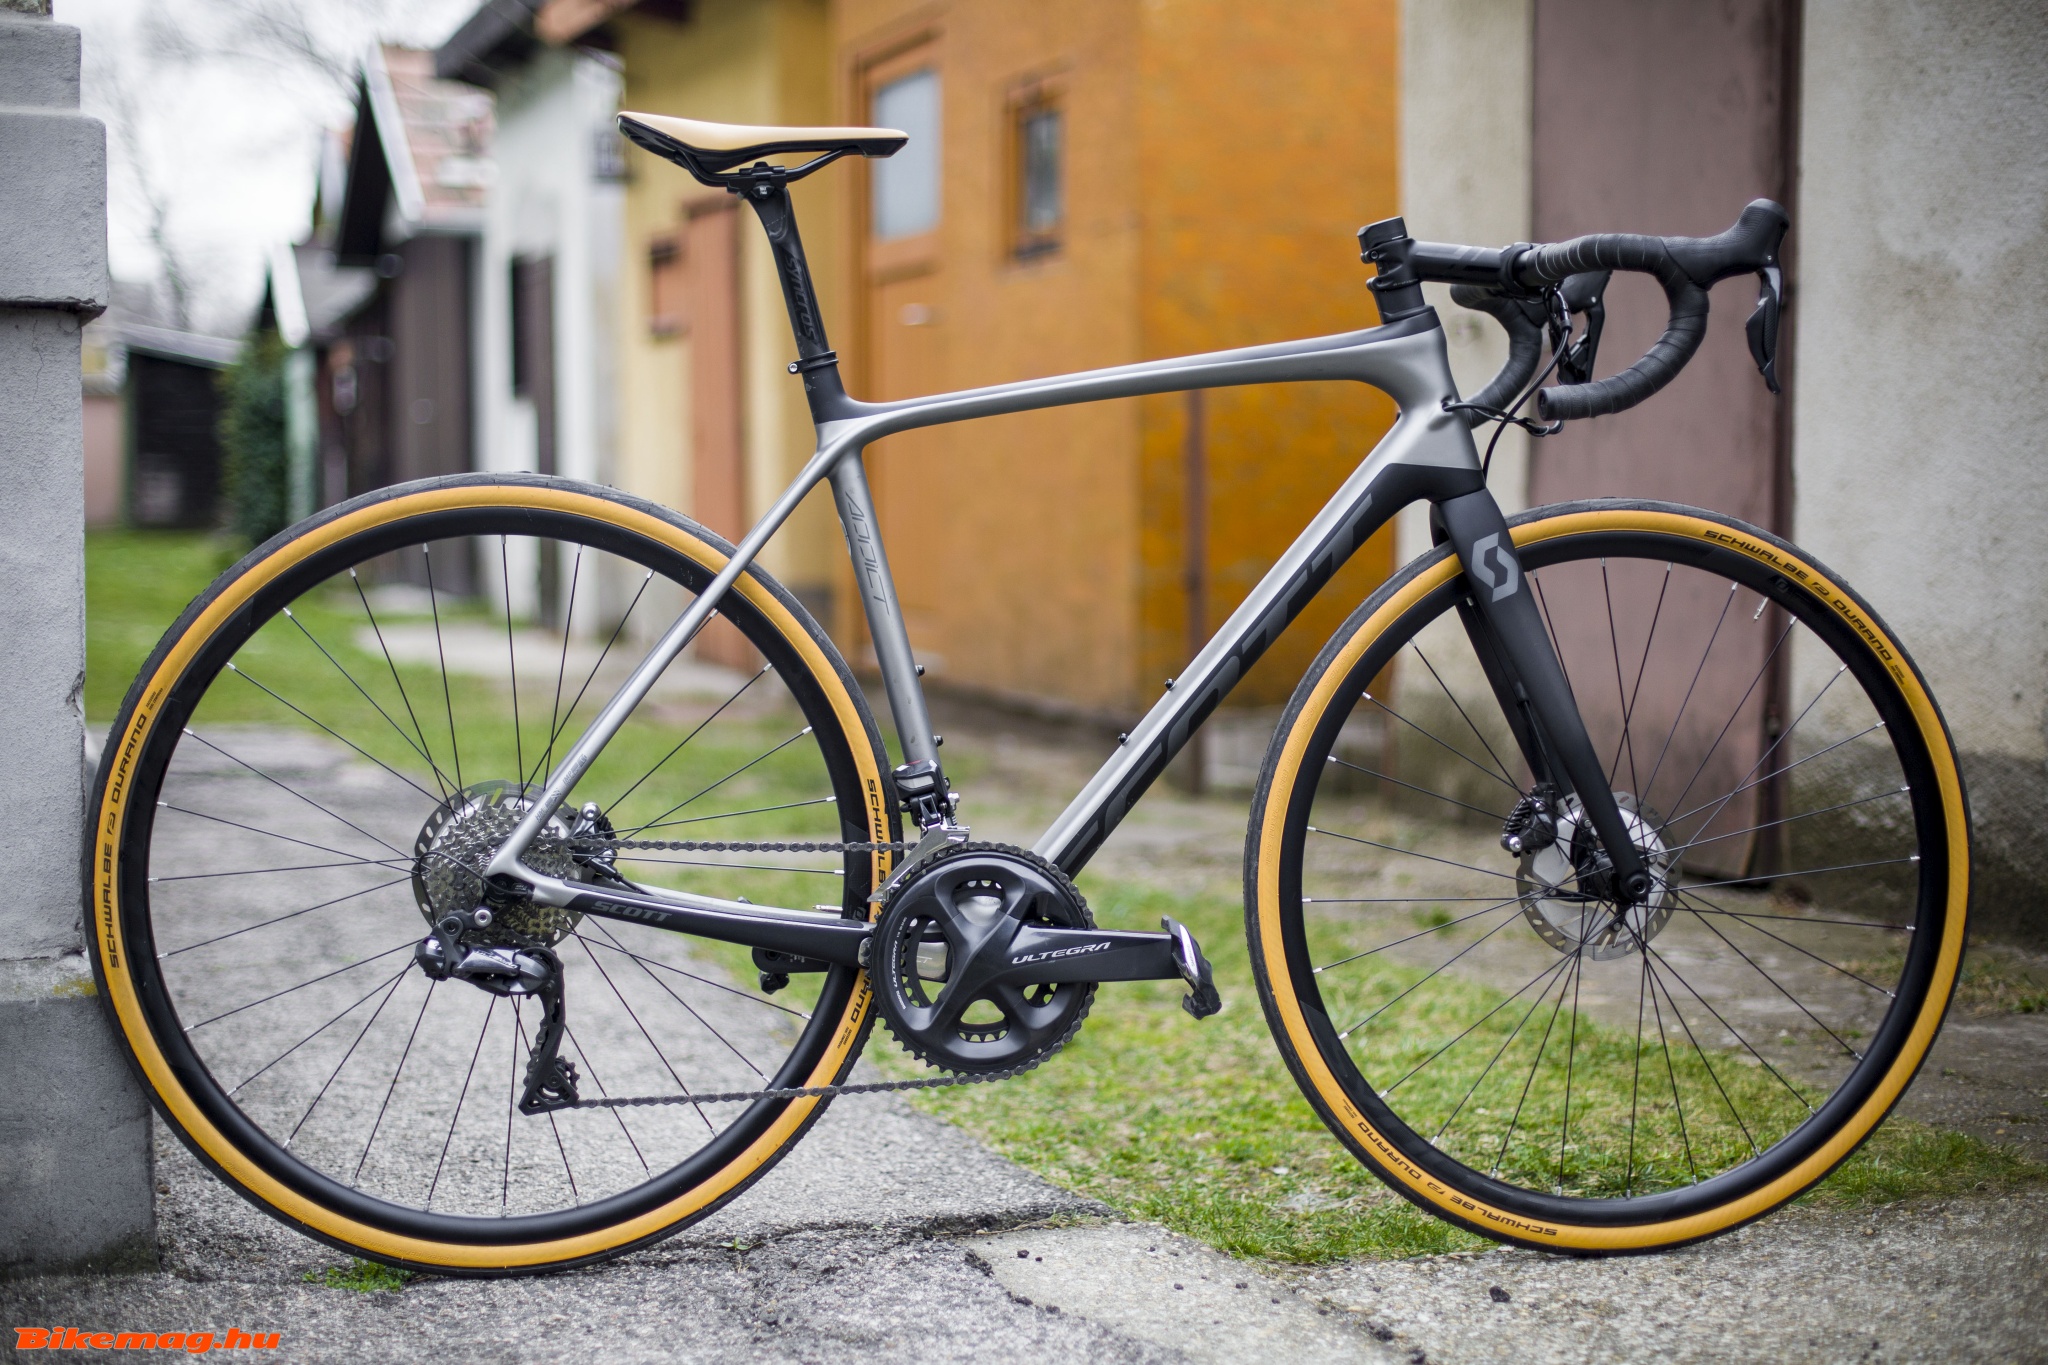
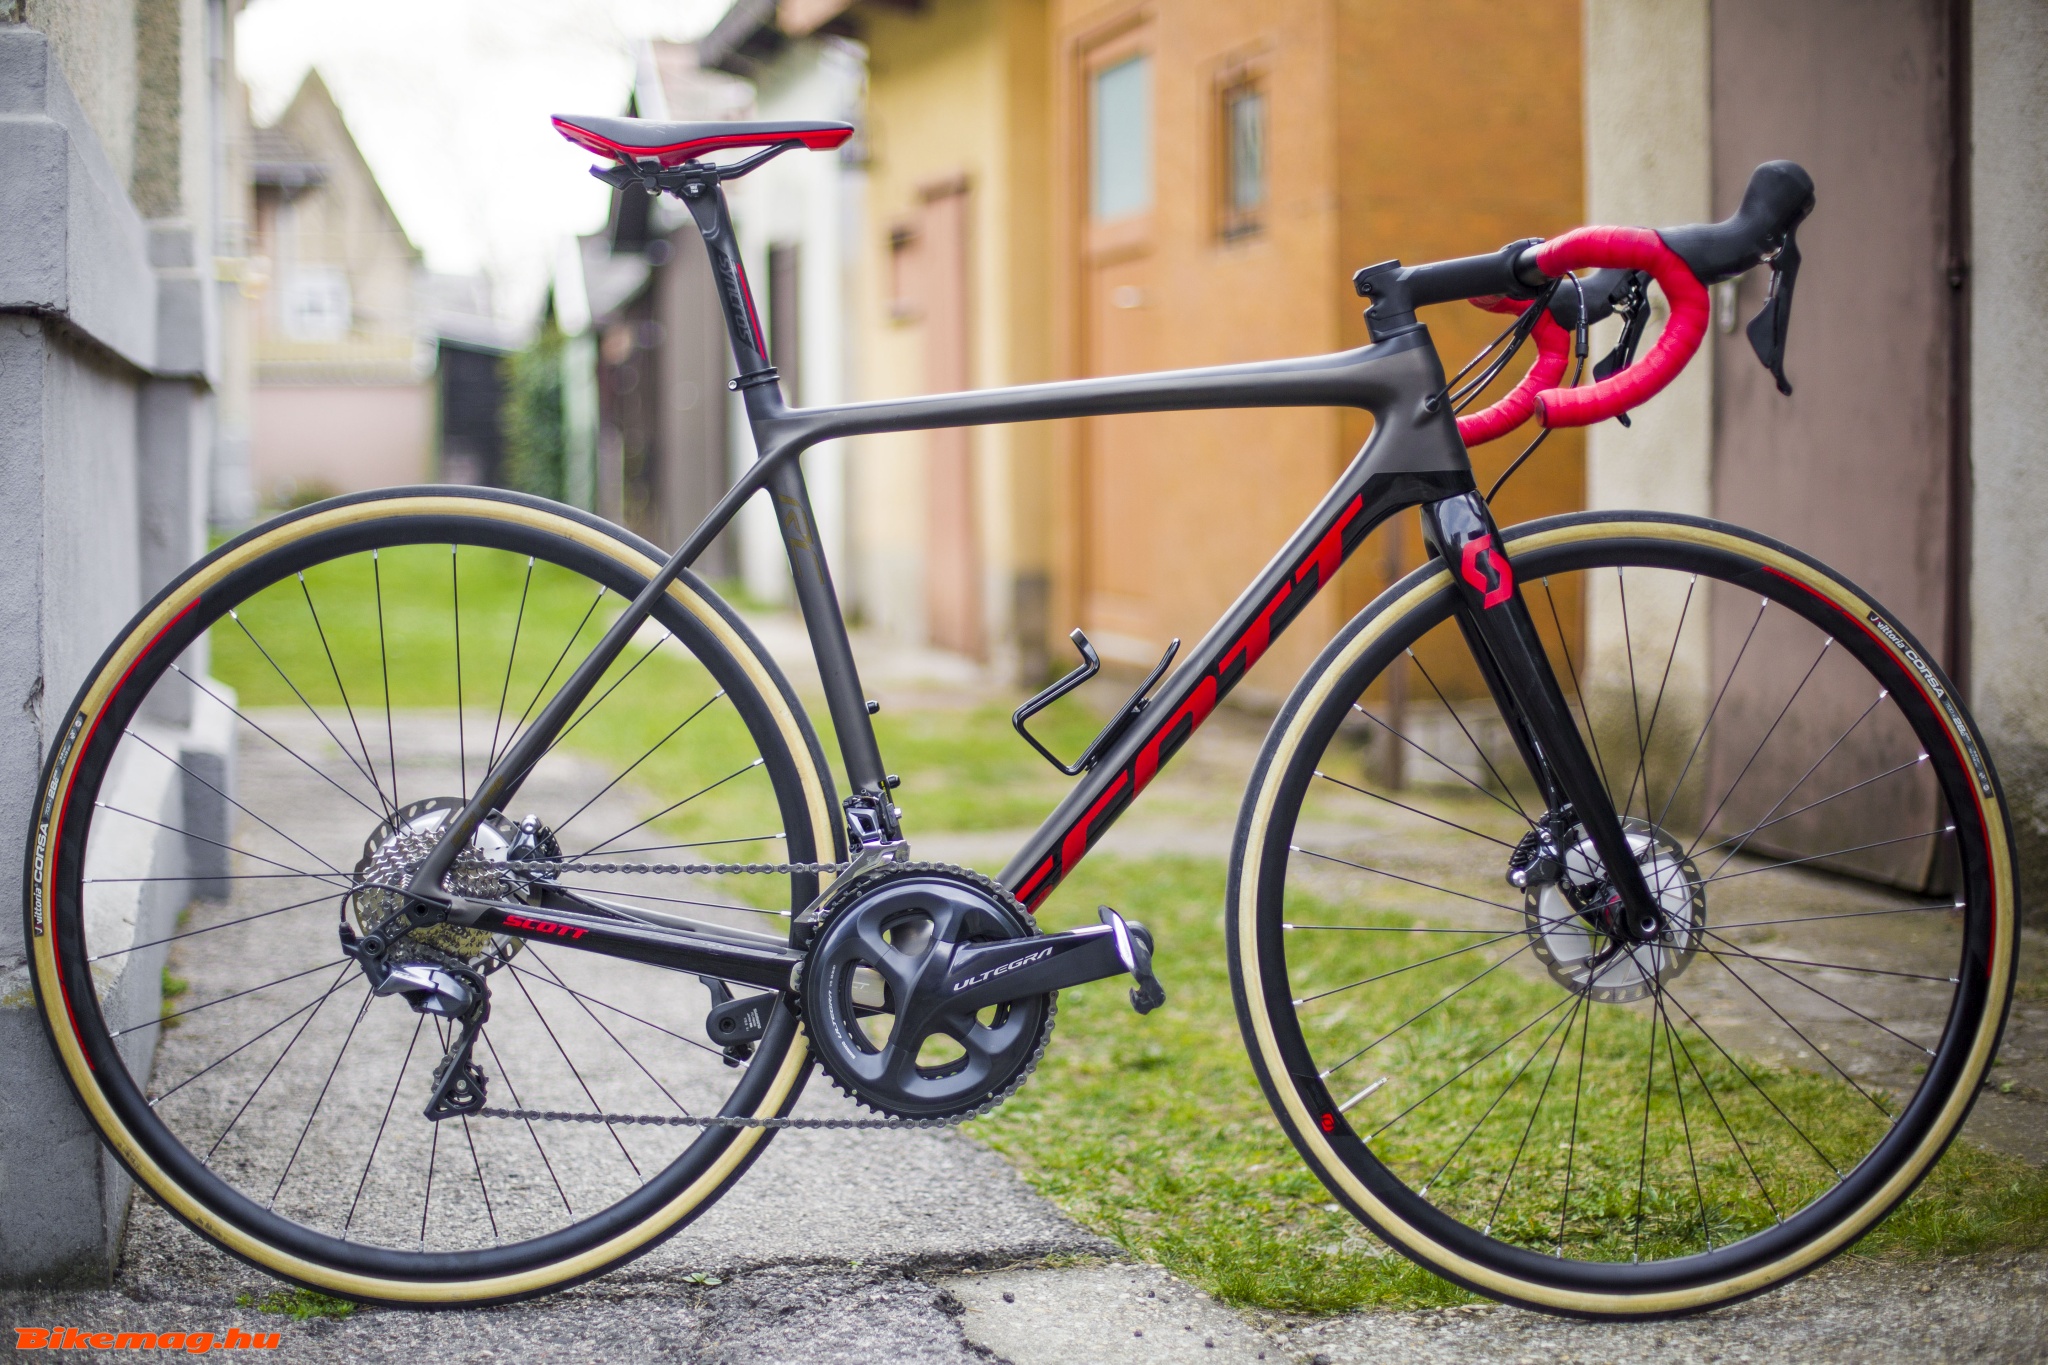
The protagonists of this review are both Addicts, each with a distinct “flavor”. One offers a more comfortable frame geometry, the other has all but racing in mind. The former is called Addict SE (Special Edition) Disc and features a full Shimano Ultegra R8000 Di2 electronic component set, the “sporty” Addict RC 20 Disc is equipped with the mechanical version of this recent Ultegra “gruppo”. What is common for both, that they are designed to be ridden on pavement with modern hydraulic disc brakes.

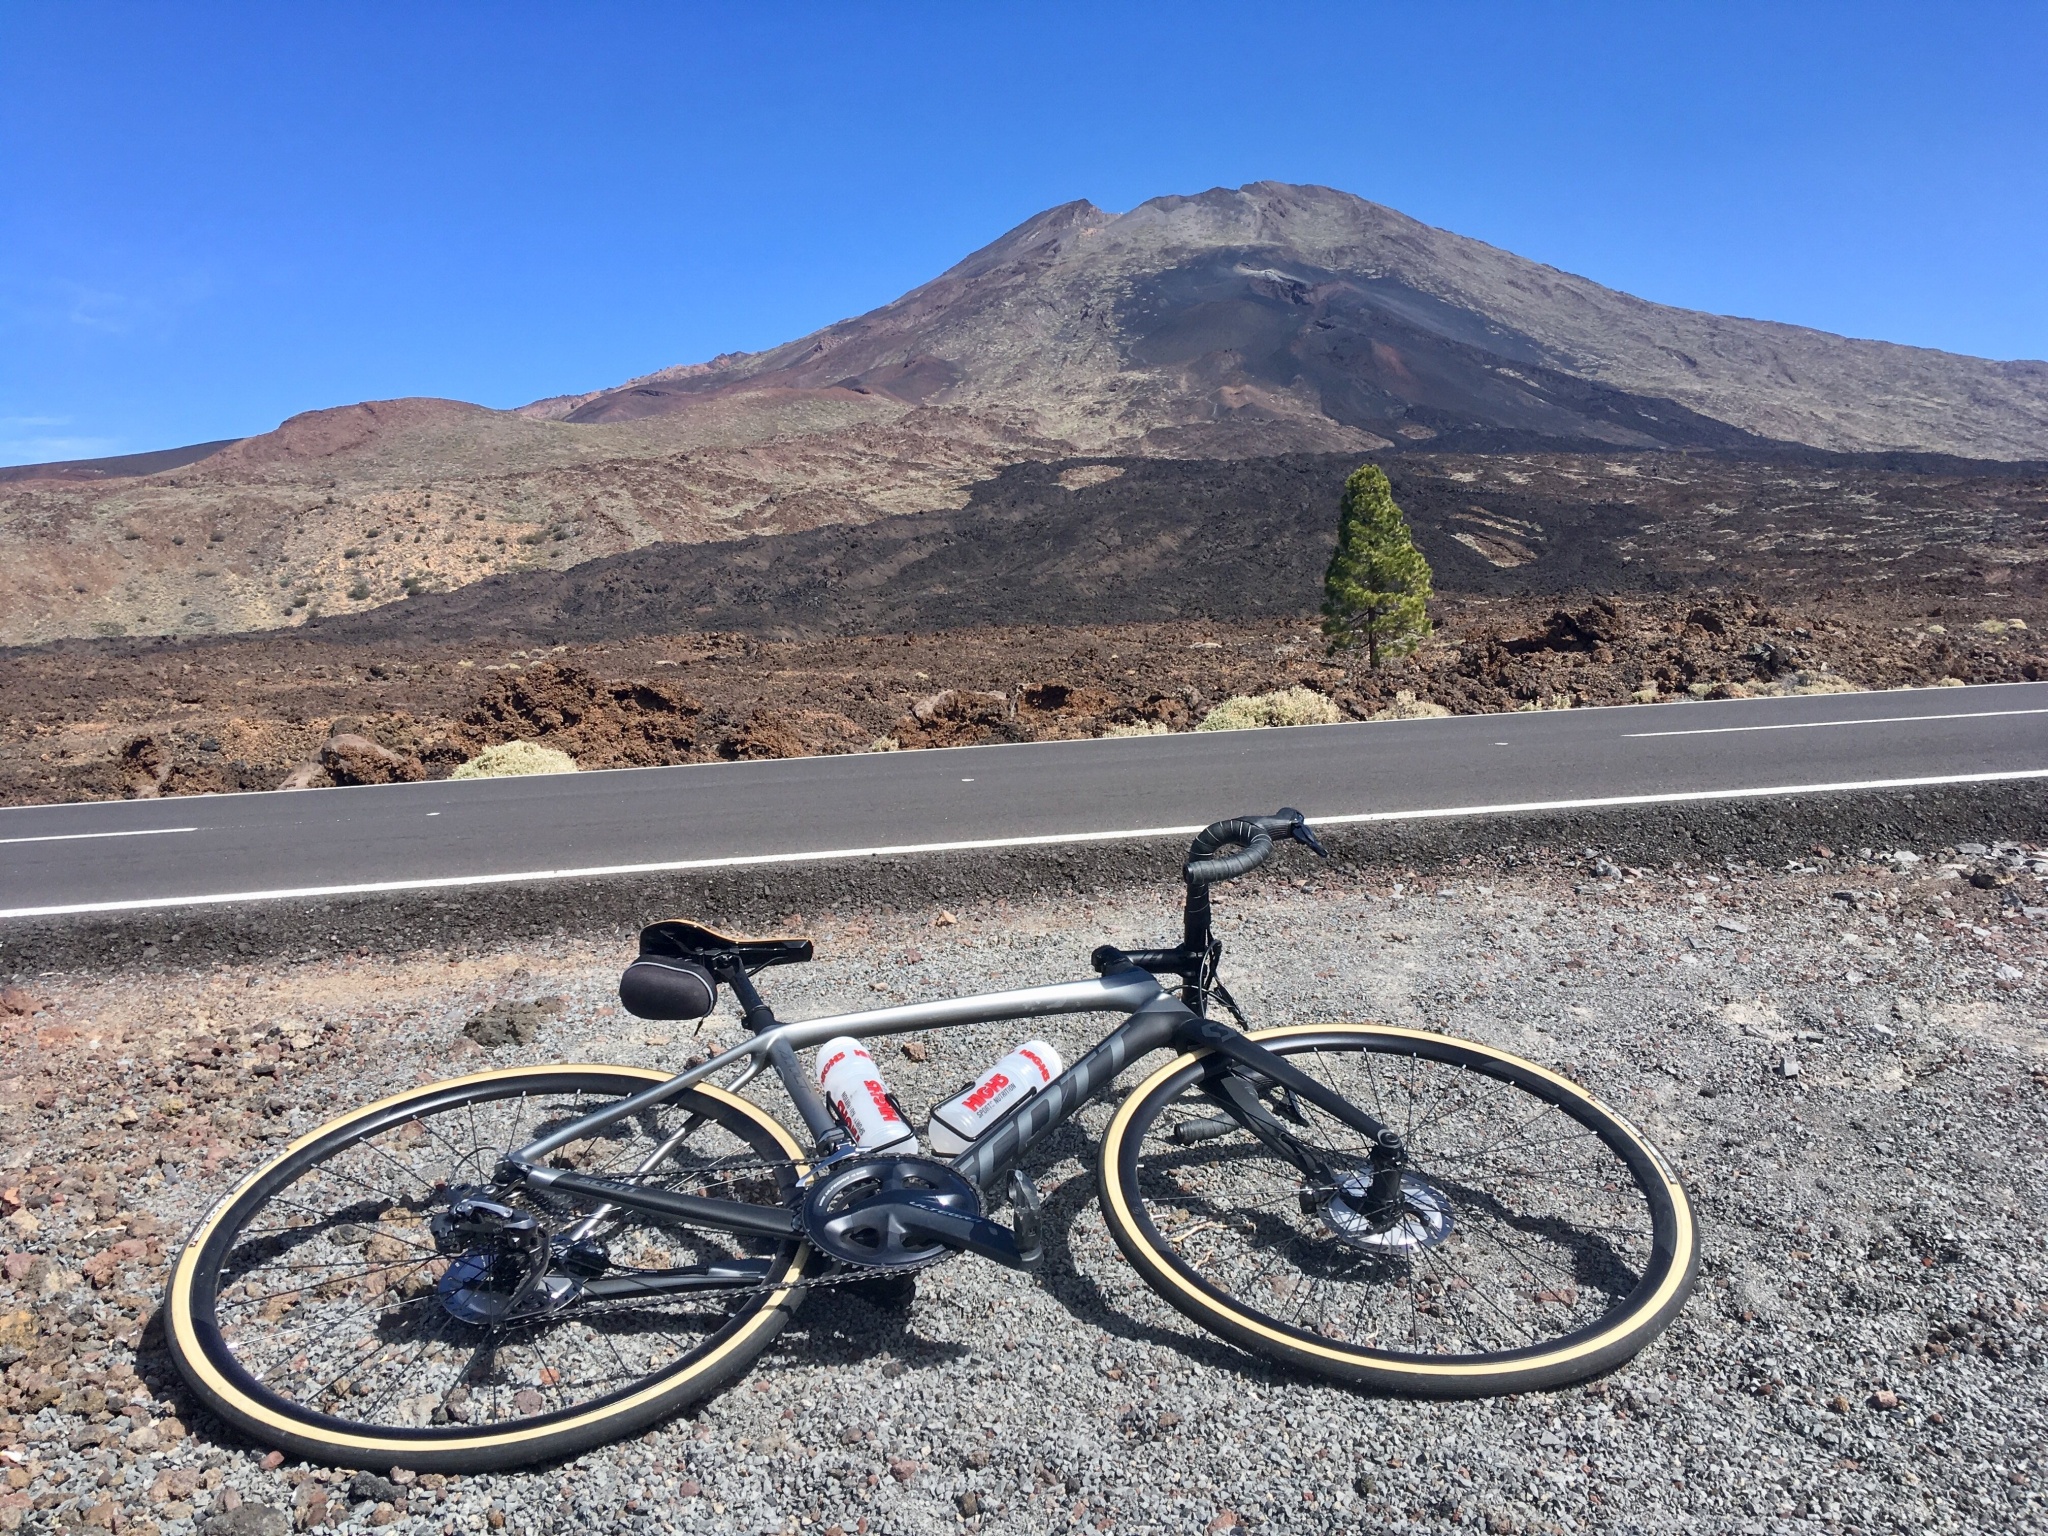
Our first idea was to test both bikes in Di2 versions. Unfortunately the Addict RC 15 Disc we picked was sold out all over Europe. Scott bikes are indeed very popular, especially since the Swiss-American brand reduced the prices all across the range for 2019. There is already a waiting list for some Scott models, shipments for the afore-mentioned RC 15 Disc is promised for this summer. As we needed the bikes in March for our training camp in Tenerife, we had to settle for the mechanical version. At least we have a chance to compare electronic shifting to mechanical while reviewing the merits and the drawbacks of the two distinct Scott Addict frame geometries!

The Addict first appeared in 2006 as the flagship model in the Scott lineup. Then manufacturers were not required to put much emphasis on the aerodynamic properties of a road bike frame, rather they tended to concentrate on offering the lightest possible weight pair with stiffness that satisfied even professional riders. Such bikes could also be made quite comfortable to ride, which is always welcome. These days have long gone, and now the buzzword is “aero”. Henceforward Scott introduced the Foil range of road bike which is optimized primarily for aerodynamic properties. We should mention that Scott had offered excellent time trial and triathlon bike frames previously, so they were not stepping on unchartered territory with the trendy Foil series.

Many brands consider frame properties other than wind tunnel data more or less an afterthought. Most amateur riders rarely reach the speeds quoted for these aero tests, and would certainly welcome a little more comfort paired with some decrease in weight rather than harvesting an extra half watt in air drag reduction at neck breaking speeds. Last but not least, many tend to think that road bikes of a decade ago possess shapes that are as more pleasing for the eye. I consider the Addict to belong in this category.

The Scott Addict range includes bike models with both disc brake systems and traditional rim caliper versions. In fact, in the course of last year’s Giro d’Italia, race leader Simon Yates have been riding a rim brake Addict RC. He prefers this RC model to the disc variant, and the fine results put no question mark to his decision. All versions of the Addict demonstrate phenomenal engineering. The rim brake model weights 1100 gr for the complete frameset – that is including the forks! The disc version is a mere 60 gr heavier, making it one of the lightest road disc frameset on the market. To achieve such incredibly low mass, Scott employs very high modulus HMX carbon fiber material.

The RC variants of the Addict range offer a different frame geometry with virtually identical carbon manufacturing technology. Depending on the frame size, the head tube is 2-2.5 cm shorter compared to the non-RC Addict, while the horizontal top tube is approximately 5 mm longer. The seat tube angle is also a little shallower to lengthen the “cockpit”, providing more reach to the bars. Unless you have a very sharp eye for detail, you couldn’t tell the two types of Addict frames apart. All shapes and contours are the same, and there are no tell-tale signs that you’re riding one of the other version. Best of all, Scott is not putting much emphasis on the above-mentioned differences in their marketing material – they avoid extravagant making claims for the either the RC or the SE, allowing rider to remain completely satisfied with the Addict of choice.

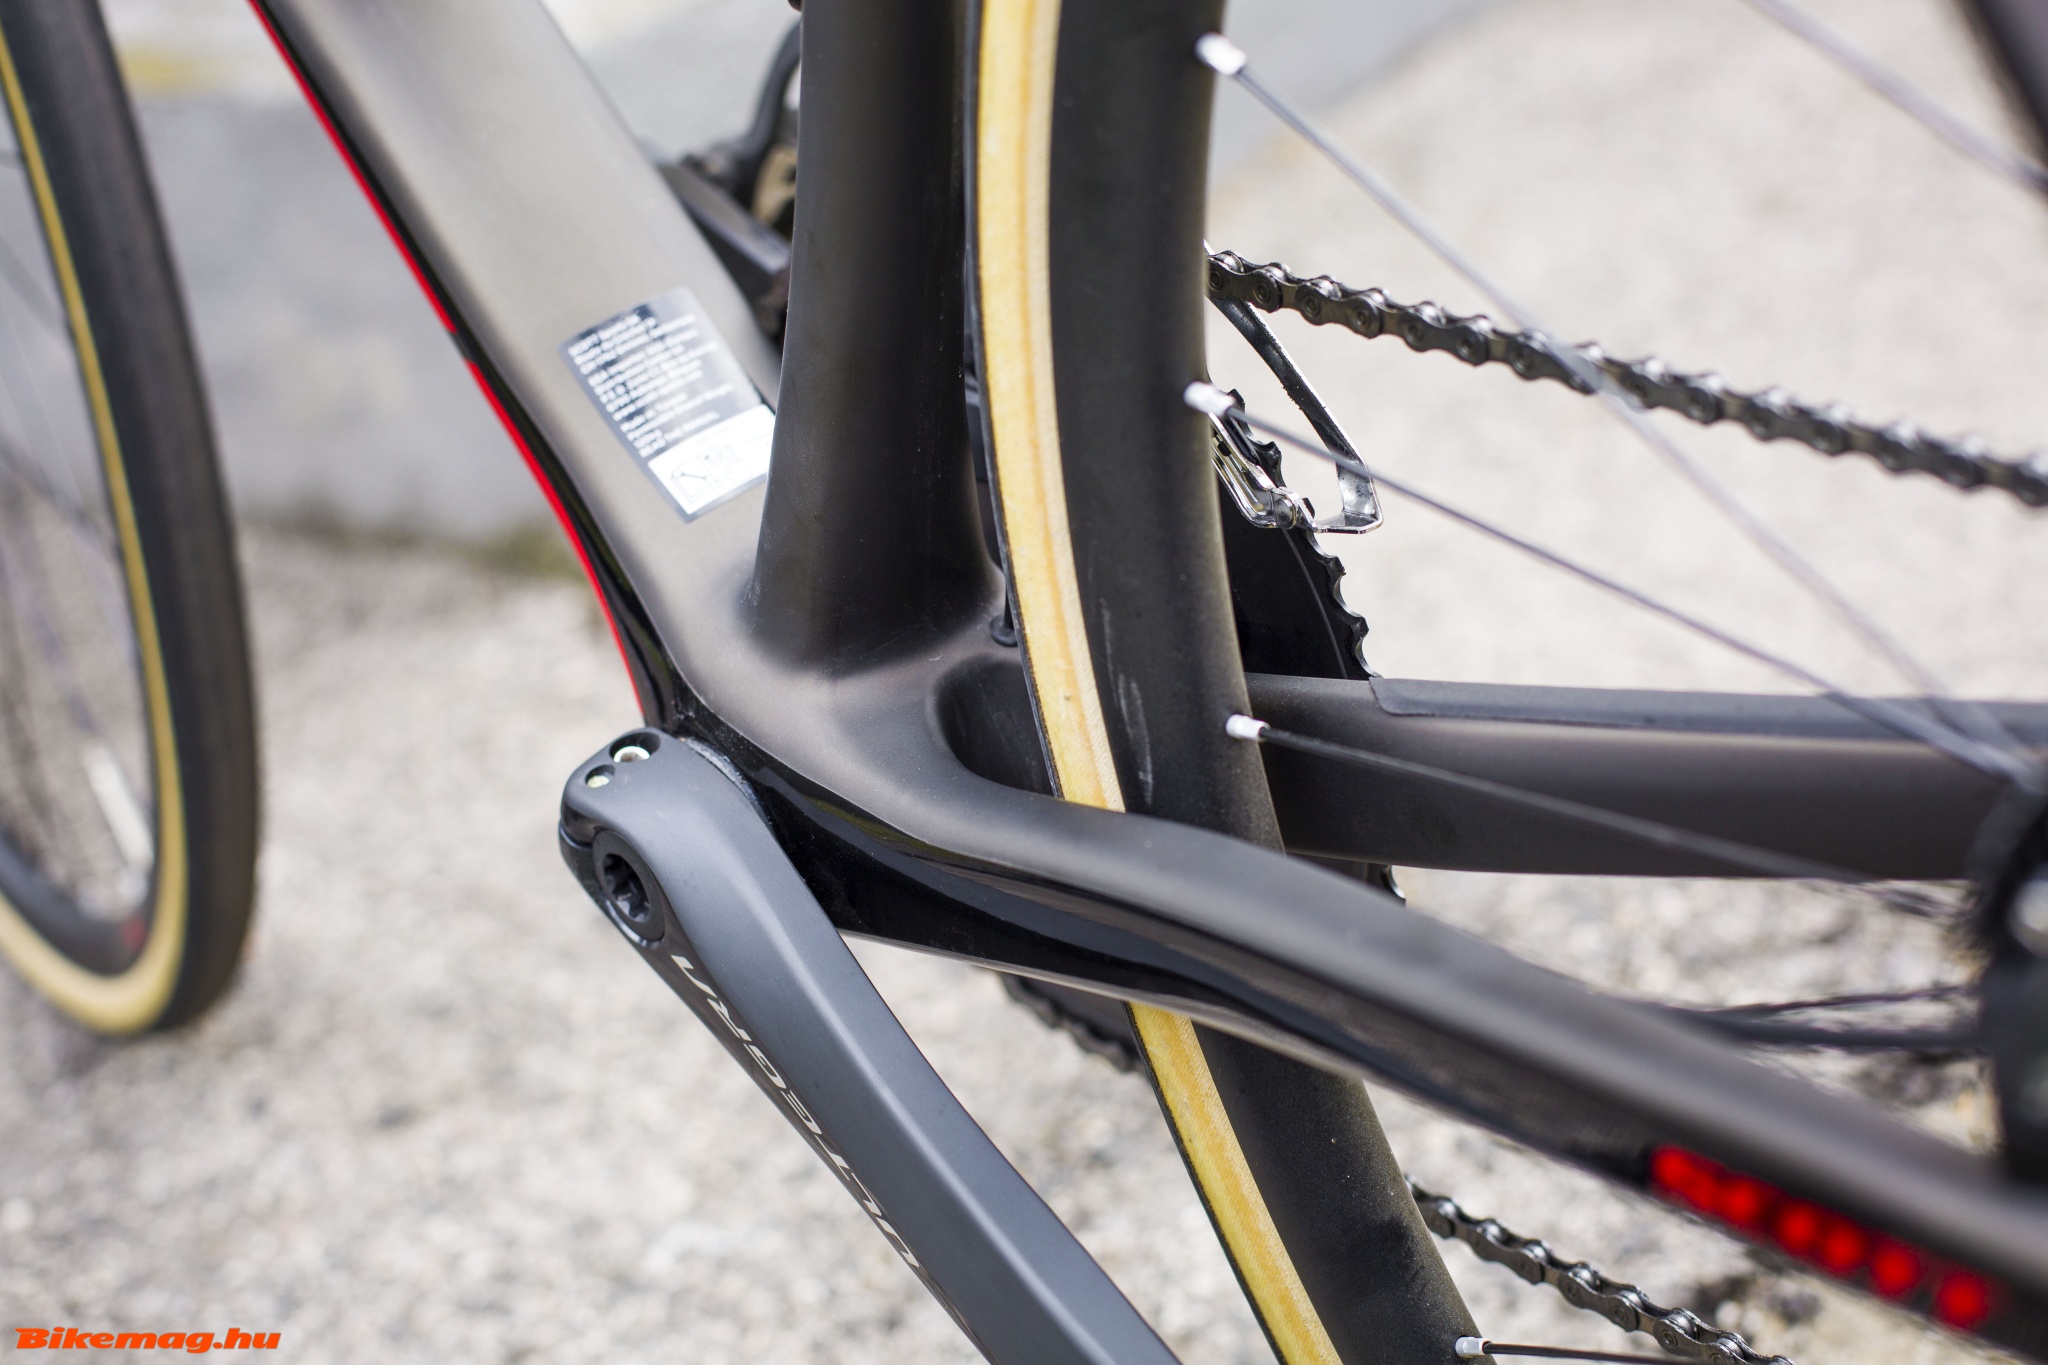
The bikes in this review are both the disc brake versions for the given Addict frame variety. As it’s expected from a road bike featured in the World Tour peloton, both deliver ample of vertical compliance at the rear end without compromising stiffness of drive efficiency. Some may be bewildered when I say the added comfort is partly down to the disc-specific frame design. In fact the lack of a rear stay bridge to attach the rim brake caliper allows the rear to flex in the desired direction, while at the front it’s the added structural support of the thru-axle which lets designers to “play” with the suppleness of the fork blades.

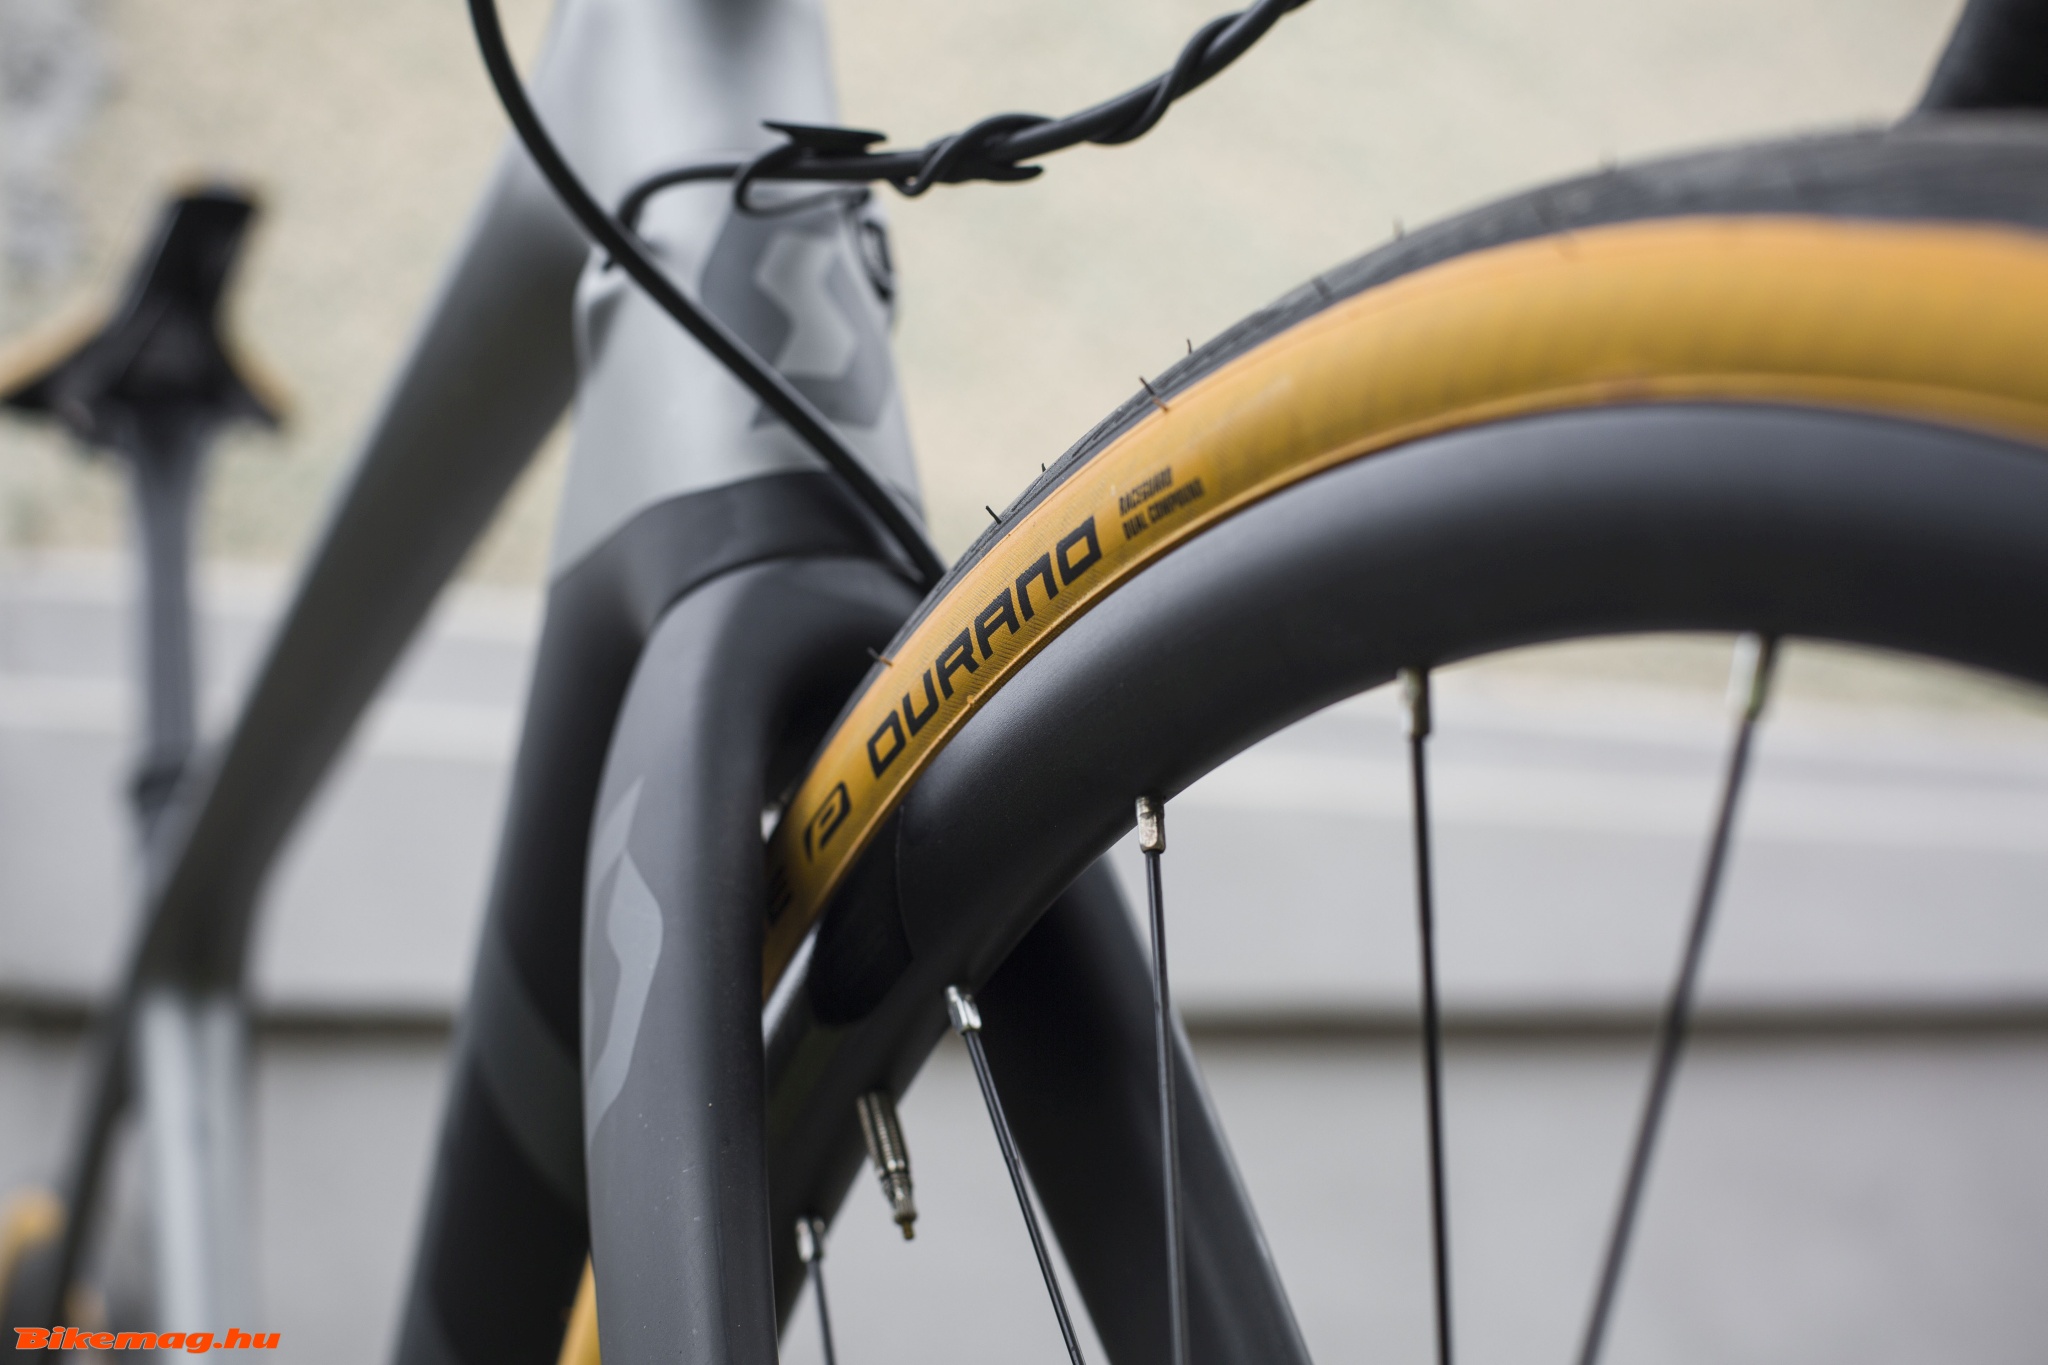
All in all, the greatest advantage of the disc brake version for most riders lies not in the outright braking performance. Rather the added benefits the design represents the main draw. Personally I care very little about the additional power of discs since I modern rim brakes provide by far plenty. In case it rains, I rather sit in a café than to barrel down on nasty descents. So I wouldn’t buy a disc brake road bike based solely on the undeniably phenomenal stopping performance. But I still prefer a disc over the rim version for the added comfort, the stiffer front end, and the fact that I’m able to run a wider tire – in the case of both of these Addicts up to 32 mm size. Rim brake road bikes are generally limited to a 28 mm tire size by design.

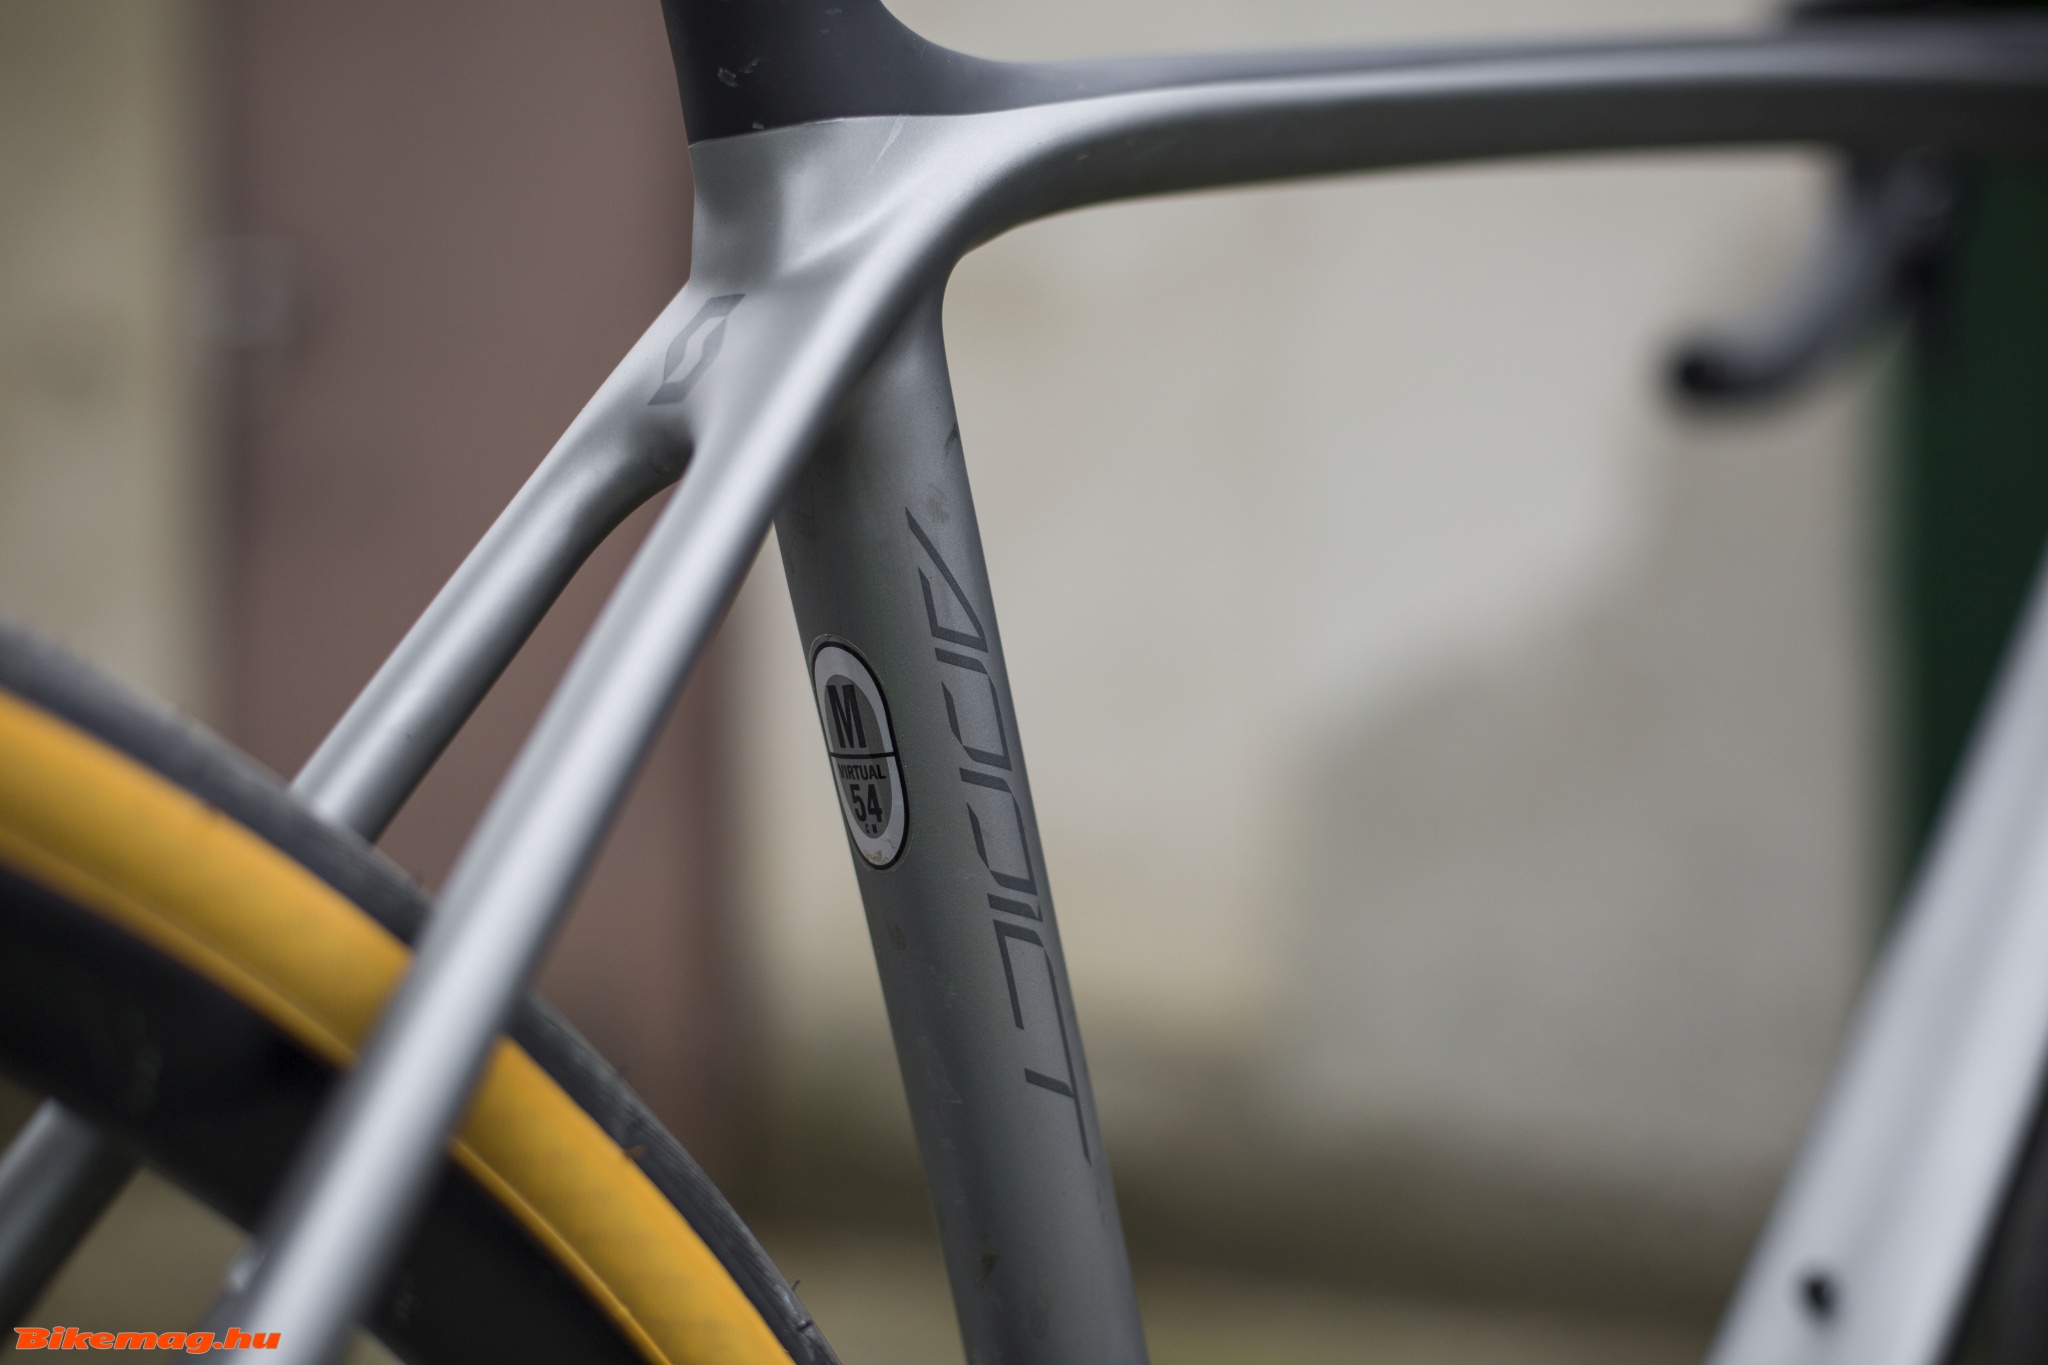
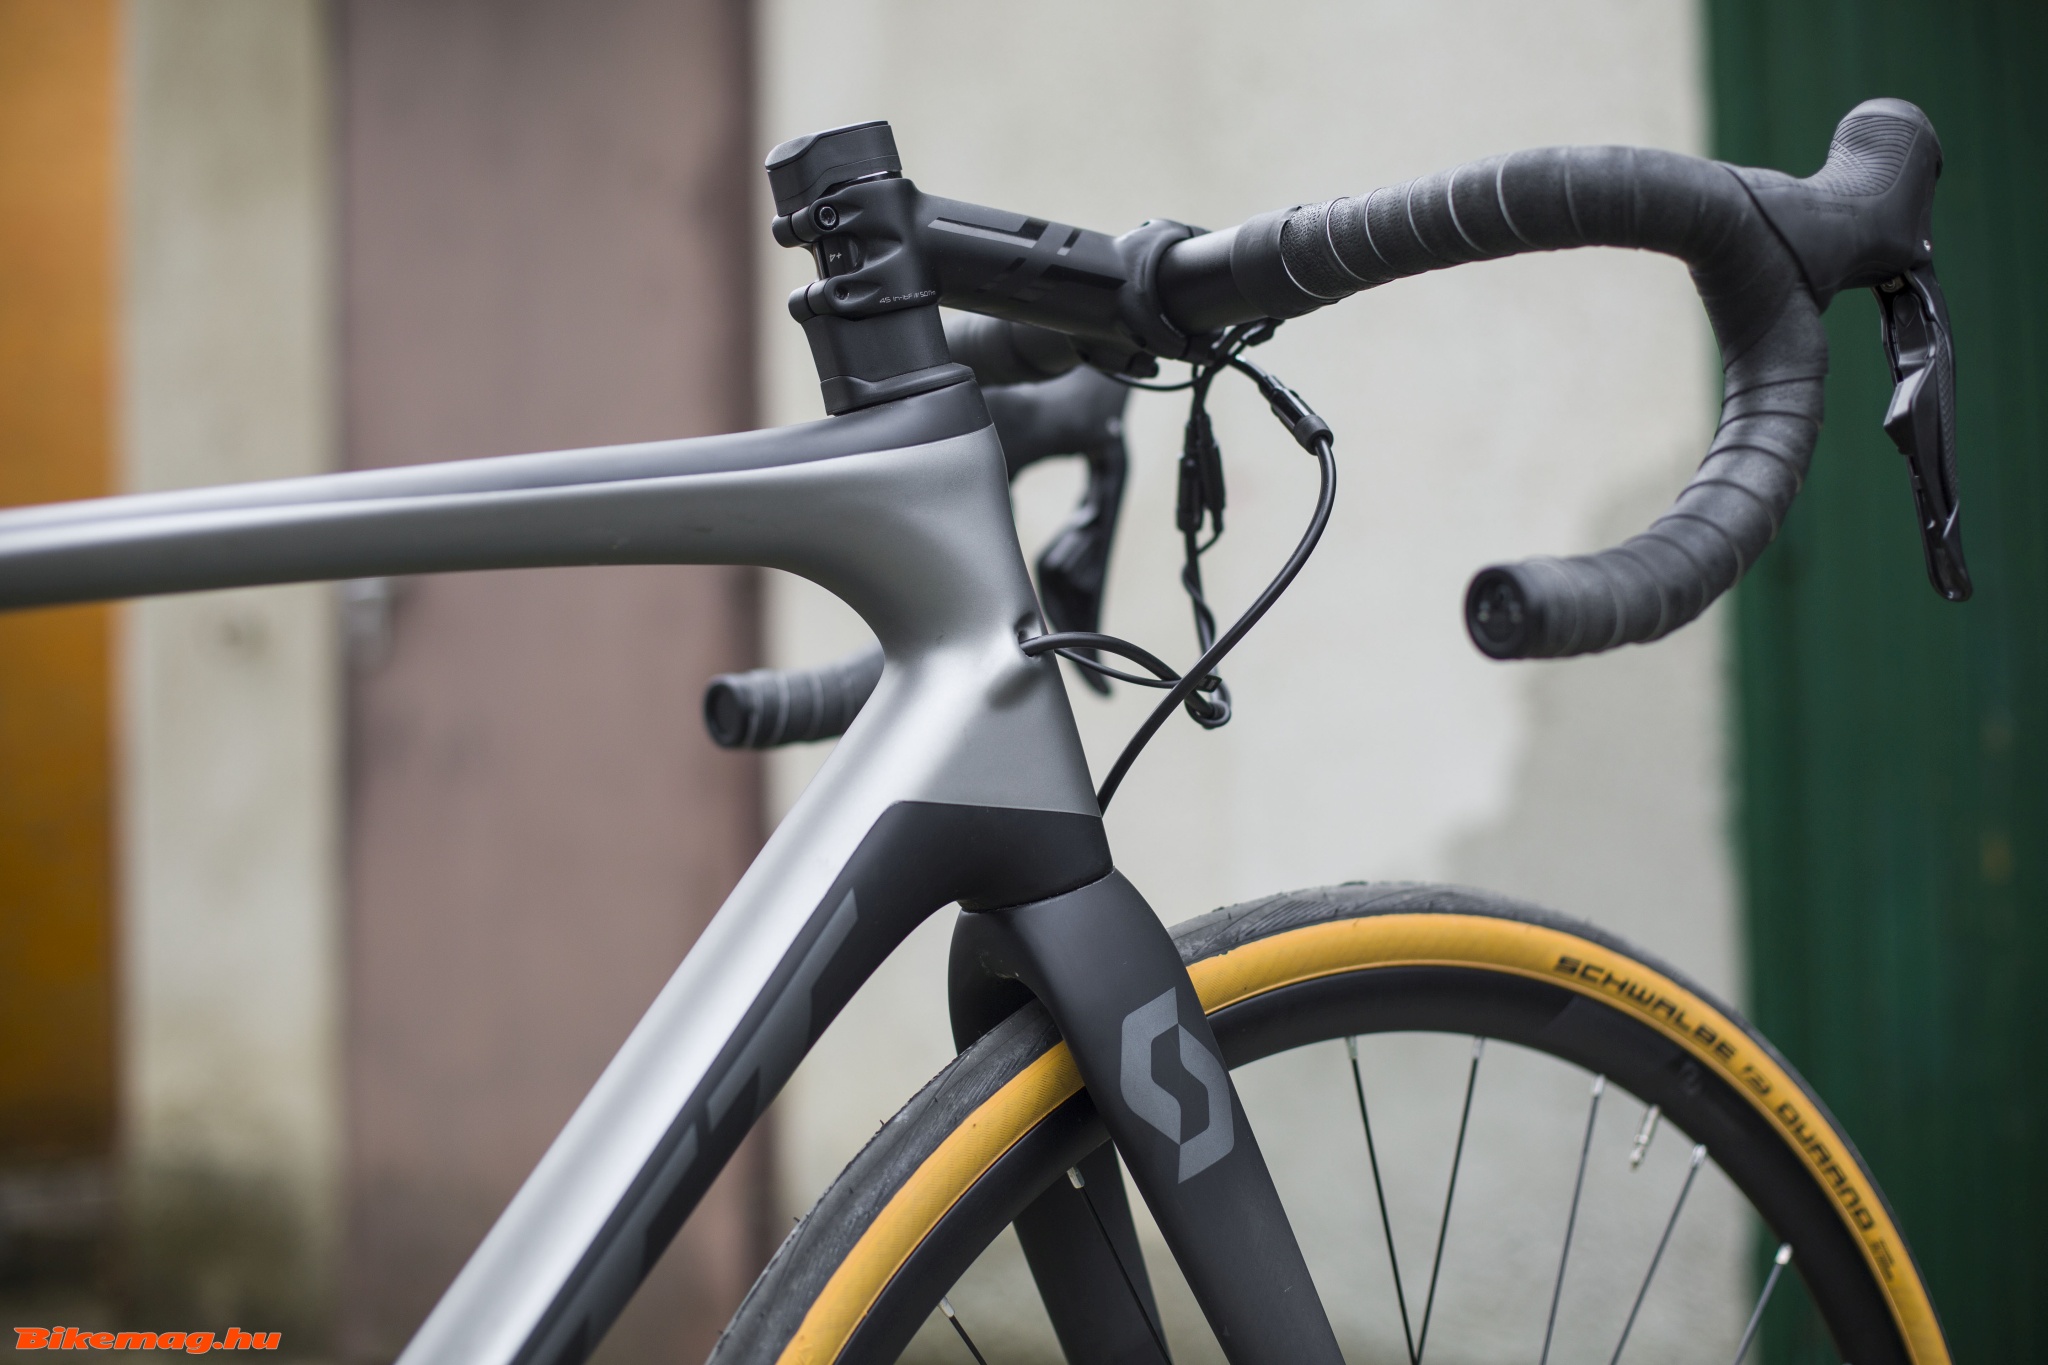
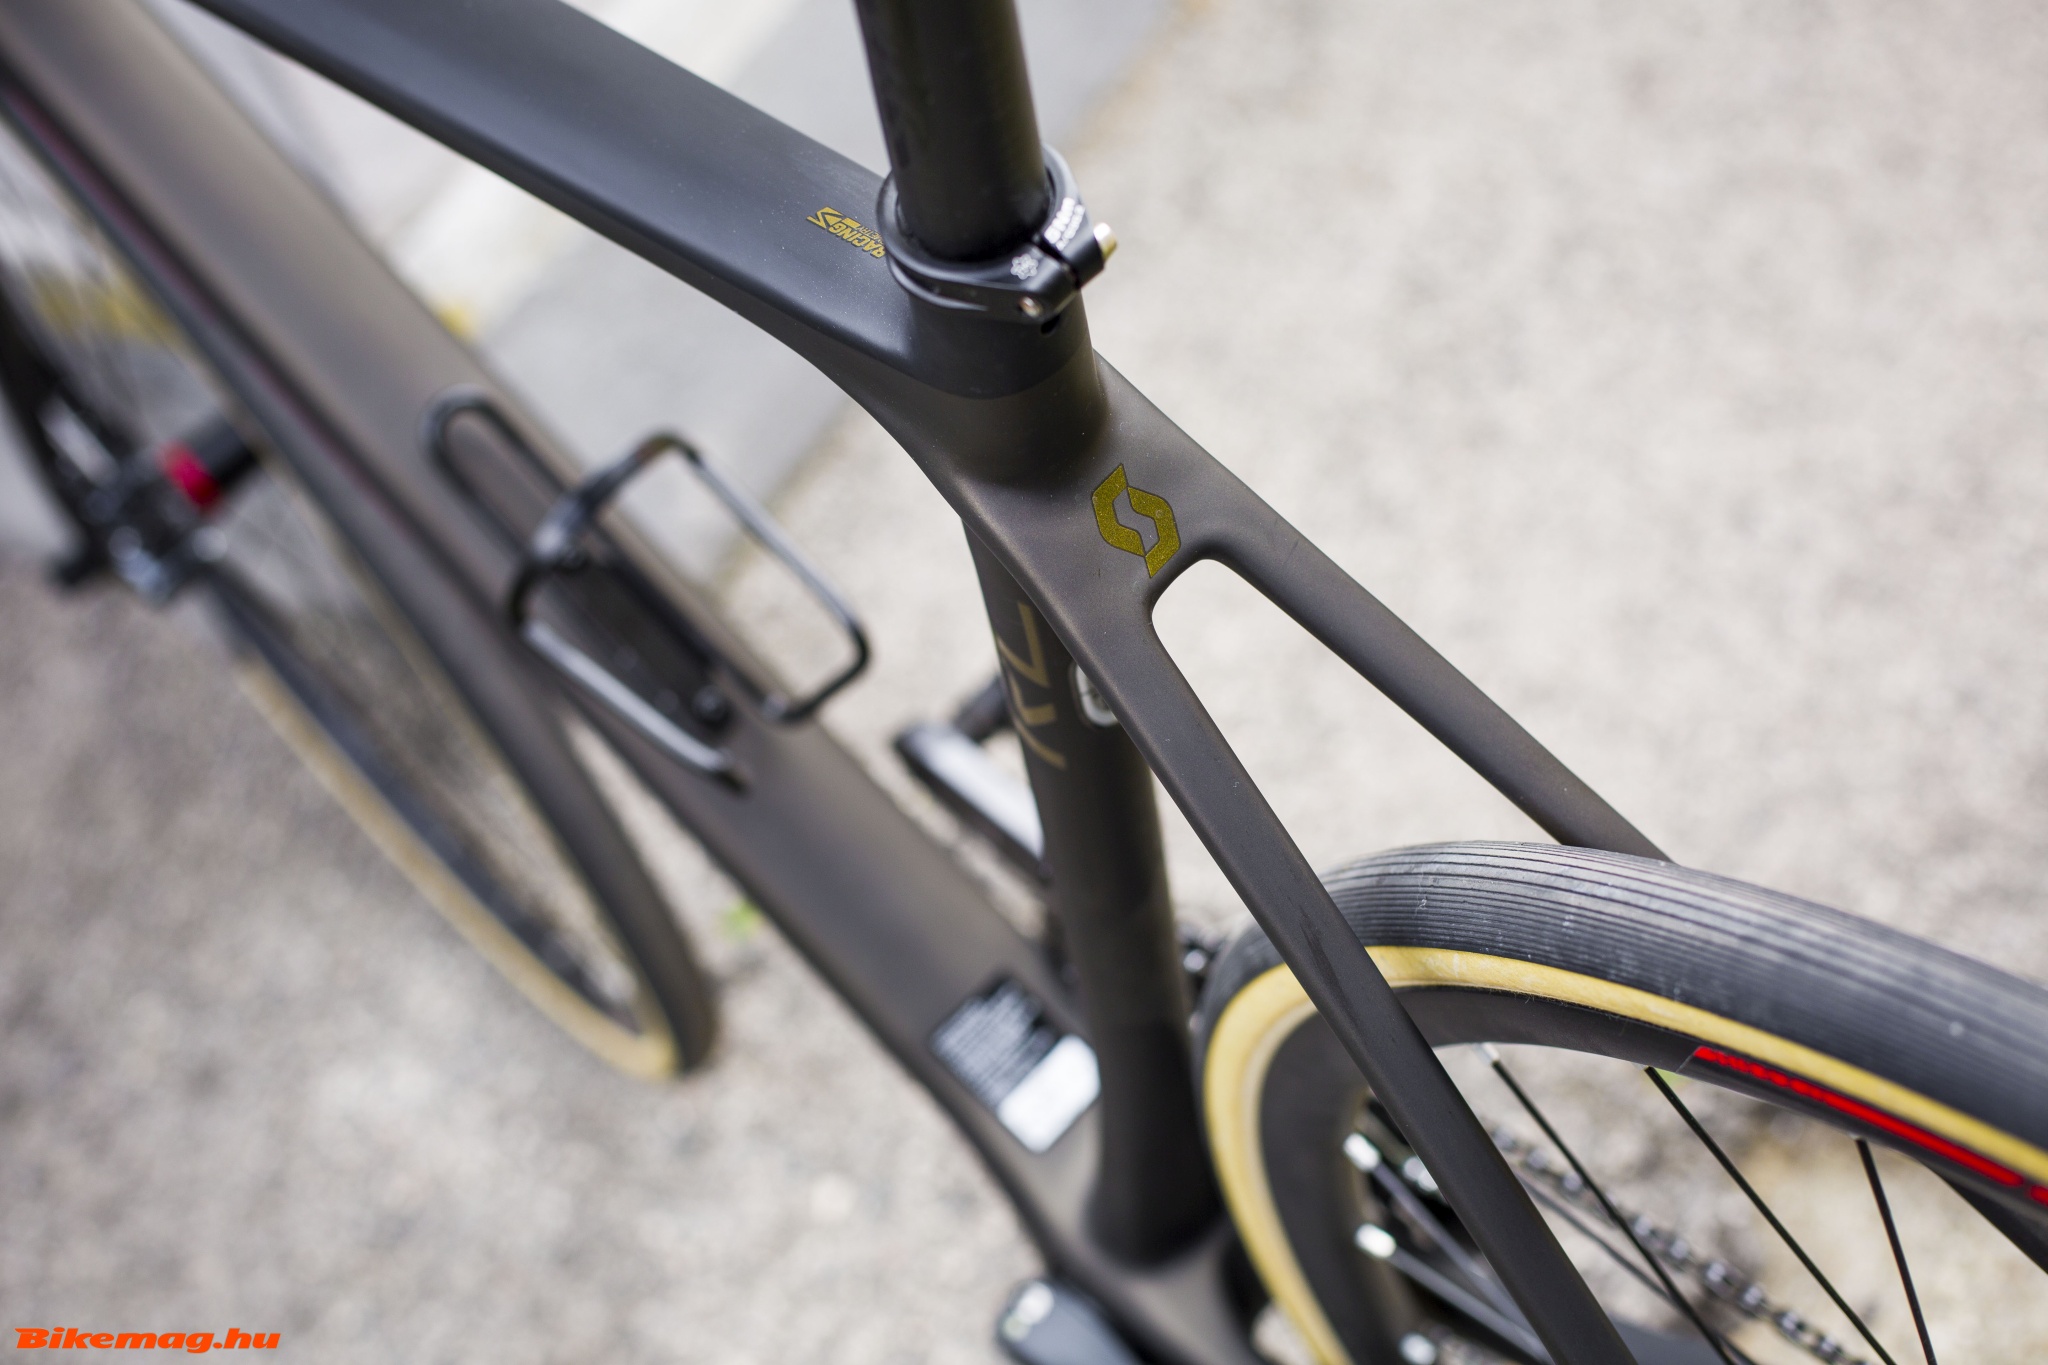
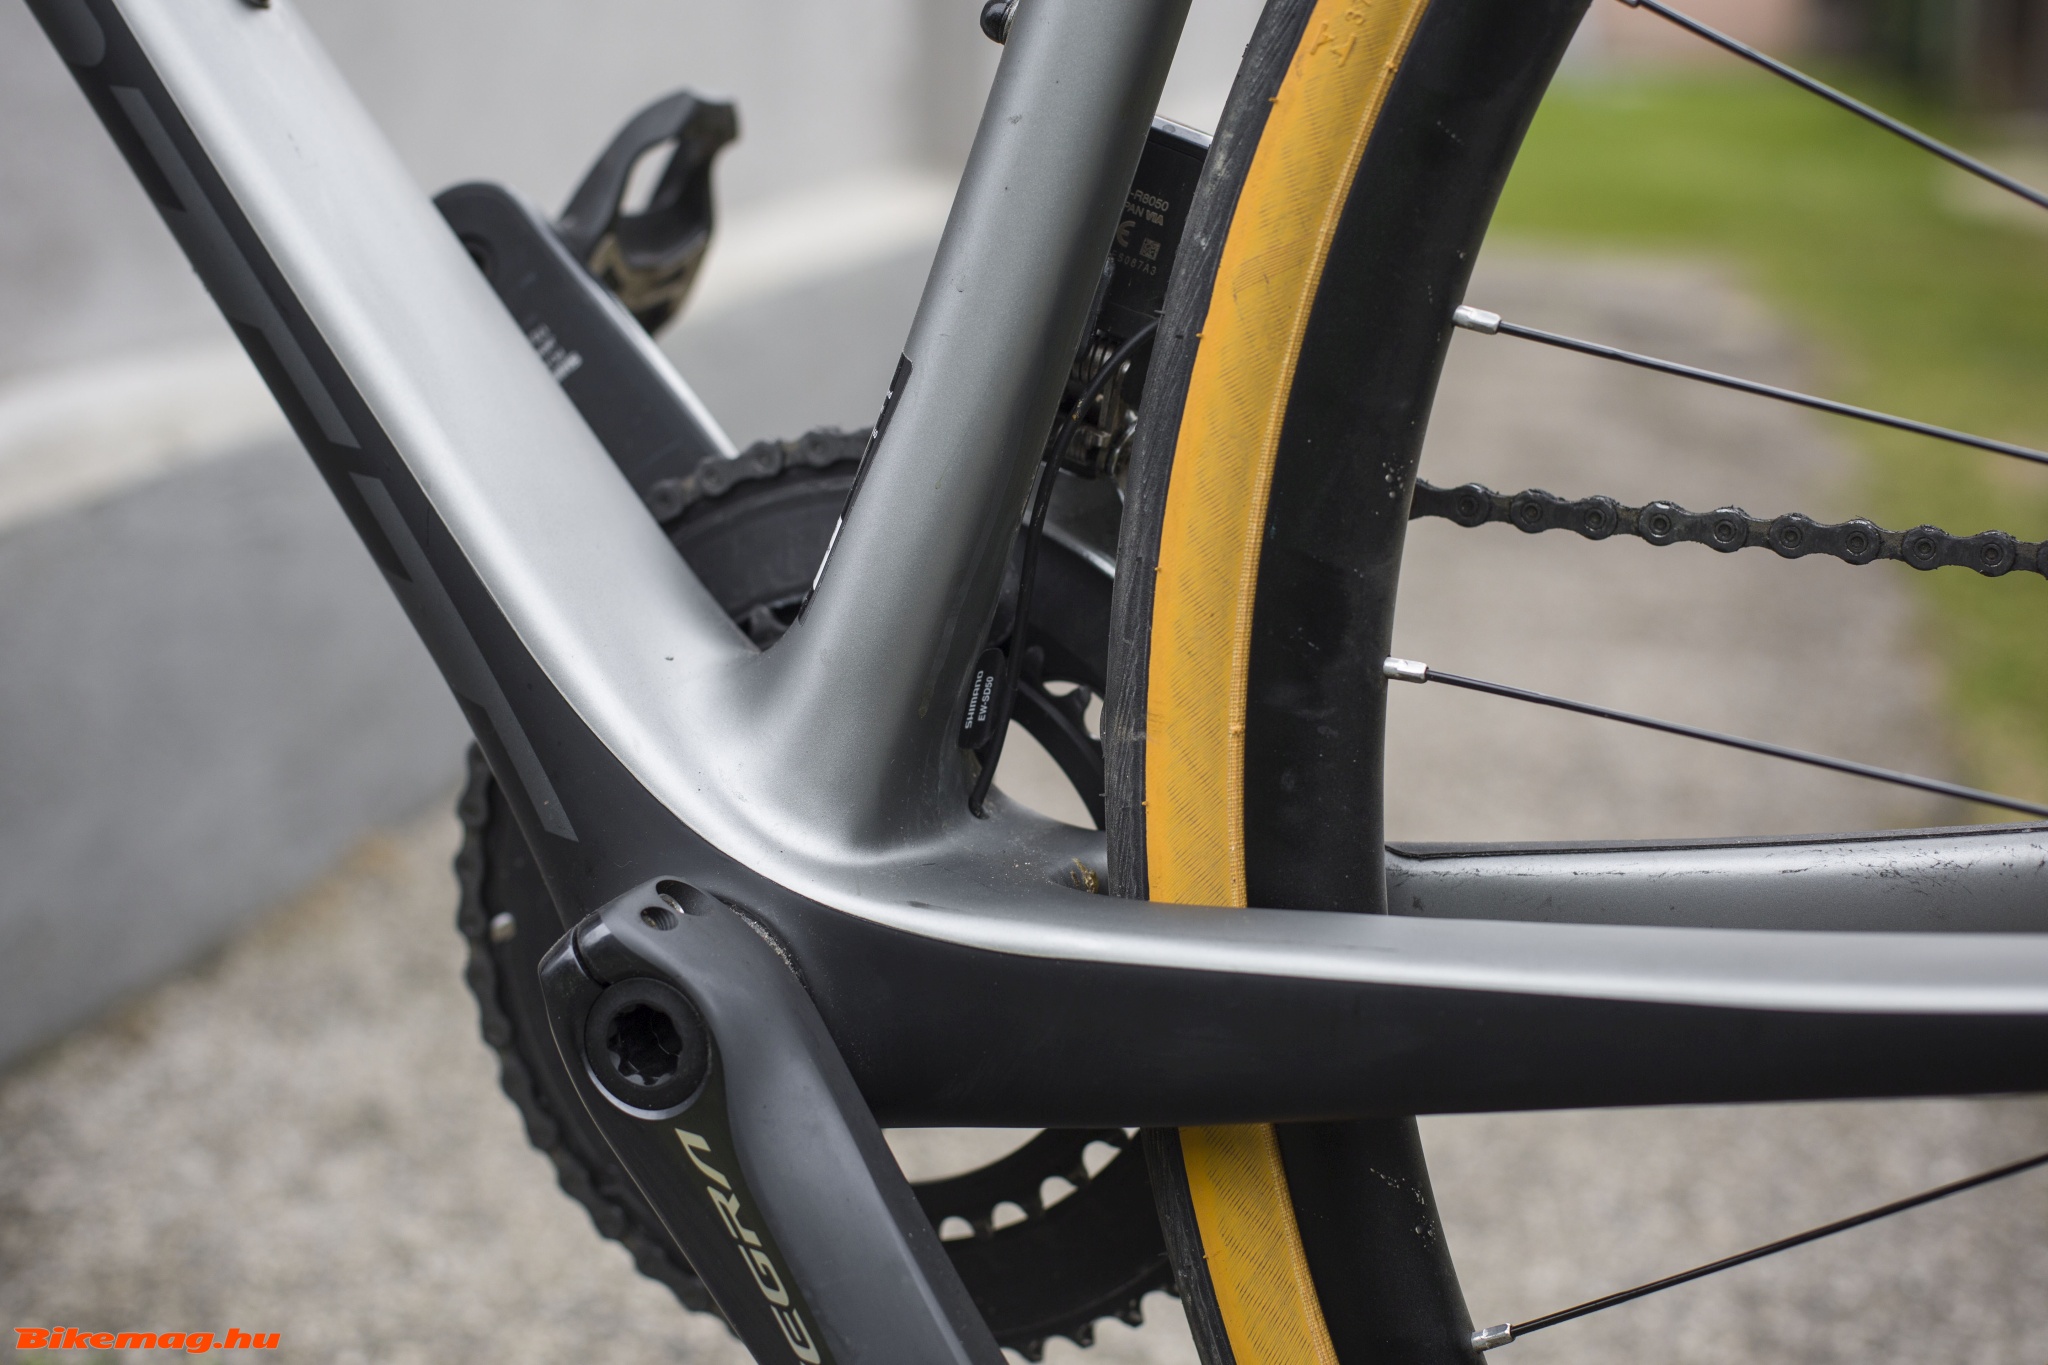
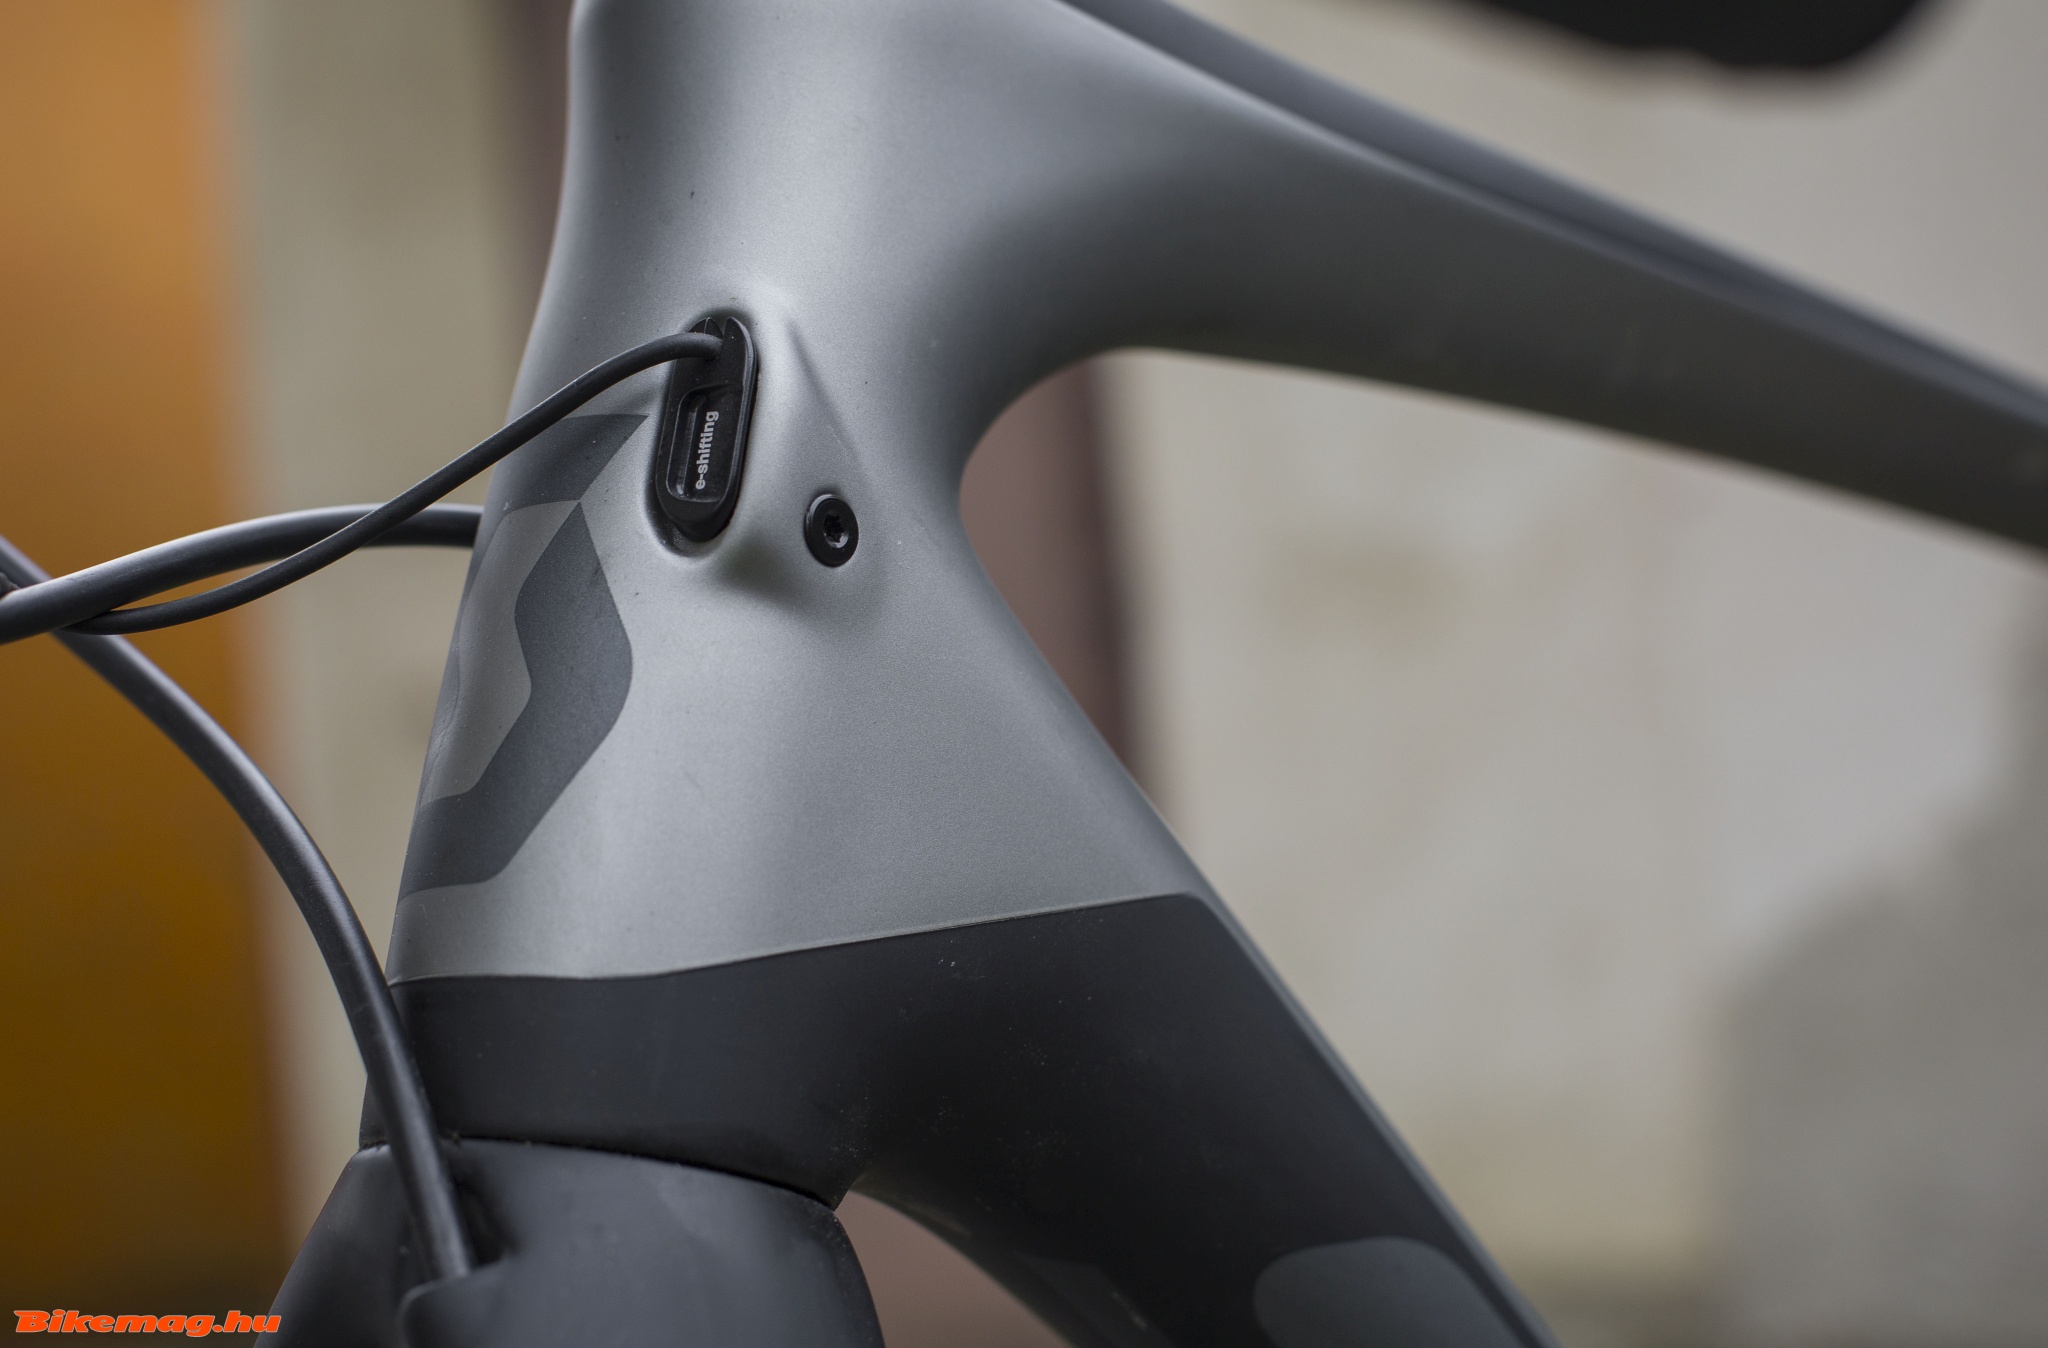
The photos accompanying this review convey that both bikes offer pleasing lines. The finish is another matter. Matt paint is the rage at the moment, but unfortunately it has a tendency to exhibit even minor scuffs and marks. Similarly every stain from a drop of energy drink to a rain drop shows up on the surface, so it’s tough to keep the frame looking top-notch. Nonetheless, the matt metallic grey finish on the Addict SE Disc is stunning, everyone who saw it was completely astonished. The pictures in the printed brochure does no justice to this paintwork: it must be seen under natural light to be appreciated. The light creates a blaze that a photo cannot capture.

More or less the same is true for the brownish paint job of the RC 20 Disc. Not many would point at the catalogue photo saying “Yes, this is a fantastic finish!” On the other hand – once seen in flesh – it reveals a very pleasing brownish-grey hue, especially under direct sunlight. It’s truly a unique color tone that I for one couldn’t stop staring. Some remarked that the red graphics complementing the subdued greyish finish were a little overdone, and a black bar tape might have been a better match. Nevertheless the RC 20 is a generally pleasing design, which works well with the classic lines of the Addict frame.

I have done several hundred kilometers on both these bikes, and all I can say is that each one delivers what it promises. The SE has a much taller front end due to the longer head tube, raising the upper body with lesser bend over the handlebar. And we’re not talking about minute differences: for size M and L the head tube is full 25 mm longer! I would consider the front end of the SE to be overly tall, even for training rides, not alone full on racing. It’s perfectly suited to those who’re new to road riding, enjoy the swiftness offered by the narrow tires, the drop handlebars and the high-tech frame, but lack the flexibility to move into an aerodynamic body position. Thus making it ideal for club rides, light touring or someone just enjoying road cycling on a very fine piece of kit.

The RC’s front end is a striking contrast with its short, sporty 140 mm head tube (for size M). It was designed with pure racing in mind, placing the rider in an aerodynamic tuck, permitting full use of all the muscles. It’s for the experienced road rider looking for the outmost performance from the bike. Otherwise both Addict versions behave the same way: the handling is not too agile, but far from slow, spot on in the “goldilocks” zone for most road riding conditions.

It’s safe to say that both bikes offer something different for the particular rider, while keeping the basic concept the same – offering very a very high level of performance for each task on hand. No matter which model variant you choose, the Addict provides a harmonic ride experience, textbook handling and ideal stiffness to comfort ratio. All in all both are a joy to ride for the cyclist it was designed for. My “flavor” of Addict is clearly the RC, and I experiences no downsides to this bike at all. I have ridden the Scott Foil on many occasions, and compared to the present flagship model the Addict is plenty stiff, efficient, and – last but not least – it offers much better comfort on rougher road surfaces. Obviously the wider tires also play a role in the added suppleness, which could be run as low as 5-6 Bar without the fear of punctures. I actually went for a narrower 28 mm Vittoria Corsa at the test camp in Mallorca and enjoyed great comfort paired with excellent grip descending the island’s renowned hairpin roads.

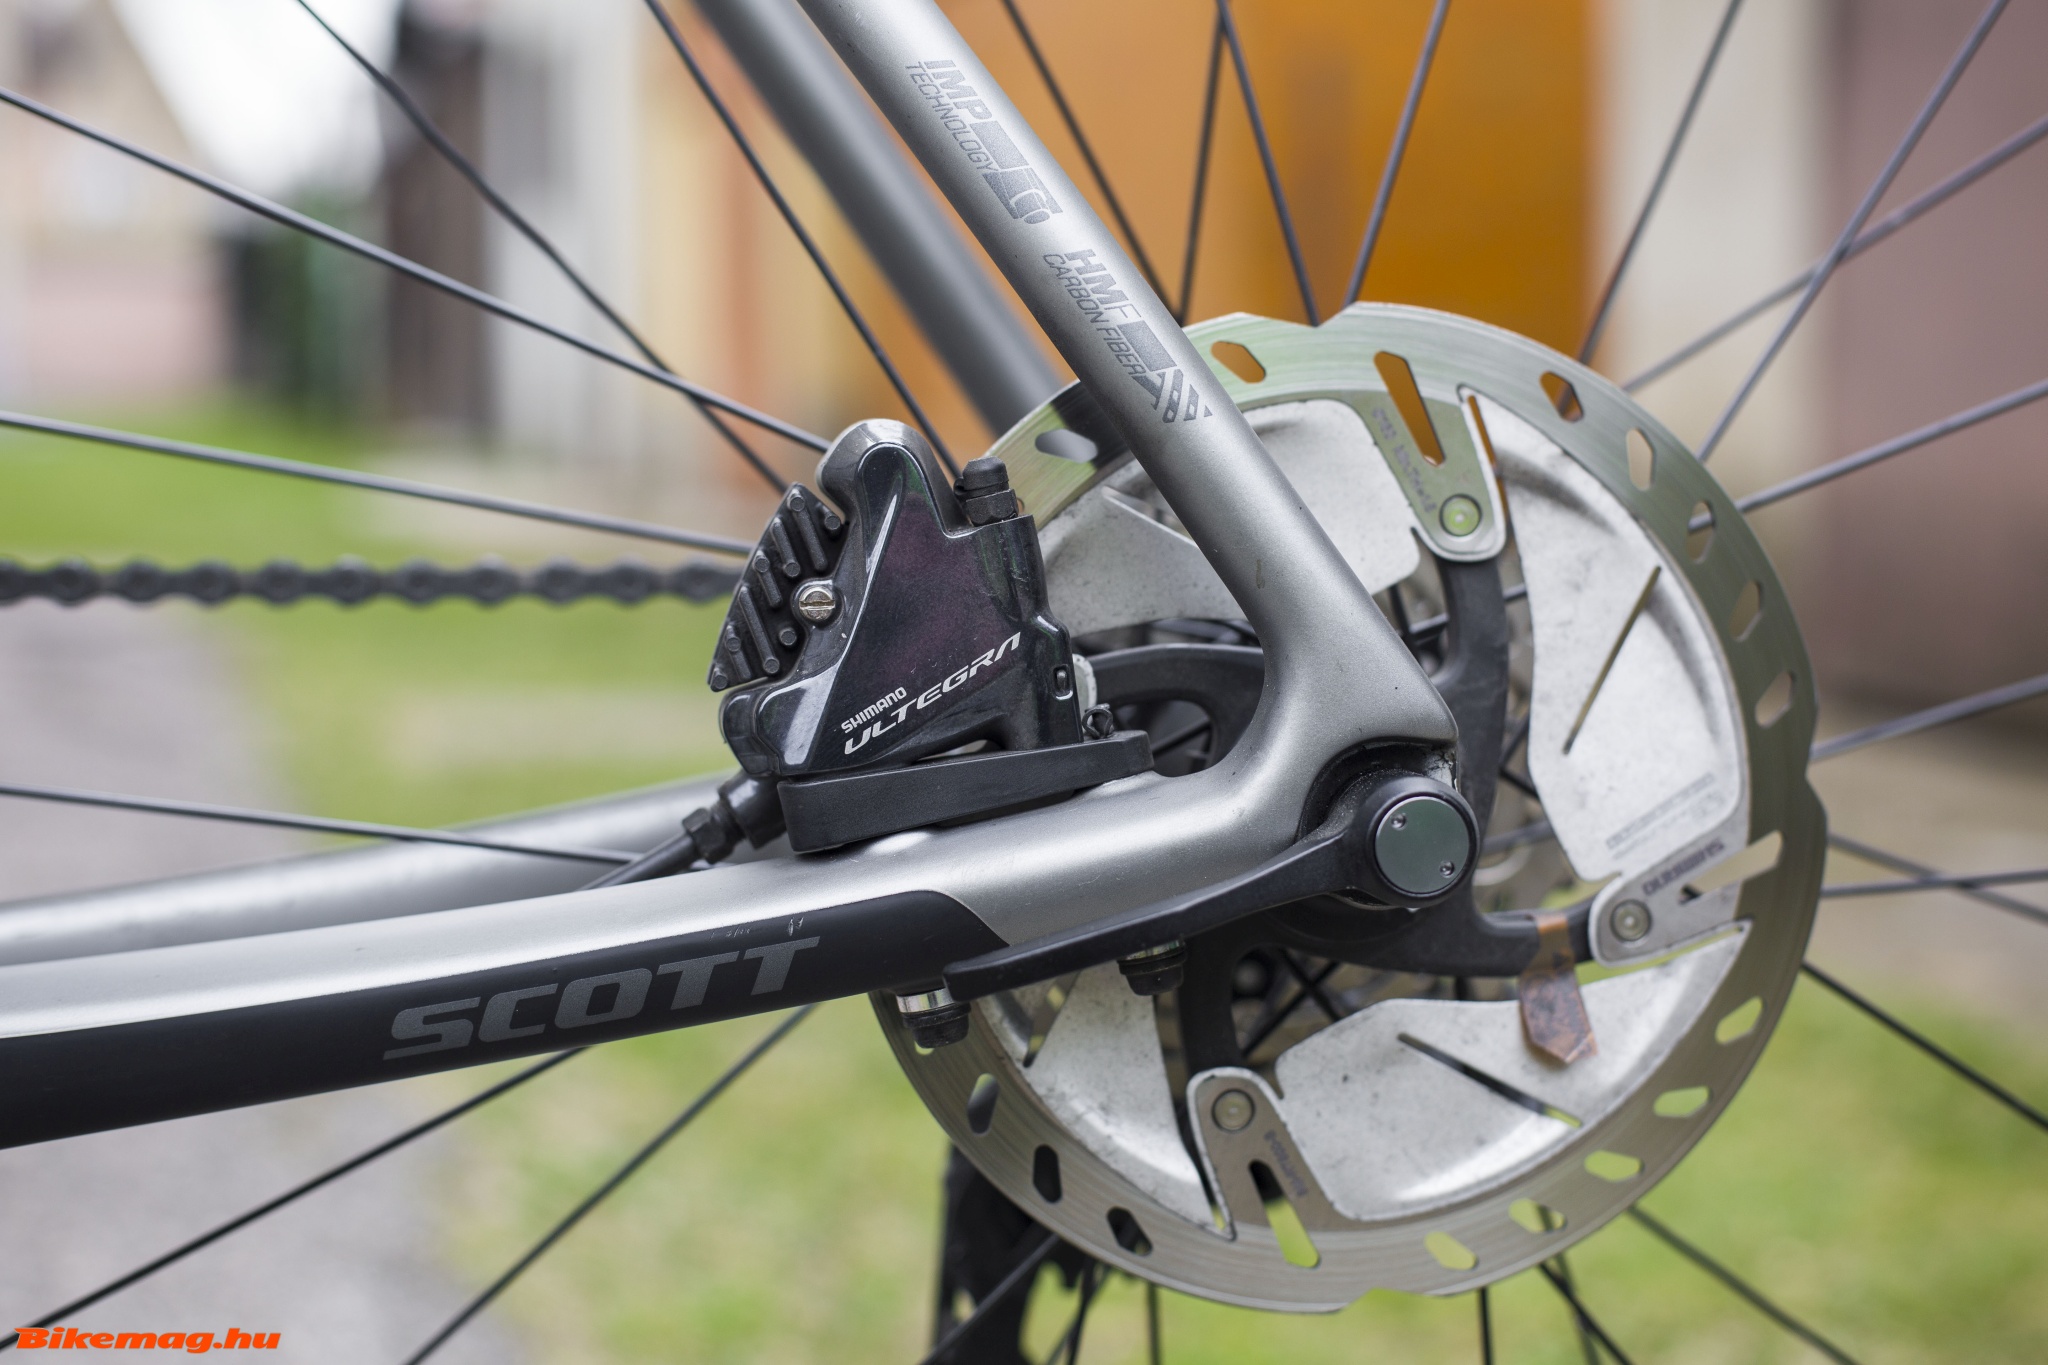
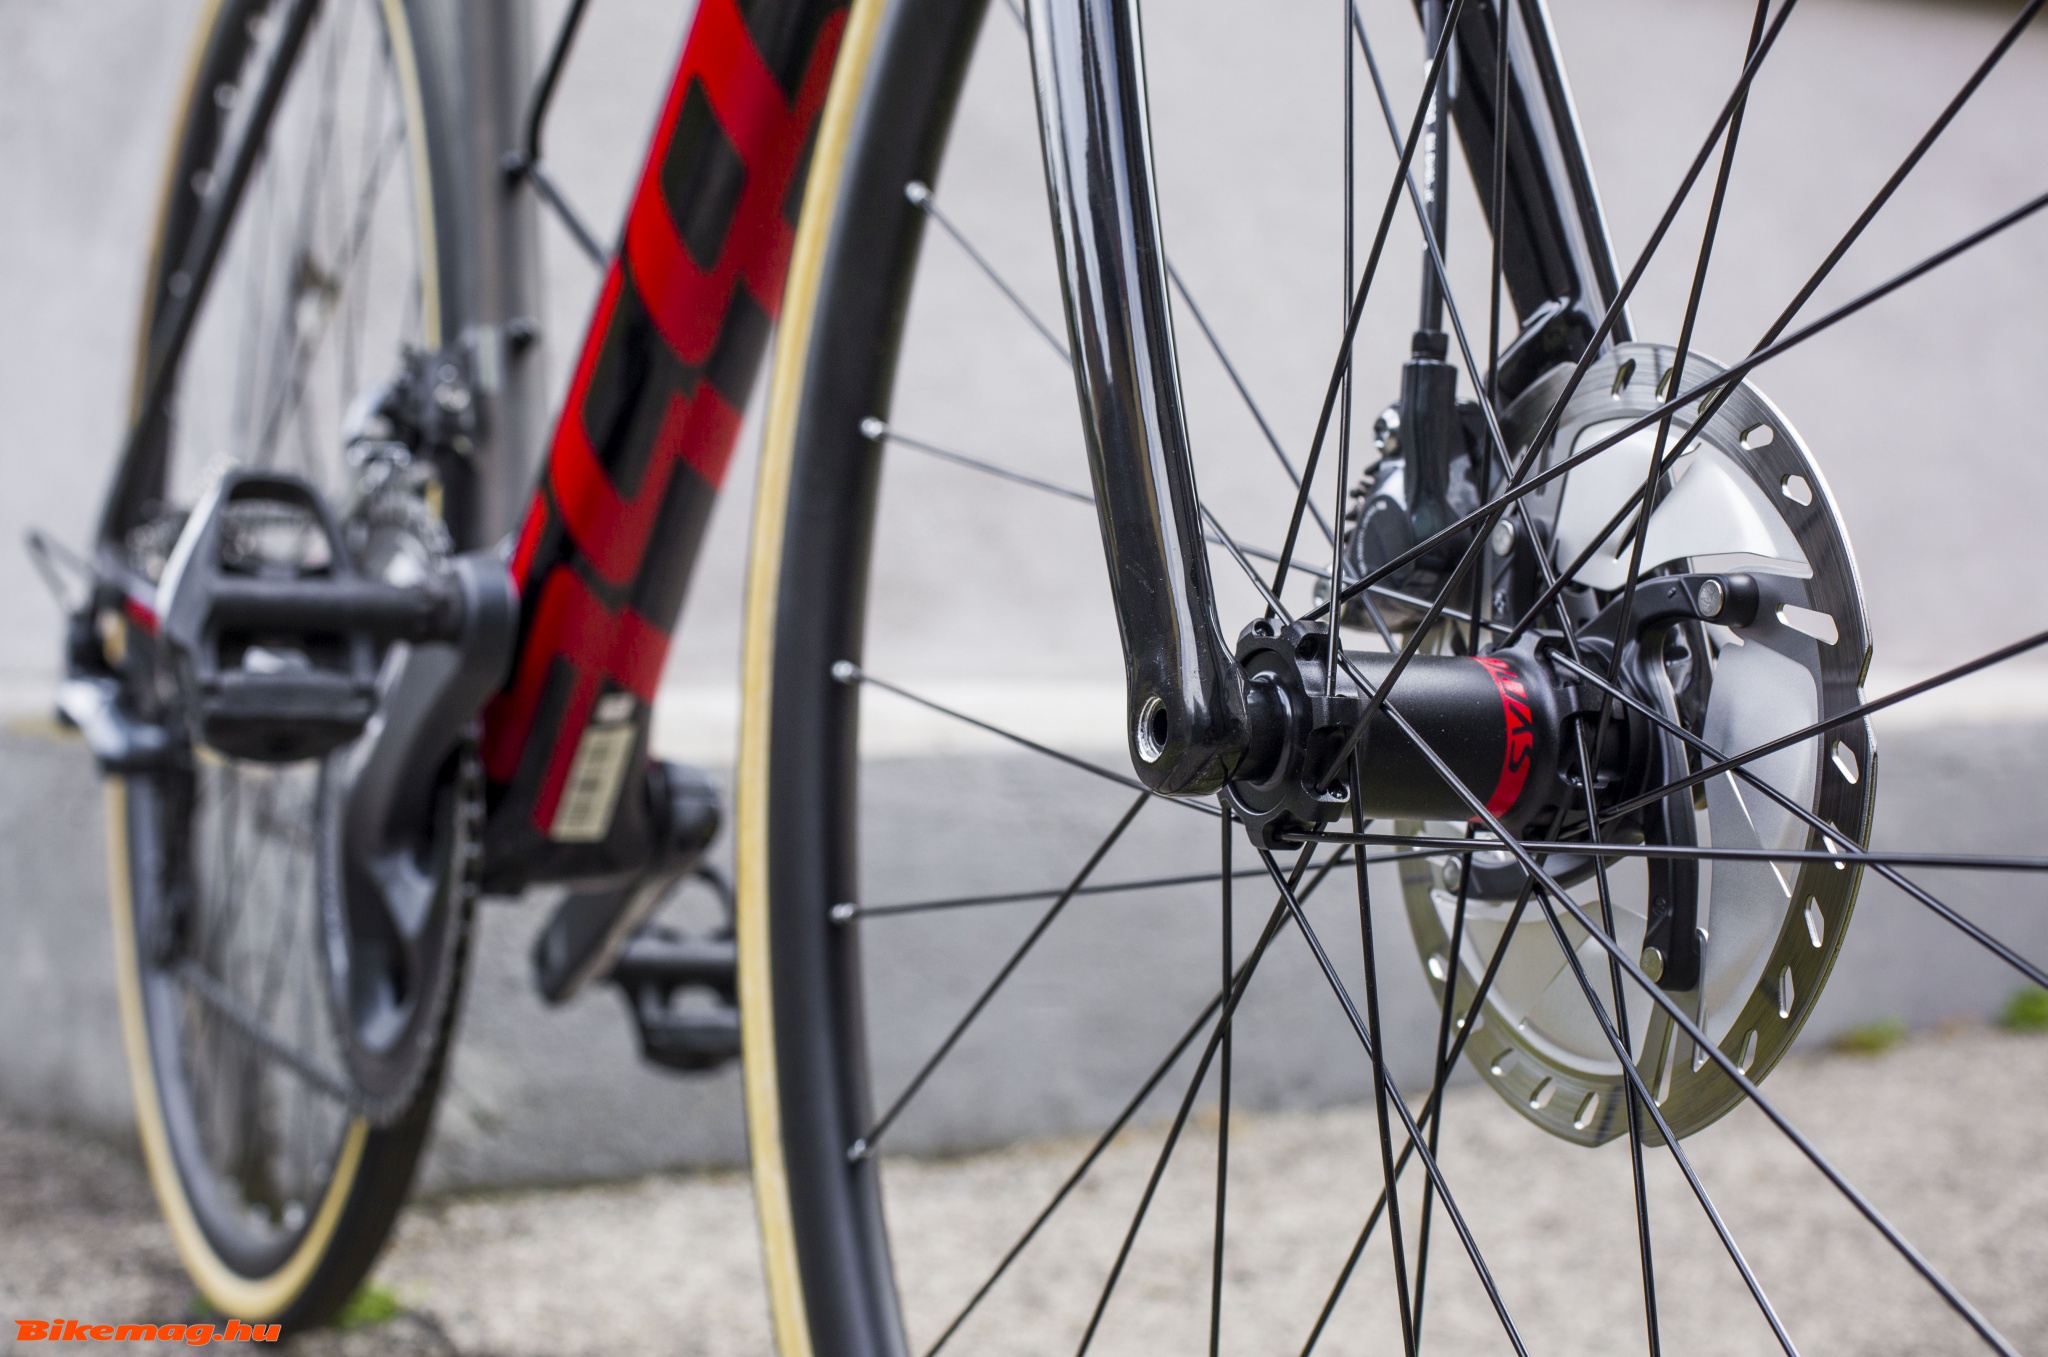
These roads also proved to be ideal to test the disc brake systems on the bikes. Both feature the Shimano Ultegra units with 160 mm discs, which offer adequate cooling even on steep – over 10% gradient – roads with constant switchbacks. Heavier riders – especially those who tend to drag the brakes while descending – may experience some overheating under these conditions, and have to compensate for the fading effect, but most road cyclist will be totally fine using these excellent stoppers. Having timed my descents both this year in the previous training camp, I can attest that using the Ultegra hydraulic discs cut significant seconds off my previous record on board a top-notch bike with rim brakes!

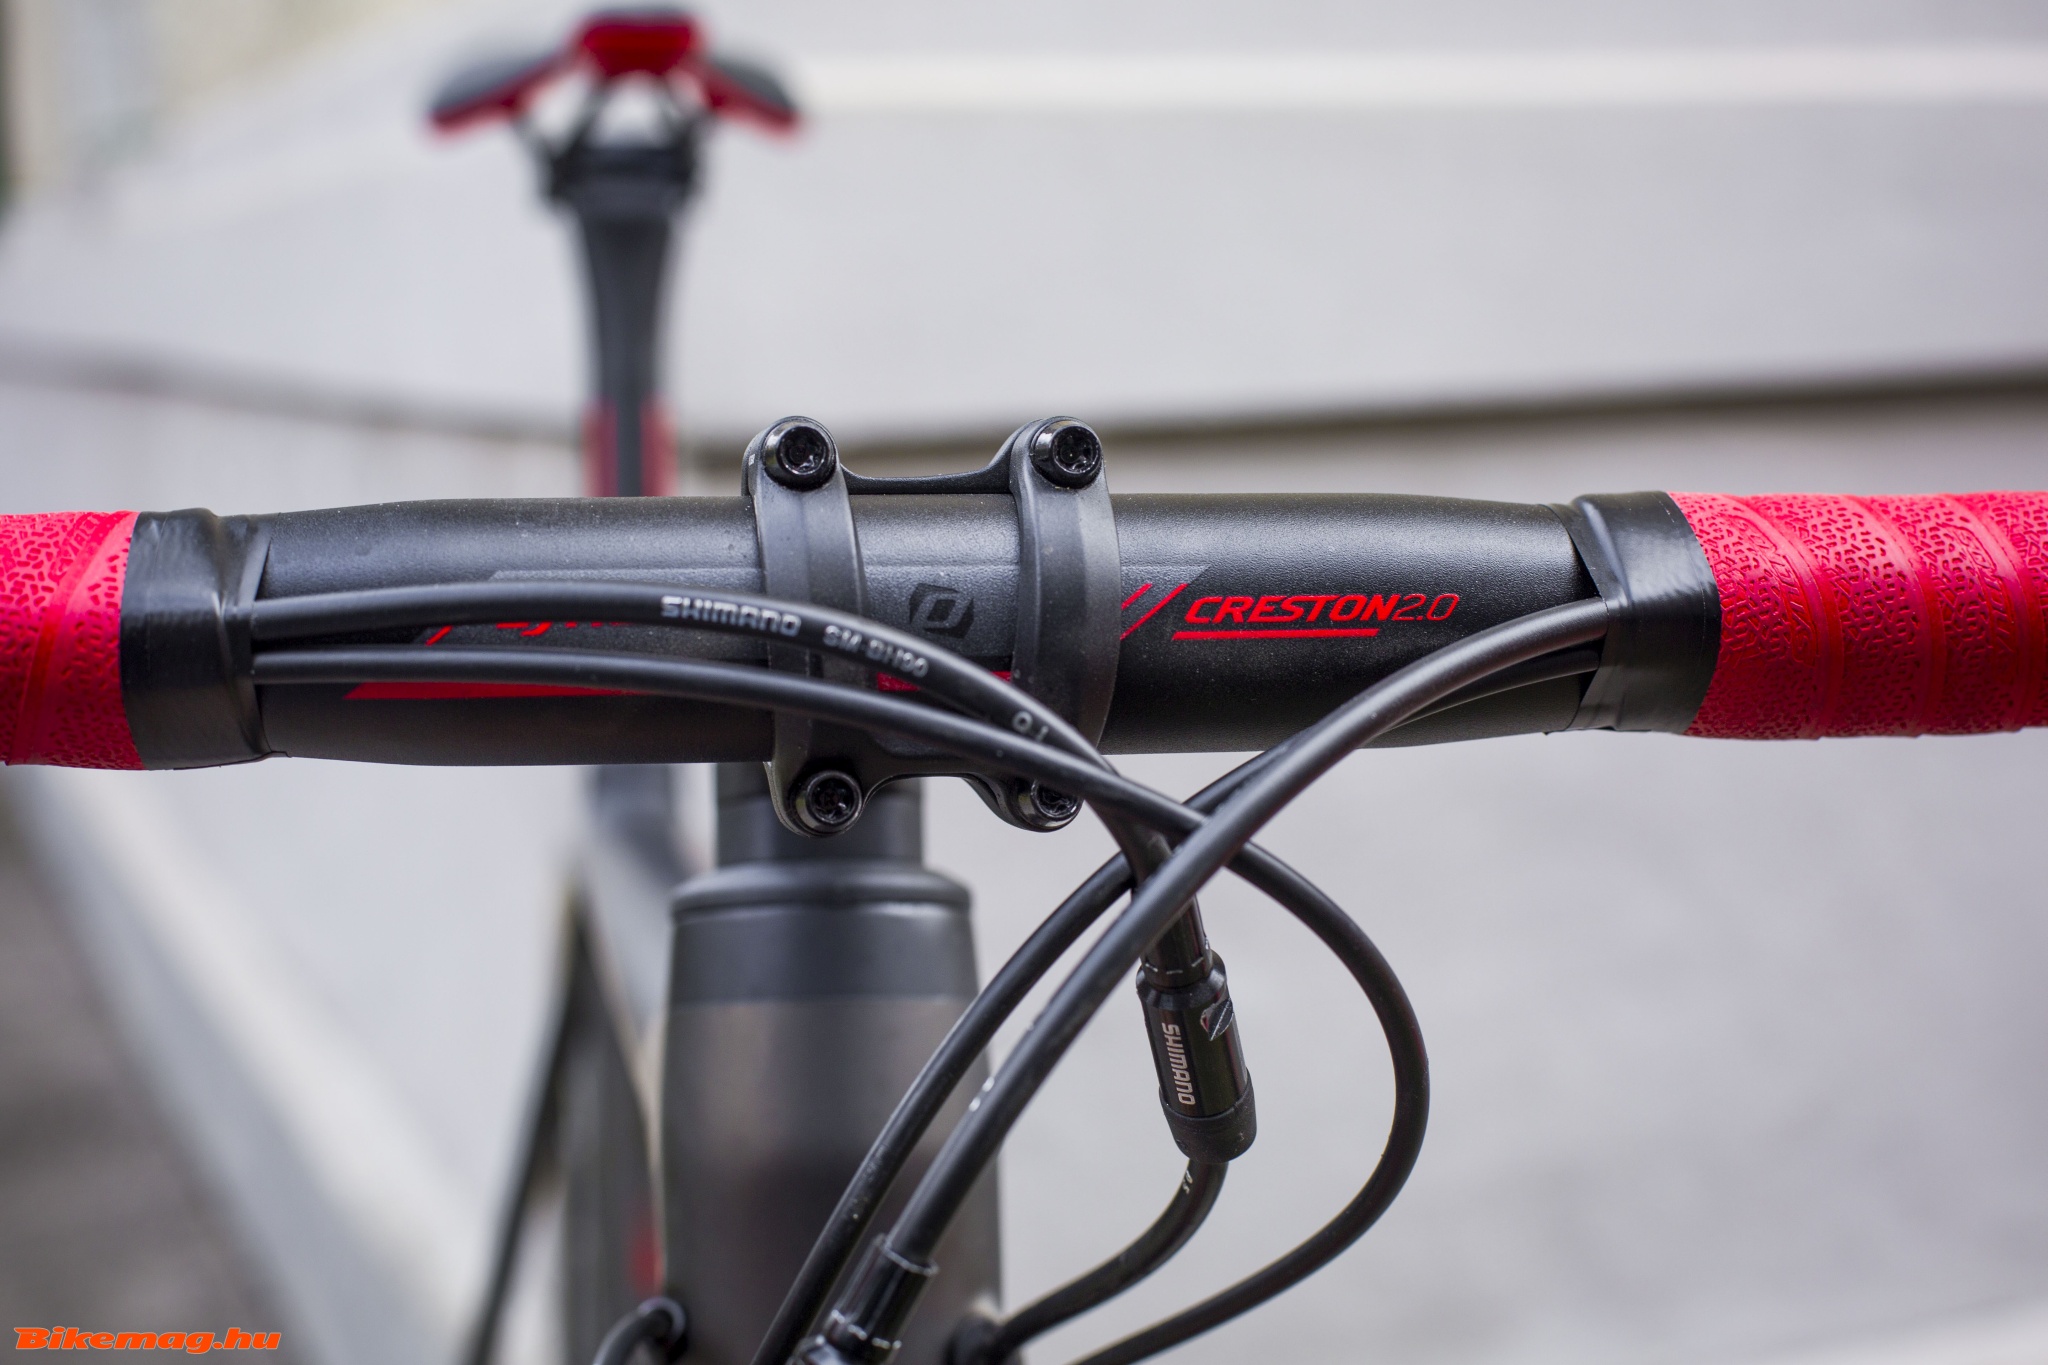
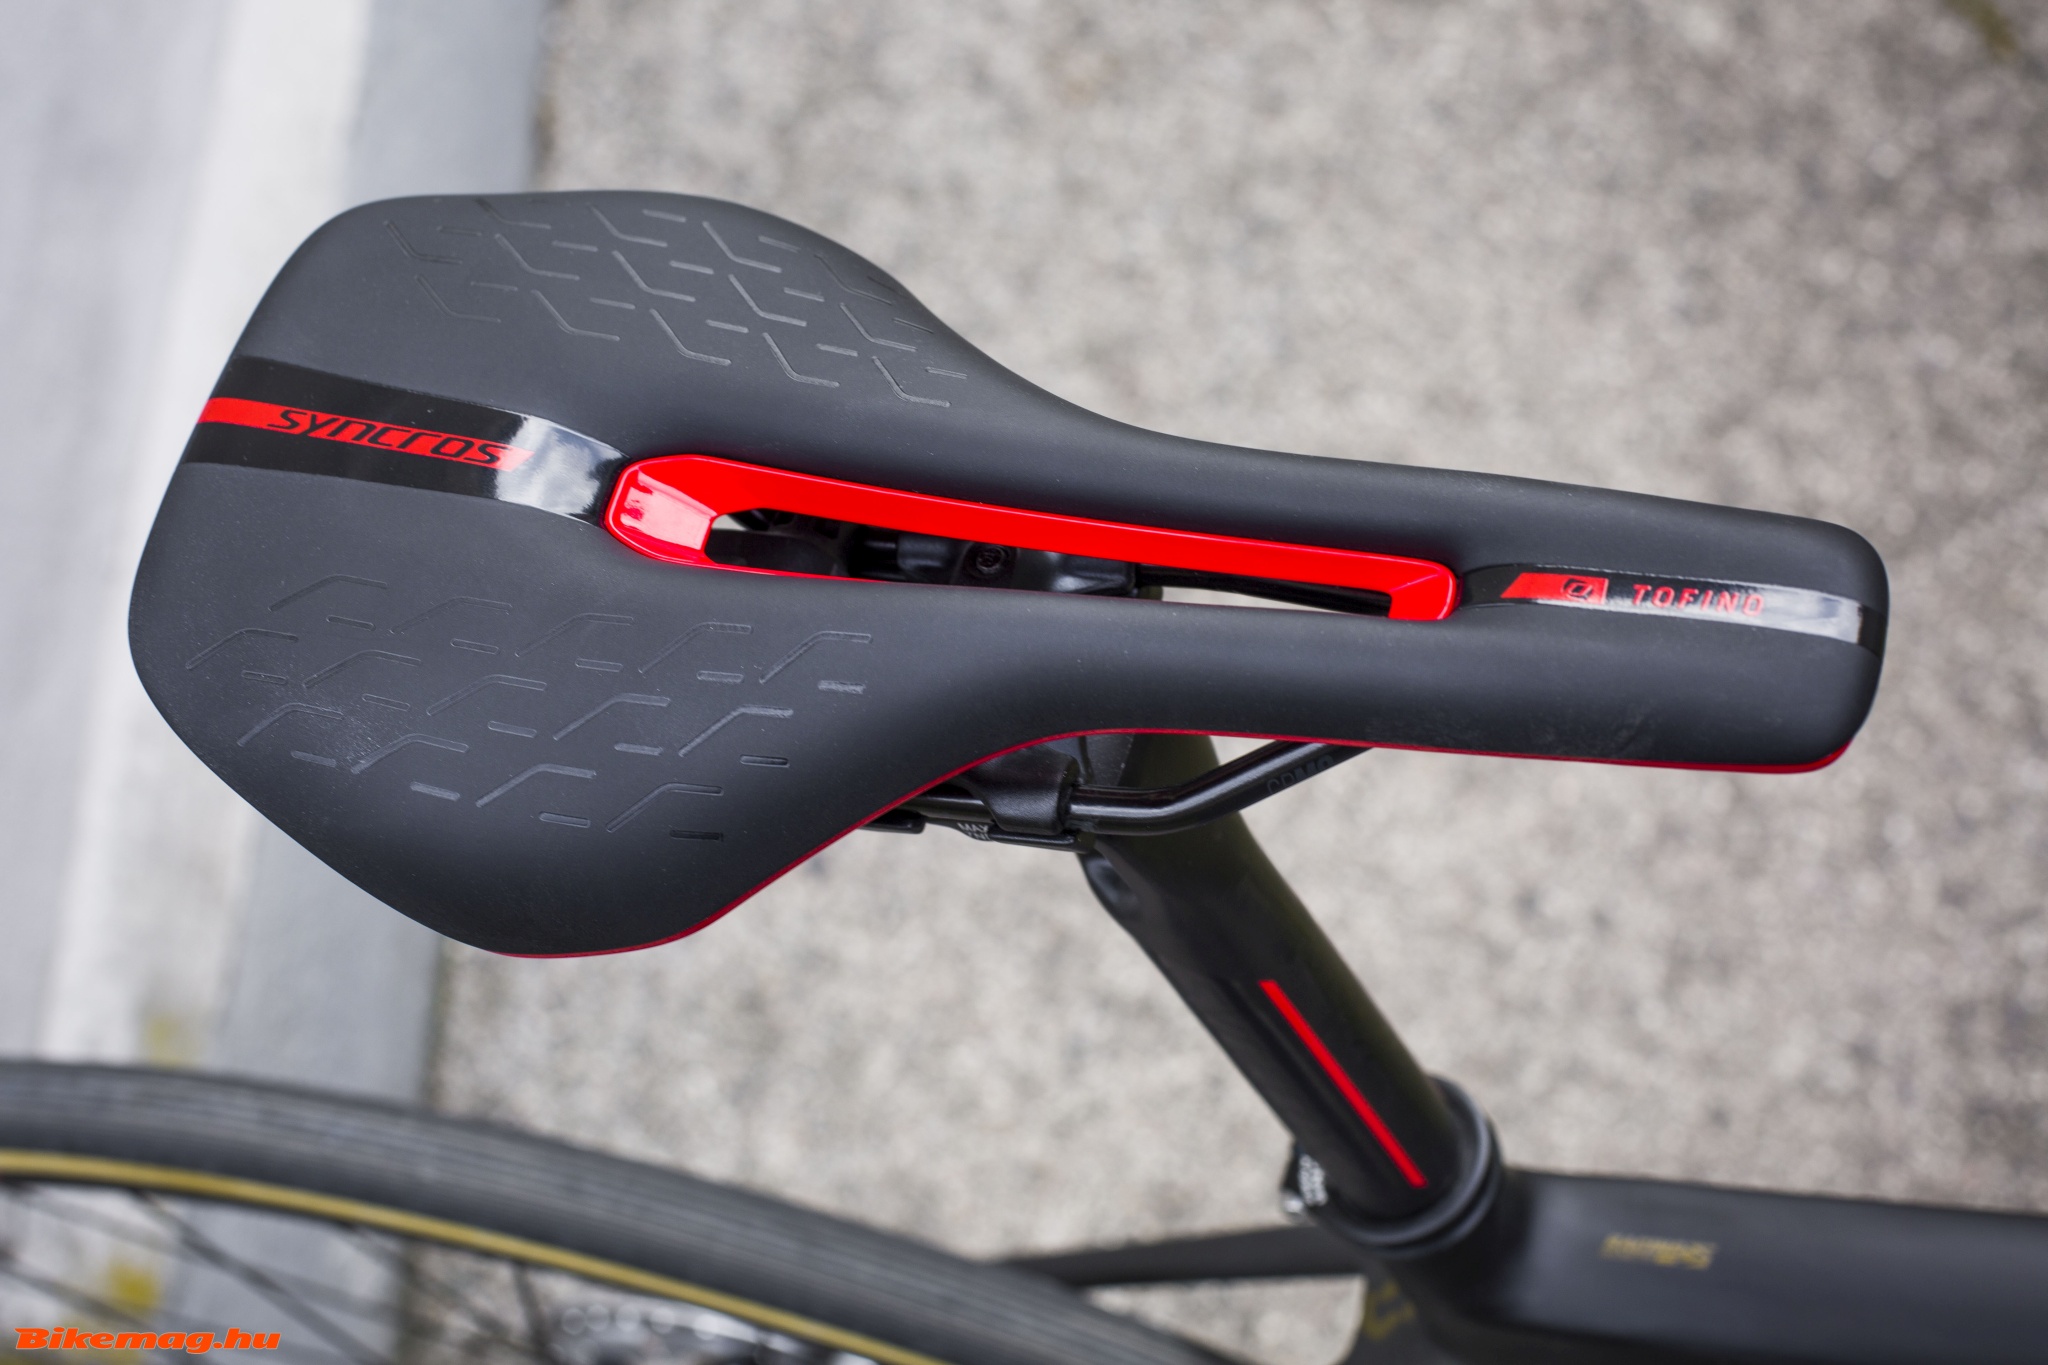
The accessories – like handlebar, stem, seat post and saddle – are the identical on both bikes, carrying the Syncros brand. The bar and the stem are not overly distinguished pieces of kit, but they certainly match the design and the paint scheme, resulting in an aesthetically pleasing harmony. The stem looks especially good with spacers of corresponding shapes. These parts provide a stable platform, they do not show any flex, however the weight figures may not be something to write home about. The seat post is a carbon fiber construction, and the clamp mechanism was designed to provide some additional give to enhance suppleness. It’s a good match for the Addict’s comfort-oriented design concept.

The Syncros Tofino turned out to be a fine saddle: it fit me well and most who have ridden the bike. I have a similar saddle on my cyclocross bike, so I had high hopes for a pleasing relationship, and the Tofino didn’t disappoint. Of course this is a silly thing to say, but the saddle just looks comfy. My only excuse for this mindless comment is that this time the instinct turned out to be spot on. The Syncros RP 2.0 Disc wheelset is another good addition to both these bikes. They feature high-end DT Swiss hubs and tubeless compatible rims, and the weight doesn’t exclude the possibility of racing on these either: it’s roughly 1600 gr for the set.
The variance in frame geometry does not entail a surcharge, but the electronic group set does. The Addict SE carries a price tag that’s approximately 500 euro higher than for the race-oriented RC. (The former costs HUF 1,299,990 while the RC 20 sets you back 1,099,990.) I would say that for most riders the ease and speed of the gear changes may in fact compensate this extra expense. There is also the added convenience of not having to trim the front derailleur when shifting several sprockets at the back. On the other hand, those who are adverse of the modern technology on bikes, who prefer not to have to charge their shifting system or adjust the settings from a laptop still have the choice: the excellent mechanical Ultegra R8000 group set can be had on either of these bikes.

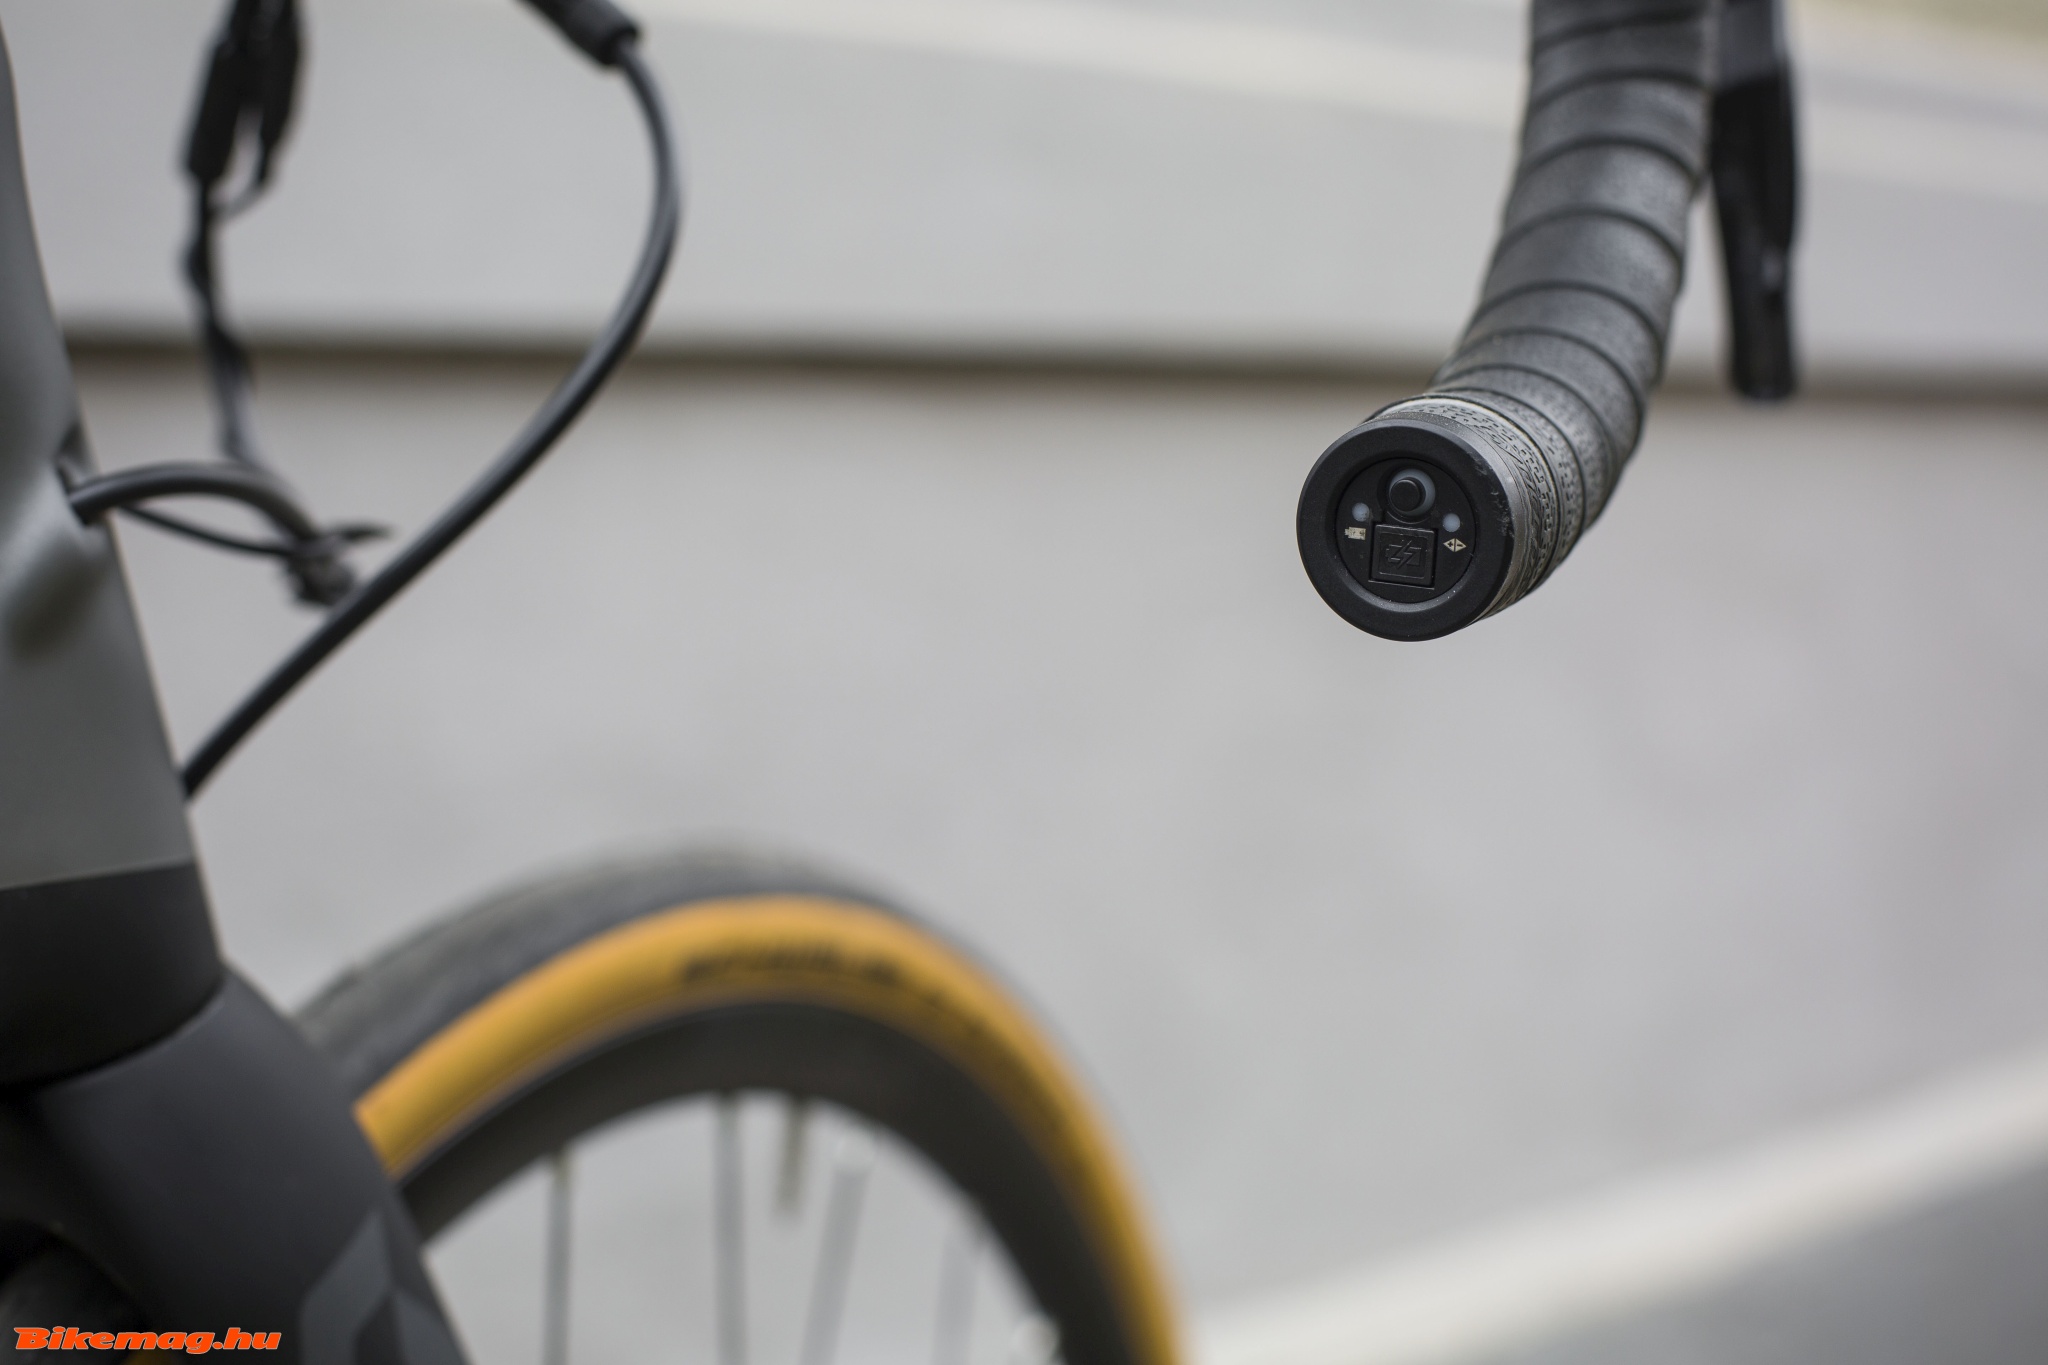
This was my first ride with the new R8000 version of the Japanese brand’s new second-tier Di2 set, and I was amazed by the simplicity and convenience of the new end of handlebar mounted control unit. It much more visible than the older stem-mounted device, the buttons are more accessible, you can do some fine adjustments and a possible system reset without taking the hands off the bar. Unfortunately I had to carry out the latter chore on several occasions during my rides, likely due to severe road bumps which seem to have set the rear derailleur to “protect” mode. It’s far from ideal, but at least the remedy was always – literally – on hand! Another upgrade to previous Di2 systems I have tried was the Synchronized Shifting and Semi-Synchro modes seen first on the Dura Ace, and now offered on the R8000.

Regarding the gear range the two bike differ slightly: the comfort-oriented SE offers 50/34T chairings paired with an 11-32T cogset at the back, while the RC has 52/36T in front and an 11-30T cluster on the hub. But proved to be sufficiently wide for the terrain we rode in Mallorca.

All in all I preferred the RC 20 over the SE, but as they say, it is horses for courses. Some will surely find the RC’s frame geometry overly aggressive, and will happily ride the more comfortable body position of the SE. This is possibly the best feature of the Scott Addict range: namely every type of rider is catered for, the high performance frameset is not reserved only for the seasoned riders. And if the Addict is not your cup of tea, there are other great model lineups ranging from outright aero to the rougher world of gravel and cyclocross. Whichever type of Scott bike you may settle for, you can expect the highest technological level paired with trendy modern design and a competitive price to boot. For more information click on the links below, which will direct you to the Hungarian distributor’s website. Alternatively just pop into the K2 Bike Shop in Budapest!

Scott Addict RC 20 Disc

Scott Addict SE Disc


Tour de Hongrie: Piros, fehér, zöld, no és a sárga!

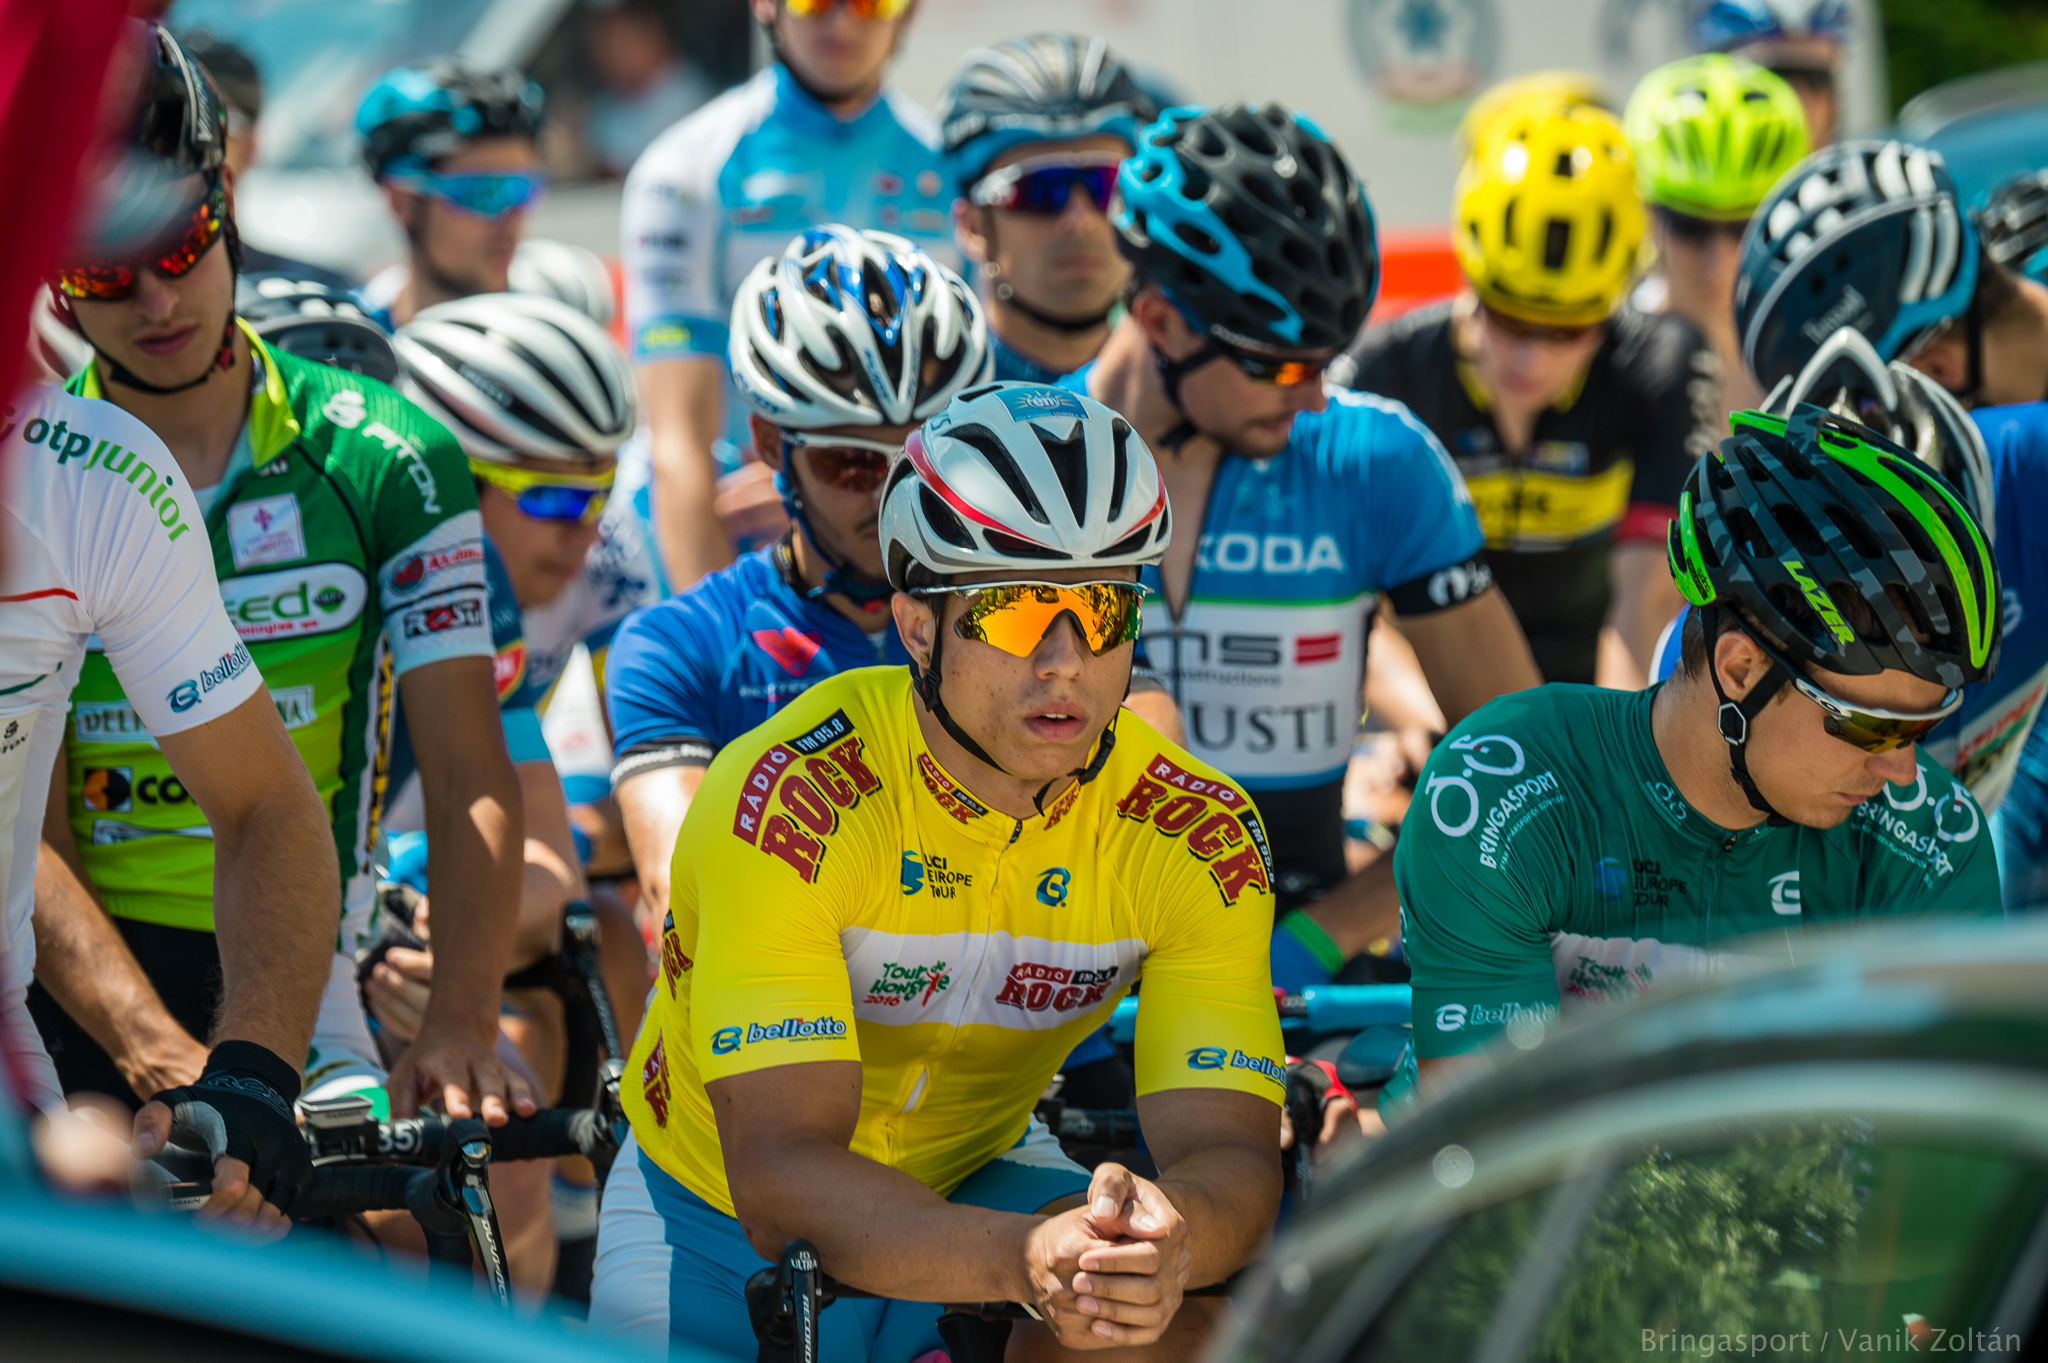
A nagy kerékpáros körversenyek, a Tour de France, a Giro d’Italia vagy a Vuelta a Espana nézői számára nem újdonság, hogy néhány kerékpáros különleges, színes, úgynevezett megkülönböztető mezt visel. Természetesen így lesz ez az idei Tour de Hongrie során is: a sárga, a zöld, a piros és a fehér mezért ismét óriási lesz a küzdelem!


(Mielőtt belevágnánk: a címben jelölt mezek sorrendje sem tetszőleges, elsőként a legrangosabbat illik említeni, ez pedig esetünkben az összetett legjobbjának járó sárga. A második legrangosabb a gyorsasági pontverseny legjobbját illető zöld mez, a harmadik a legjobb hegyimenőn feszülő piros mez, s végül negyedik a legjobb hazai kerékpárost jelölő fehér mez.)

Egy többszakaszos verseny sárga trikója (az esetek többségében az összetettben vezető ezt a mezt viselheti) minden kerékpáros álma, ám igen keveseknek adatik meg az a dicsőség, hogy a sportág egyik legbecsesebb mezében versenyezzen.


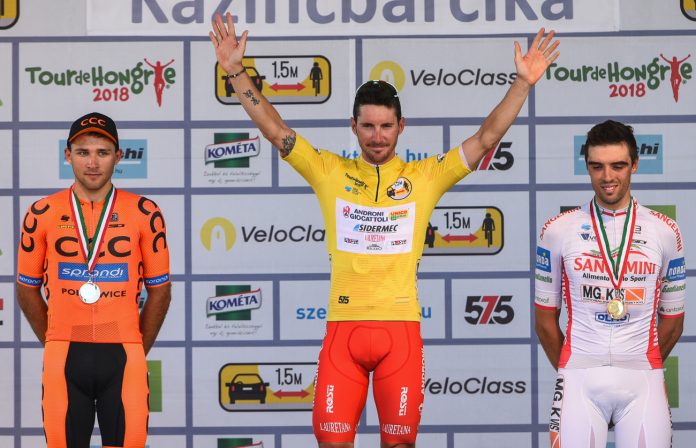
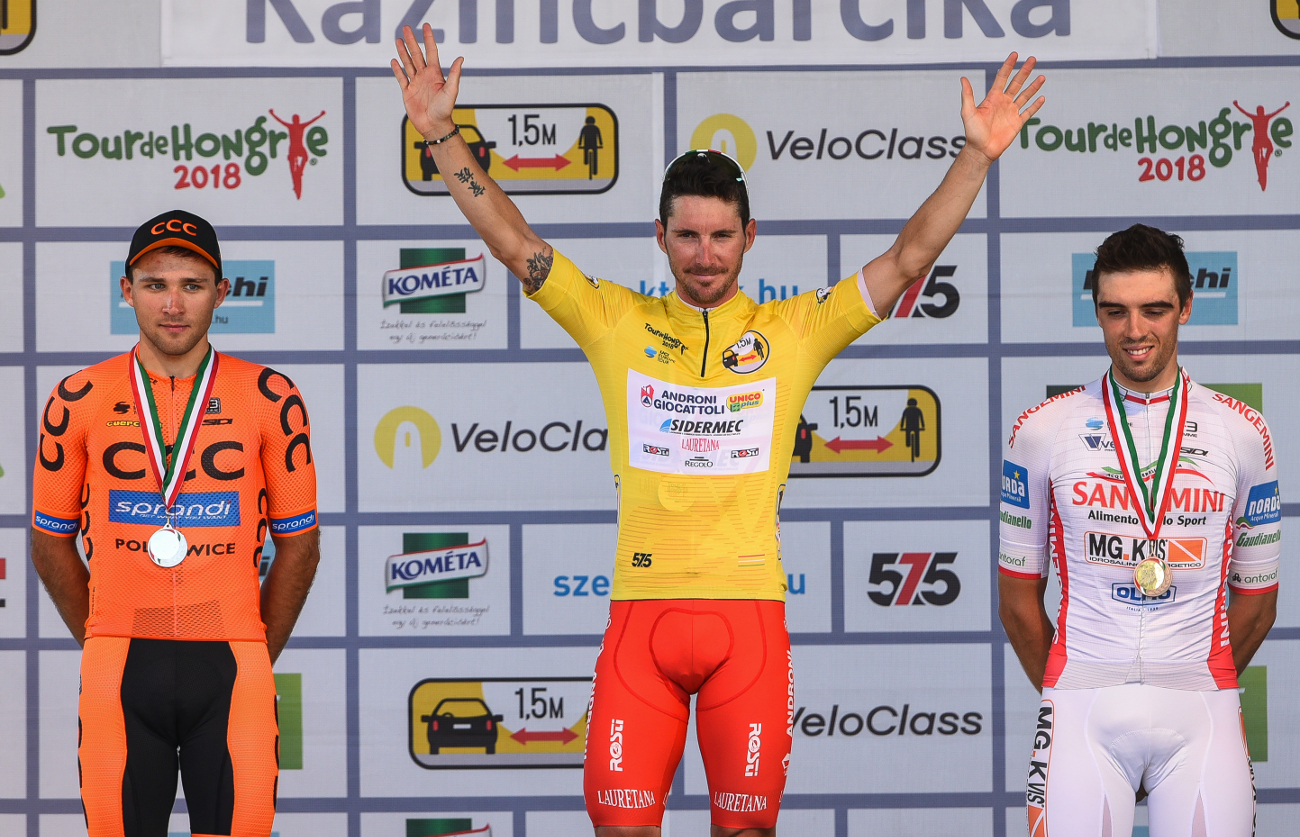
A 2018-as Tour de Hongrie összetett győztese, Manuel Belletti a sárgában


Természetesen a Tour de Hongrie során is a sárga megkülönböztető trikót viselheti az a kerekes, aki a legjobb időeredménnyel rendelkezik, vagyis az összetett versenyben az élen áll (persze volt már a magyar Touron piros trikó is a győztesen, amikor az egyik nagy üdítőital gyártó volt az esemény főszponzora).


Született: Franciaországban


Az első Tour de France során még egy megkülönböztető karpereccel jelölték az összetettben élen álló versenyzőt, majd 1919-ben (hat esztendővel az első Tour de Hongrie előtt) szponzori nyomásra a L’Auto magazin színeit idézve vezették be a sárga trikót. Igazság szerint már korábban is próbálkoztak vele, de a belga Philippe Thys akkor egyszerűen nem volt hajlandó felvenni azt. Hivatalosan első ízben 1919-ben Eugene Christophe, toronymagas esélyesként ölthette magára a mezt, az első kőkemény etap után.


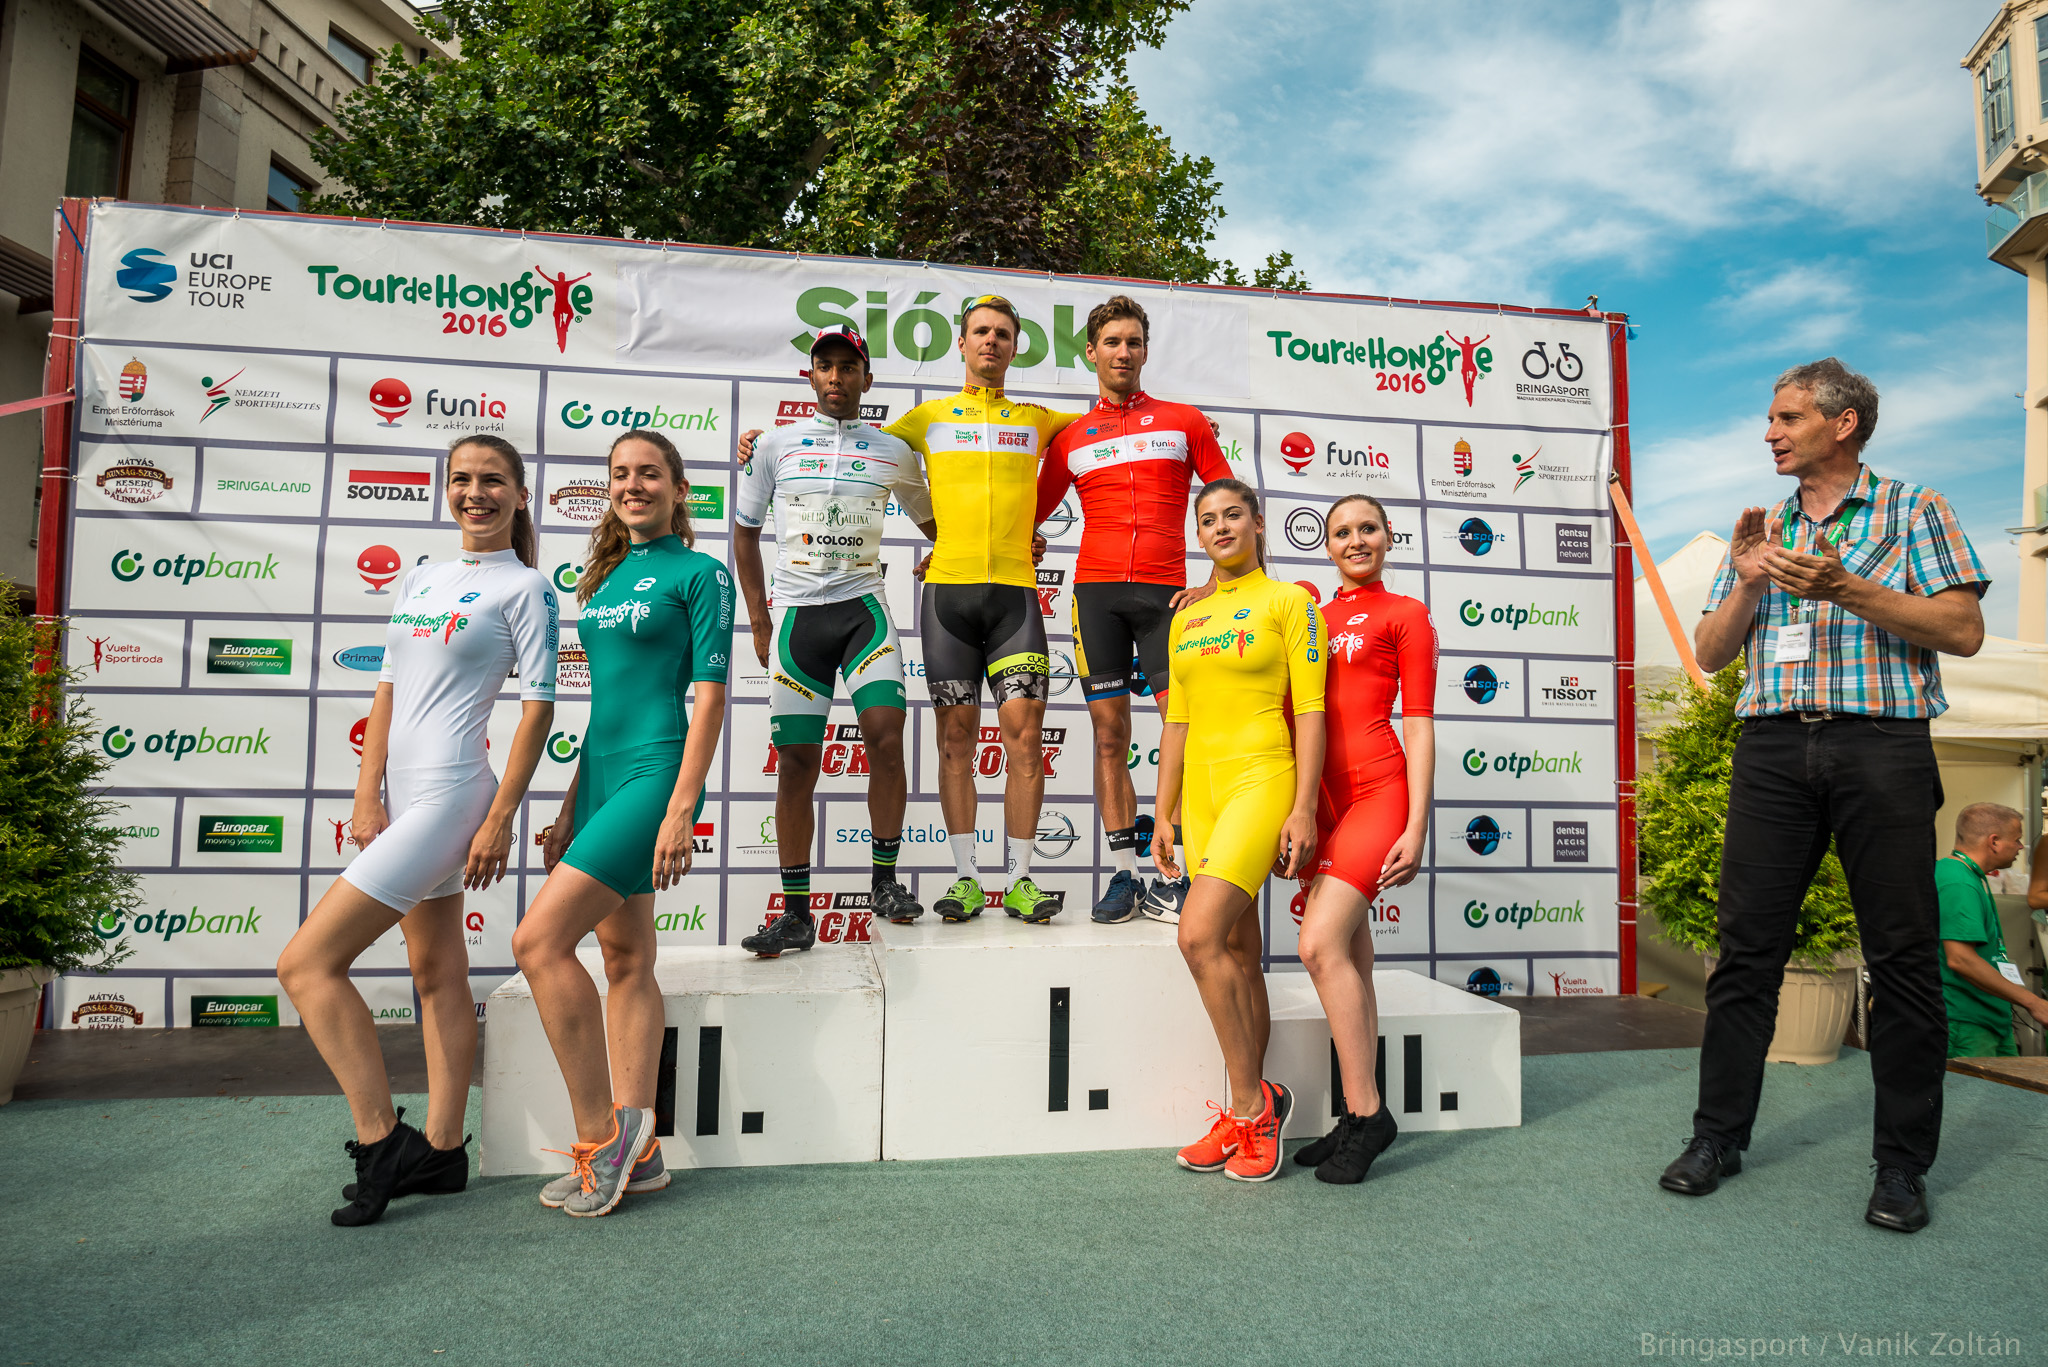
A legutóbbi magyar sárgat trikós, Szalontay Sándor 2016-ban, a fertődi rajtnál


A reklám mellett más célok is ösztönözték a mez bevezetését. A versenyben vezető kerékpárost szerették volna valamilyen módon mindig jól láthatóvá tenni a szurkolók és a média számára. Az 1919-es Tour mezőnye azonban csak tizenegy versenyzőből állt és Christophe-nak nem tetszett, hogy így mindenki nyomon tudta követni pozícióját. Az sem tetszett neki, hogy a tíz, még versenyben lévő társa a „kanári” gúnynevet adta neki a mez színe miatt. Nem is bírta elviselni ezt a terhet és végül csak a harmadik helyen érkezett meg Párizsba.


Kanáriból Kannibál


A megkülönböztető mez az évek során egyre nagyobb presztízzsel bírt, bár olykor kisebb-nagyobb botrányok is övezték, a múlt század hatvanas éveire véget ért a trikó negatív megítélése, a nagy francia kedvenc, Jacques Anquetil sorozatos győzelmei új presztízst adtak a meznek. Ezt követően a sárga trikót viselni már valóságos kiváltságnak számított.

A legendás „Kannibál”, Eddy Merckx pályafutása során kilencvenhat napon át hordta a megkülönböztető mezt, amely öt Francia Körverseny-győzelemhez segítette hozzá. Ötven napnál többet volt a „maillot jaune” Bernard Hinault, Miguel Indurain és a már említett Jacques Anquetil vállain is.


2016 legjobbjai a Magyar Körverseny színes mezeiben


A jó példának igen hamar követői is lettek, a Giro d’Italián a rózsaszín mez a legjobb kiváltsága, a Vueltán piros mezben feszít az összetett legjobbja, de ezen kívül az egyes versenyek különféle színű, pöttyös, csíkos mezekkel jutalmazzák a részfeladatok első helyezettjeit.


Sőt! A kerékpársportban 1927 óta megkülönböztető mezt visel a világbajnok (hófehér mez szivárvány csíkokkal – valójában az olimpiai ötkarika színeivel: zöld, sárga, fekete, vörös és kék), de „saját” meze van minden ország nemzeti bajnokának is, ezt addig viselheti, amíg meg nem fosztják tőle.


Sárga, zöld, piros, fehér


A közelgő Tour de Hongrie során is hatalmas megtiszteltetés lesz a bringásoknak, akár csak egyetlen nap erejéig is magukra ölteni a Francia Körverseny mintájára sárgában pompázó trikót. S hogy melyik szín mit jelent?


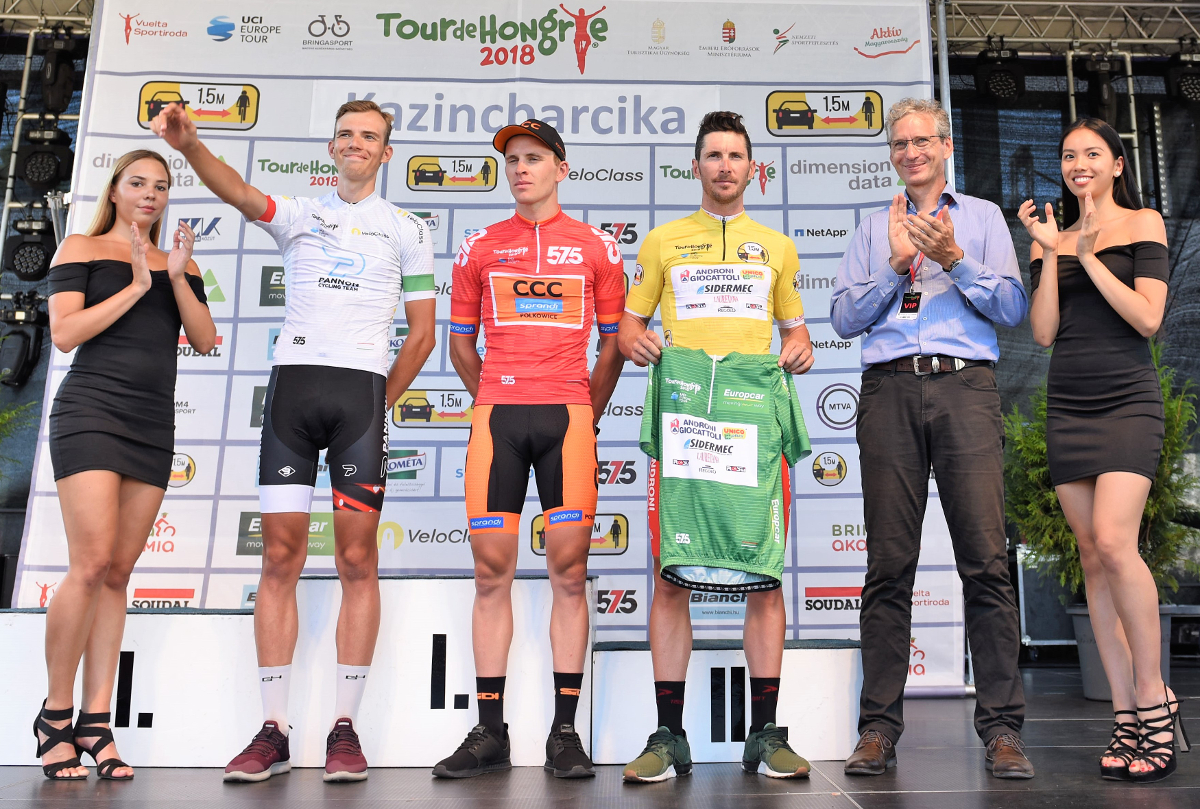
Sárga mez: a WOW Hungary Nagydíjért, a összetett egyéni versenyben élen álló versenyző viselheti
Zöld mez: a Bringasport Nagydíjért, a gyorsasági pontversenyben vezető kerékpáros viselheti (a részhajrákért, valamint a befutóknál járnak a pontok, a mez viselője lehet a mezőny legjobb sprintere)
Piros mez: az Europcar Nagydíjért, a hegyi pontverseny első helyezettjét illeti (a különböző szakaszokra hegyi hajrákat iktatnak be, amelyek során az ott elsőkként áthaladókat pontokkal jutalmazzák)
Fehér mez: a Cofidis Nagydíjért, az összetett versenyben legjobban álló magyar kerékpáros kapja meg


Tavaly ők vitték el a mezeket: Valter Attila (balról) a fehér, Patryk Stosz a piros, Manuel Belletti pedig a sárga és a zöld mez tulajdonosa lett

Lazítás körkörös terápiával a masszázsmedencében

A technológia fejlődése az élet minden területére kiterjed, egyre jobb minőségű és az igényeket jobban kielégítő eszközök vehetek minket körül. Ez alól a jakuzzik sem képeznek kivételt. Mára, akár egy masszőr, a test legtöbb izmát képesek átmasszírozni, kezelve ezzel a meglévő ártalmakat és megelőzve a komolyabb problémákat.

A Caldera jakuzzik gyártója is kiemelt figyelmet szentel annak, hogy a fúvókáknak a lehető legoptimálisabb helyzetet adja, így a lehető legtöbb izomcsoportot átmozgatva adjanak kiemelkedő élményt a hidromasszázs kedvelőinek.

Mi az a körkörös masszázs terápia?

A jakuzzin belül mindegyik ülőhely speciálisan egy testtájék masszírozására lett kialakítva. Ebből kifolyólag, ha körben haladva mindegyik pozíciónál eltöltesz egy kis időt, olyan érzésed lesz, mintha egy valódi masszőrnél jártál volna, ugyanis a teljes testet átmozgatja. Mivel a vízsugár erejét Te szabályzod, a mindennapi igényeidhez szabhatod, hogy egy kellemes és simogató masszázst szeretnél, vagy egy erőteljesebb élményre van szükséged.

Ha Te is szeretnéd átélni a mindennapi hidromasszázs felemelő élményét, keresd fel a Caldera Spas oldalát és válaszd ki a legkényelmesebb jakuzzik közül a hozzád leginkább illő darabot!

Miből áll a körkörös terápia?

Az Ultramassage ülés a tested felsőbb területeire összpontosít. A szervezetednek ez az a része, ami a leginkább ki van téve az okoseszközök túlzott használatából eredő természetellenes tartásnak, így a nyak, váll és hátközépi izmok hálásak lesznek az Ultramassage ülés használatáért.

Az Atlas Neck Massage System az ülőmunkát végzőknek lesz nagyon jó barátja. Ez a rendszer kifejezetten a nyakra fókuszál. A folyamatosan mereven tartott nyakizmokat alaposan átmasszírozzák a fúvókák, miközben a fejet egy kényelmes párnán pihentethetjük.

A Whirlpool rendszer a medencében finom örvényeket kelt, de a hasznossága nem merül ki ennyiben. Körkörös mozgásával a gerinc melleti izmokat és a derék tájékát kényezeti. 

Az EcstaSeat a Caldera medencék méltán közkedvelt része. A nagy hátizmokra összpontosítja a fúvókákat, amiket az élet bármely területén munkálkodóknak jólesik átmozgatni. A házimunka utáni pihenéstől az ülőmunka ellensúlyozásán át egészen a nehéz fizikai munka utáni regenerálódásig, minden területen kiváló társ. Főként, hogy az ülés extra kényeztető funkcióként tartalmazhat lábikrára és csuklóra irányuló fúvókát a teljes kényeztetés érdekében.

Az Euphoria befúvók neve kimondottan beszédes, ha a hozzájuk köthető élményről van szó. Ez a részleg a lábak kényeztetéséért felel. A comboktól a lábfejig minden lényeges izomcsoportra jó hatással van.

Végül a Sole Soothers jetek a talpakat kényeztetve pihentetik el a testet, hogy az egész napos talpalásnak ne legyenek olyan kellemetlen utóhatásai, mint például az éjszakai talpzsibbadás.

Online hirdetések típusai – előtérben a PPC kampányok – avagy a Google Ads és Facebook&Instagram hirdetések

Mára mindenki tisztában van azzal, hogy az online eredményesség egyik kulcsa a megfelelő PPC kampányok összeállítása és futtatása. Az online marketing egy eléggé komplex terület, de azt egyértelműen kijelenthetjük, hogy az egyik kihagyhatatlan eleme a PPC kampány. Sokan azonban még a mai napig bizonytalanok, ha ezekről van szó.

Ha tudod, hogy hatékonyabbá kellene tenned az online jelenléted, de nem igazán vagy tisztában a PPC kampányok adta lehetőségekkel, akkor tarts velem a következő cikk erejéig! Megtudhatod, hogy melyek hazánk legelterjedtebb PPC hirdetési felületei és azt is, hogy mit is takar pontosan a fogalom. 

Mi is az a PPC hirdetés (Google Ads, Facebook Ads)?

A PPC kifejezés gyakorlatilag a Pay Per Click szavak rövidítéséből származik, ami annyit jelent; hogy fizetés per kattintás. Mi következik tehát ebből? Az, hogy az ilyen típusú hirdetések esetében csak akkor szükséges fizetni a hirdetőnek, ha rákattintottak a hirdetésére.

A PPC kampány ezzel szemben már a rendszerbe fogott PPC hirdetés egységét jelenti, amelyet általában profi stratégiai tervezés előz meg. Ezen kampányok során általában különféle célokat határozunk meg, amelyet szeretnénk elérni segítségével. Ma már az online marketing legfontosabb részét képezik.

Milyen PPC hirdetéseket készíthetünk? 

A Facebookon és a Google Ads rendszerében megjelenő hirdetések is PPC hirdetéseknek számítanak, azonban ez esetben kicsit másképpen történik a fizetés. Ekkor ugyanis már az sem mindegy, hogy ember látja azt. Célzások segítségével (érdeklődési kör, nem, kor, stb.) alkothatjuk meg hirdetésünket, ez esetben nincs szükség kulcsszóra. 

Amennyiben neked is már csak ez a rész hibádzik a marketingedben, akkor az Adnet Media segíthet a Google Ads hirdetéskezelésben! 

A Google Ads (AdWords) rendszerében szintén készíthetünk PPC hirdetéseket, ám ezeket előre meghatározott kulcsszavak alapján hozzuk létre. Ez úgy működik, hogy ha az általunk megadott kulcsszó valamelyikét beírják az internetezők a keresőbe, akkor minden bizonnyal látni fogják a hirdetésünket. A megjelenésért nem, de a kattintásért már fizetnünk kell, ez lesz a CPC vagyis a Cost Per Click. 

Miért van szükség PPC kampányokra? 

Sokan panaszkodnak, hogy nem térül meg minden forint, amelyet az online hirdetésekre szánnak, vagy csak nagyon kis része. Ahhoz, hogy minél sikeresebb és gazdaságosabb legyél, szükség van PPC kampányokra. Használd hát bátran a Google Ads, vagy a Facebook hirdetés felületeit. 

A kulcs azonban az, hogy folyamatosan kövessük az adatokat, és azok alapján optimalizáljuk a hirdetéseket. Ha erre odafigyelsz, akkor bizony nem keveset spórolhatsz! 

A mérhetőség mellett a másik nagy előnyük ezen típusú hirdetéseknek, hogy jól célozhatóak. Ez pedig garantálja, hogy kizárólag a potenciális ügyfeleket szólítsd meg és azt kínáld fel nekik, amit épp keresnek!

Ha kerülnéd a zsúfolt teraszokat – tippek egy otthoni koktélpartihoz!

Bár a vendéglátóhelyek teraszai nemrégiben kinyitottak, a hirtelen rájuk zúduló tömeg miatt sokan nem érzik biztonságosnak, hogy a zsúfolt bárok kültéri asztalainál találkozzanak és iszogassanak a barátokkal. Arra viszont már mindenkinek nagy szüksége van, hogy egy kicsit kieressze a gőzt, ráadásul az egyre melegebb estéken jólesik odakinn ücsörögni. 

Ezért ha te is kerülnéd a tömeget, ám mégis hiányzik már a társaság, akkor hívd össze a legközelebbi barátaidat, és tartsatok valamelyikőtök kertjében egy jó kis házi koktélpartit! 

Finom falatok, ízletes italok

Egy efféle kellemes estére nem szükséges háromfogásos vacsorával készülnöd, de azért gondoskodj róla, hogy az italok mellett legyen némi étel is. Jöhetnek az olyan jól bevált, klasszikus “sörkorcsolyák”, mint a pogácsa, a sós kifli, a perec, a sajtos rúd, de ha nincs kedved sütni, akkor csak szerezz be pár zacskó chipset, kekszet és ropit. Persze ha kiadósabb lakomára vágytok, akkor a pizzarendelés sem utolsó ötlet. 

A lényeg, hogy többféle nassolnivaló legyen, ha pedig a vendégek közt édesszájúak is lesznek, akkor ők biztosan díjazni fognak egy kis teasüteményt vagy csokoládét.

A koktélkeverés örömei

Nem baj, ha nincs a csapatban gyakorlott mixer, hiszen a közös amatőr próbálkozások biztosan rengeteg mókás pillanatot eredményeznek majd! Már a buli előtt gyűjts össze néhány egyszerűbb (vagy akár bonyolultabb) koktélreceptet, és szerezd be a szükséges alapanyagokat. Shaker, jég és szívószál feltétlenül legyen, a többi pedig attól függ, milyen italokat akartok majd kikeverni. 

Arra ügyelj, hogy jó minőségű hozzávalókat vásárolj, mert silány alapanyagokból nem lesz ízletes a végeredmény sem. Esetleg megbeszélheted a vendégekkel, hogy ki-ki maga hozza a kedvenc koktéljai alapanyagát, így nem mindent neked kell finanszíroznod. 

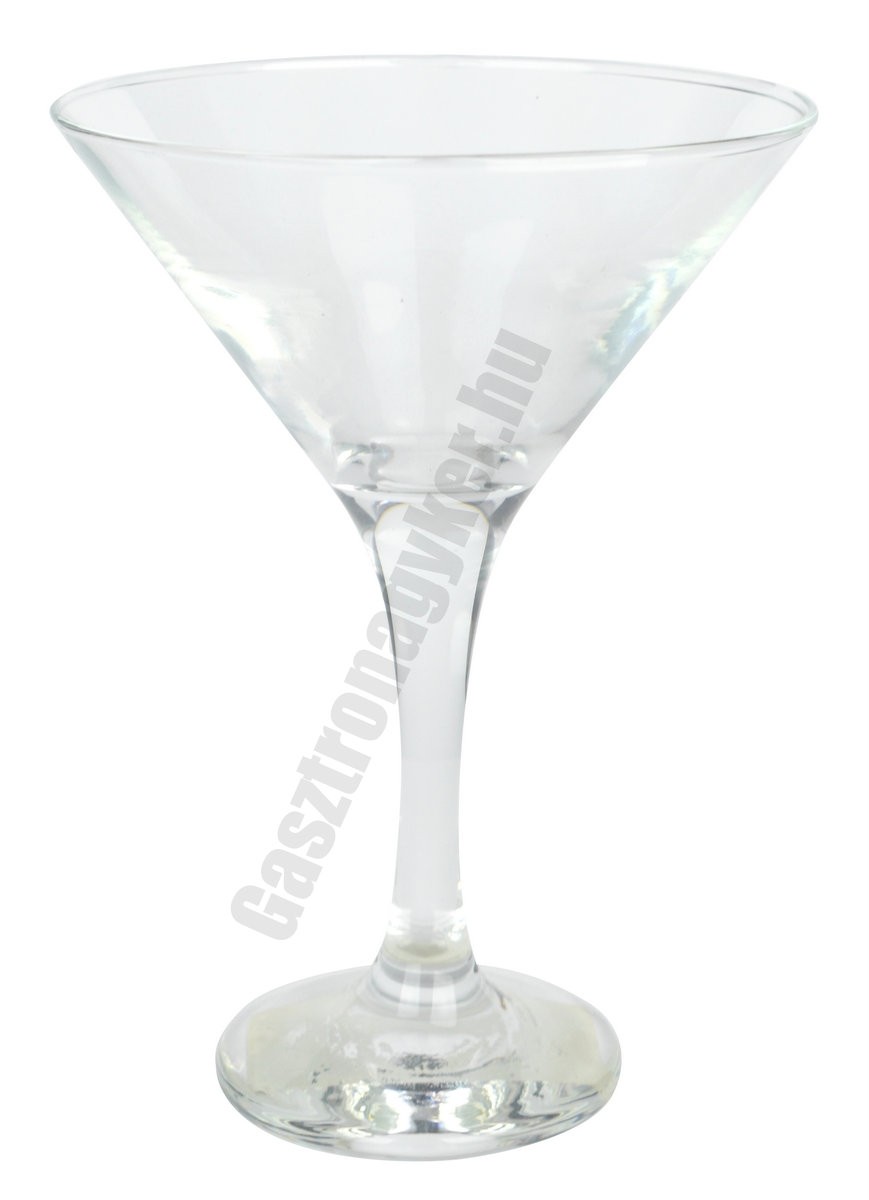
Az elegáns koktélospoharakról viszont nem szabad megfeledkezned, hogy stílusosan tudjátok elfogyasztani a remekműveket! Ha eddig még nem szerezted be őket, akkor nézz körül a Gasztronagyker oldalán!

A meglévő alapanyagokból némi kreativitással akár teljesen új italokat is kikeverhettek, ami szintén nagyszerű szórakozás! Ha valamelyik különösen jól sikerül, akkor mindenképp jegyezzétek fel a pontos receptet, a “feltalálója” pedig adjon neki valamilyen frappáns, hangzatos nevet. A következő partin ismét el lehet majd készíteni.

Az igazi partihangulat

Bár a sok koktél (főleg, ha alkoholos), valószínűleg úgyis mindenkit jókedvre derít, de ha ezt még tovább akarod fokozni, akkor a világítás és a zene sem maradhat el. Nem gond, ha nincs professzionális fény- és hangtechnika, néhány LED-füzér, egy-egy pislákoló mécses és egy Bluetooth-hangszóró is bőven elegendő. 

Ráadásul egy ilyen baráti összejövetelen mindenkinek lehet beleszólása abba, hogy milyen zene legyen, így sorra felcsendülhetnek a kedvenc dalok, ha pedig a koktélospoharak kiürültek, akkor talán egy kis tánc is belefér majd.

Kézműveskedés gyerekekkel

Minden gyerek imád alkotni a saját kezeivel, legyen az egy rajz vagy éppen egy gyurmafigura. Az alkotótevékenység fontos szerepet játszik a gyermek személyiség- és készségfejlesztésében.

A festéssel, rajzolással, gyurmázással nem csak az óvodai, iskolai készségfejlesztő foglalkozásokon tudjuk lekötni a gyerekek figyelmét, hanem otthon is. Az alkotási folyamat amellett, hogy örömmel tölti el a gyerekeket, további pozitív hatásokkal is bír, így például fejleszti a kreativitást, a problémamegoldó képességet, a finommotorikát.

A kreatív alkotás, mint a gyermeki személyiség- és készségfejlesztés eszköze

A gyermekeinkkel folytatott közös festés, rajzolás, gyurmázás, egyéb alkotómunka során sok tudást adhatunk át csemetéinknek. A közös tevékenység által fejlődik együttműködő és megfigyelőképességük, kreativitásuk, ügyesedik a kezük. Az alkotás segíti a jobb önkifejezést és a fantázia fejlődését is.

A legjobb, ha minél több kreatív technikát és készségfejlesztő eszközt megmutatunk a gyerekeknek, és bátorítjuk őket a kísérletezésre, arra, hogy szabadon alkossanak. Lényeges, hogy minden esetben minőségi készségfejlesztő eszközöket adjunk a gyerekeknek. Biztosítsunk többféle alapanyagot az alkotáshoz: színes kréták, vízfestékek, tempera, ecsetek, színes ceruzák. Válasszunk olyan eszközöket, amelyekkel könnyű dolgozni.

Az alkotótevékenység, a finom mozgások által javul a gyerekek finommotorikus képessége. A festésnek, rajzolásnak, gyurmázásnak köszönhetően biztosabb lesz a gyerekek eszközfogása, hiszen ügyesedik a kezük, egyre ügyesebben tartják az ecsetet vagy éppen a színes ceruzát. Ez segíti őket az írás elsajátításában is, így biztosabb alapokon kezdhetik el az iskolát is. 

Ugyanakkor a fent említett alkotótevékenységek nem csak a finommotorikus képességet fejlesztik, hanem a koncentrációs képességet is, ami szintén fontos az iskolai években. Az elkészült alkotások pedig valódi sikerélményt adnak a gyerekeknek.

A kreatív alkotás, mint a gyermeki önkifejezés fontos eszköze

Az alkotás fontos önkifejezési eszköze a gyermeknek. A gyerekek az alkotással, a festéssel, rajzolással ki tudják fejezni gondolataikat, érzelmeiket, problémáikat. Az alkotás lehetőséget ad a bennük lévő feszültség oldására, a problémák feldolgozására.

A gyerekek is állandó stressznek vannak kitéve, így lényeges, hogy legyen olyan eszköz a kezükben, ami segíti őket a szorongás oldásában, az őket ért hatások feldolgozásában.

Tartsunk otthon rendszeresen kreatív napot, amikor felnőttek-gyerekek együtt alkotnak. A közös munka egyaránt örömöt ad kicsiknek-nagyoknak, és az így készített alkotások örök emléket jelentenek a család számára is, amikben később is gyönyörködhetünk.

Próbáljuk ki az ujjfestést, ezt a gyerekek is nagyon élvezik, hiszen szabadon maszatolhatnak. Gyurmázzunk, rajzoljunk, fessünk közösen csemetéinkkel. A lényeg, hogy engedjük őket szabadon alkotni.